Is calisthenics suitable for bodybuilding? Yes! Calisthenics can help you develop a fantastic physique while also increasing your strength.
Bodyweight exercises have long been considered an underground workout method, with many people utilizing them to treat ailments or lose weight.
Most people are unaware that calisthenics are an excellent way to increase muscle and have a variety of benefits. Such as improved flexibility and healthier joints.
In this episode, I’ll show you how calisthenics can help you transform your body.
Personal trainer Charlotte, personal trainer Charlotte nc, personal trainer waxhaw, personal trainer waxhaw nc, personal trainer Ballantyne, personal trainer Ballantyne nc, personal trainer 28277, personal trainer 28173, personal fitness trainer, personal trainer near me, personal trainers near me, personal fitness trainer near me, personal fitness trainers near me, get pivot, life fitness, hammer strength, vibrate, vibrate five fingers
What’s up with my fitness family! Brent Kasmer here with BK PT, Brent Kasmer Personal Training. Today I’m gonna be teaching you a little bit about fat to fit transformation for men. If you haven’t watched it already, go back and watch my fat to fit video gives you the kind of basics, the rundown, and I’m gonna go into a little bit greater detail in this video as well.
The fat to fit video talked about what fat is, it is lack of muscle.
It’s a word. So no big deal, don’t get broken by a word.
It’s not a sticker stone. It’s just a lack of muscle.
And in the day fit would be obviously in shape, which in shape.
When you look in shape, you’ve got good muscle development, good muscle tonality.
And also what comes with that is also a faster metabolism.
I’m not popping a video here, I want you to go check out how to get a faster metabolism also, because that’s another great video that I have out there teaching you how to keep making sure that metabolism’s firing, alright, so all key ingredients, but you have to have a great foundation to not only go from fat to fit transformation for men but also make that transformation and then also sustain it.
Alright, so forever.
I think the first part of the foundation needs to be “determination”.
You need to be determined to do this to make this transformation because at the end of the day if you aren’t determined if you’re not focused on the end goal, you’re not going to do what it needs, what it takes to get to the end goal.
So yeah, it’s gonna take some work, but you need to make sure that you’re doing the least amount of work so that way you can sustain it later as well.
You need to be determined. And that’s why people are like…
“oh, you know, I’m lacking motivation.”
“I’m lacking, you know, the willpower.”
“I’m lacking X, Y, and Z.”
Or you get into it. And then you’re like…
“Well, I wasn’t really motivated this week. But I was really motivated last week, you know, hopefully, I’ll be motivated next week.”
Determination is your motivation.
Therefore, you are focused, and you’re going to not only do what it takes, but then when something comes up, and something’s trying to deter you, from your end goal, you are going to be determined to just not only hurdle that roadblock, or hurry up and find a way around that roadblock, to get back on track, because kinds of stuff gonna come up, gonna get sick people gonna get sick around you, people’s birthdays are happening, certain things are always coming up to derail you from success.
And it’s about staying determined and focused on getting to that end goal.
All right. So you have to have the right tools.
You need to have to be able to track your body fat, how much muscle you do have.
You need to be able to take pictures so that way you could see some stuff along the legs when you wake up every day you look in the mirror.
Obviously, this transformation may be happening, but since you see yourself every day, you’re not going to notice it every day.
So you want to take periodical photographs so that way you do have success.
And you see, the success also keeps you determined at that end goal.
Alright. And also in that last video from fat to fit, I felt like it hit home pretty well, especially for men.
You take an old beat-up, junkyard car, and you’re like, man, this thing is sweet, you see something different in it when you go grab that junkyard car.
But when you go to fix it up, because it’s an OD, it’s a collectible.
You have an idea of what you want it to look like, the shaping of it, the color of it, the sleekness of it, the shine of it, the rim, the tires, the Chrome, the paint, like the different things that you have in the interior.
You have all of this stuff in your mind of what the end goal is what the end outcome is for this car.
And then it’s kind of like piecing together everything. So that way it gets to that point.
Yeah, it’s work, you got work from the old junk beat-up car.
But once you get it to that point, guess what, the maintenance of it is not nearly as bad as the work is getting to that point.
Plus, now you know what it takes to go from here to here as well. So if something breaks down, like…
“oh, my gosh, I change this out, oh, yeah, take this out.”
And you know, okay, that took me about this long.
So, therefore, you got an idea of how long it’s going to take, you have an idea of how much it’s going to cost, you got an idea of all these things. That way, you can always keep it looking good, feeling good, fit, alright.
That’s also a big part of it, you got to know your body fat, a composition so that we can base all these other key ingredients that go along with getting fit, and staying fit is going to be alright.
One determination.
And to have that determination, you got to have body fat trackers, and you got to take pictures along the way, and stay focused.
Two is going to be your nutritional plan, your nutritional plan is super important.
All right, don’t make it harder than it needs to be.
You don’t need to find a fat diet that had worked for somebody else.
But you can’t make it your own lifestyle.
It’s not going to work, might work for three weeks, six weeks, eight weeks, 10 weeks, and it might get you to a goal.
But in the day, it’s not going to be sustainable.
You need to make any lifestyle.
Make it a lifestyle.
You got to take your career, what’s going on in your life right now.
And mold that meal plan around your life, not the other way around. All right.
And that’s what I teach when I teach my Ignite meal planning system is I try to teach you how to take your life and make your meal plan fit it everything from either preparation or shopping or whatever it might be, to get you the right things, the right ingredients to get into your body to make it you know, easy, sustainable thing.
Alright, so there is the timing of your nutrition.
Every single meal must be based around a protein source because a protein source is thermogenic.
You want to make sure that your body is digesting it and storing it properly to make sure your body is always anabolic.
Anabolic means is not burning muscle, it’s burning fat, your muscle is being built and your fat is getting burned.
Anabolic, alright, that’s what you need to make sure that you’re doing.
By knowing how much muscle you do have is a good foundation for starting to know how many grams of protein that you need to eat in each of your meals.
Don’t get overwhelmed with the whole meal thing because that’s something I do explaining my meal planning system.
It is simple, I promise you, I wouldn’t have helped 1000s of people do this gets them.
I work with doctors and lawyers and moms and dads and everything, athletes on all different levels.
For some people, it is their job to be in shape and stay in shape, and always be building.
But some people obviously have a job.
And this is obviously just something that they need to do to help feel good and be fit.
They can play harder. Meaning, go enjoy life and not watch other people enjoy life around you.
You want people to be jealous because you’re playing with your kids.
You’re playing with your grandkids, you’re being a role model, example, and all these different things that you want to be and not watch and be dependent on other people being these role models examples for the loved ones around you.
Oh, man, it hurts.
Hopefully, that makes sense, though so that way you don’t slip back into the non-determination, lacking motivation category.
All right?
Cuz I know who you are, you’re determined, you’re motivated, let’s hit this nail on the head and knock it out of the park, man.
All right.
So what’s a protein, timing it, knowing what to do, how to make sure that your preparation doesn’t take too long.
You want to make sure you’re prepared for the week, everything’s Tupperware it up in the fridge ready to go.
You can come in, grab it, take it, eat it, and not worry about it because you just know it’s there.
You’re not making mistakes, grabbing the wrong things.
I also want to teach you how to make non-mistakes and grab the right things.
Being able to run into a grocery store. Say you’re not prepared, running into a grocery store, going into the prepared foods, having them grab just grabbing a blackened chicken breast that they already have, in the prepared food section, grabbing horrible eggs that they already have in the prepared food section.
Yes, they actually have a prepared food section in your grocery store. Go look, it’s crazy.
They actually have your protein, carbs, fats all there for you, you just actually got to go grab it, it takes five minutes, it’s faster than driving through the daggone fast food lines.
Alright, so know where those things are. That’s super simple stuff.
That’s the stuff you do when you’re in a pinch, drink a protein shake, make sure it’s the right kind of protein shake, though.
You’ll make sure that the protein sides like 100 ish calories, and you’re getting the adequate protein you need.
Not the other sugar, fats, fillers, other junk in there as well. Make sure you get the right one.
Nutritionally, those are great tips for fat to fit transformation for men.
Moving on, and the second key ingredient for your foundation, getting your protein in every meal being prepared.
And getting the right stuff getting the right foods in your body, right macros, protein, carbs, fats.
And the third but not the least is your workout program your workout regimen.
I created this called the accelerated PT method. Why is it the accelerated PT method?
Because it’s no-nonsense, man.
It gets you in the gym, it gets you doing the right stuff that gets you doing the most effective things to get the end result.
I’ve done tons of videos on these things, you want to be sure you’re doing compound joint movements for one, two, and needs to be at a high-intensity level.
That means not doing the repetitions fast, not jerking, and doing everything crazy like a spastic lunatic in the gym.
It means working in a strategic fashion, doing supersets, doing giant sets, doing certain things in the right order to make sure you’re doing it correctly, but same time getting the most bang for your buck.
Also with this, you got to make sure you’re lifting heavy stuff, you will also make sure you’re doing the small intermediate stuff that you need to make sure that keeps all your joints, ligaments, tendons, all in a good, organized fashion in your body.
And also staying injury-free, increasing the injury that you do have, you want to make sure you’re working around it, and you never want to miss.
Making your body stronger, making sure that you’re working out at a set time every single day, making sure that you’re doing these things, your workout should never take less than 15 minutes never take longer than 45 minutes.
Those are all key things for fat to fit transformation for men.
If you’re taking an hour, hour and a half, two hours in the gym too long, stop wasting your time.
Your ATP CP pathways can’t produce enough energy.
Trust me, especially if you’re coming from fat to fit.
You’re not at a good spot, you know to get going.
So start a good routine, pick it at a time of day where there are no distractions, meaning the fact that I mean I’m a firm believer get it done first.
Because like once morning hits, you get a few things out of the way.
All of a sudden one thing runs into another and your nine o’clock time slot your noontime at lunchtime time slot, your after-work time slot all of a sudden disappears because something else came up that has a 99% likelihood of not being disturbed.
All right, things come up again. So get back on track fast.
If you get derailed, get back on track determination.
Back to that key point. Compound joint movements, doing supersets, triceps, quad sets, giant sets that just means doing one or 2, 3, 4, 5 exercises and a group lifting heavy weights periodically to make sure that you’re getting stronger building muscle, building muscle spasm and herbalism all those good things.
Those are the key ingredients, key ingredients for fat to fit transformation for men.
Did you get questions?
Hit me up, put in there what’s going on in your life, and tell me so that way I can help you help assist you to make the right decisions all the time.
Not some of the time all the time will point you in the right direction.
Make sure you’re doing the right things.
Make sure you are living a fit life and you’re not going from fat to fit, then fat to fit the fat, then fit the fat the fit, because sucks I don’t want to see you do it.
I want to see you always living that healthy fit life.
Alright, be a role model. Be a role model.
Put in the comments how this helped you, where you’re at in your journey, any roadblocks you overcame, and how you did it.
So that way you can help other people out there overcome that stuff too.
Because guess what, this is real, baby. This is real fat to fit transformation for men.
I try to teach people time-saving strategies. And to have time-saving strategies, you have to do the best stuff, because that’s what’s gonna get you the best results. So today, I am going to show you the five best exercises using dumbbells, and to help you with your dumbbell workout for beginners, and that way you don’t have to waste time.
#1 Dumbbell Bench Press
We’re going to start off with a dumbbell bench press. Why the dumbbell bench press?
It’s not number one of the most, highest, or best for our exercises or for dumbbell workout for beginners, but it is because there’s a compound joint movement, which means multiple joints are working. You’re getting the most bang for your buck, or hitting the majority of your chest by doing the flat bench because you hit not only the upper of them, the major but also underneath. That way, you get the majority of the chest muscle as opposed to if you’re lagging and you want to just hit the incline presses. Incline presses are great as well as chest hips or decline press.
A big thing with the dumbbell bench press is to make sure you get a good position when you’re picking the dumbbells up. Set them on your thighs. I want you to lay back into position bringing them to your shoulders, and we’re going to press them up and together.
With your dumbbell press, you don’t want your elbows flared out to the side straight aligned with your shoulders. You want them tucked up under about a 45-degree angle coming down as deep as you can. Don’t hurt yourself. If your body really doesn’t want to go that deep then don’t because you don’t want to hurt yourself. If you can, and you have no ailments, you want to definitely get that good range of motion, because not only you are getting the positive contraction, but you’re also getting that stretch along the way.
Also, stretching those muscles out so that way you’re not so super tight. And anytime you get a good strong long stretch on it, it seems long gating that muscle also. That way when the contraction is there, the muscle looks nice and full.
#2 Dumbbell Bent Over Row
If you’re a beginner just getting started, I would prefer you to do the single-arm dumbbell row. That way you’re giving yourself back that support needed to get a good motion, but at the same time not putting yourself in danger by just doing a bent-over row by itself.
You want to make sure your hands planted on the bench, grabbing that dumbbell, dragging your arm straight up beside you. Good control, explosive on the way up, exhaling on the way up and then coming down. Don’t overextend your shoulder.
It’s the same thing on the other side as well, hands directly under your shoulder and just pulling it straight up, spines align. Looking down, keeping that spine align, and dragging that arm up. That’s the one I was explaining. If you’re a true beginner getting started, dumbbell single arm row, definitely a great one.
If you’ve been around the block for a while, you’re just looking for the five best, the bent-over row is a great exercise for your dumbbell workout for beginners.. But make sure your cores’ tight so that way you do not get injured. Dragging those arms right beside you, pulling up, and good control on the way down. You always want about a one-second to two-second negative motion on the way down.
#3 Goblet Squat
Heads up back straight, and you want to make sure you hold the dumbbell nice and want your feet shoulder-width apart. I typically set something behind most clients just for the fact of them sitting on their heels. Once you understand the whole sitting on your heels, you don’t need it because you can go a little bit lower as long as you’re able to. Same thing, no knee issues, no problems. And definitely, you can go deeper.
There are several ways to hold the dumbbell. If you want to, you can use two dumbbells. You can also hold them right up in front of you. Same thing, nice squat, and holding those dumbbells in front of you.
#4 Stiff-Legged Deadlift
You can pull the back end of the bench up. You would want to have something a little higher than your hip. You’re not keeping it in front of you pushing off of it, it’s just for balance. Do you have to have anything? No, we want to make sure you keep that hand nice and tight to your shin.
Keep in tight to your shin, and straight-up driving through your head. Make sure you feel that stretch on the hamstring that is on the ground. If you get too jerky and you go too fast, you can get a really good high hamstring pull, strain. Definitely, be careful always, nice and control on the way down. You can drive that up. What I mean by that is nice and controlled. And then you can drive up nice and fast. Driving up squeeze, driving up the squeeze. You almost want the dumbbell to straddle your foot.
Alright, so that would be your dumbbell single-leg RDL. If you’re working on balance, you can do this with no support for that opposite hand.
You can also do both legs just like if you’re holding a barbell, down, up, squeeze, always pushing that butt back. Whenever you’re doing a stiff-legged deadlift, I always say it’s like you have a bag of groceries and you’re trying to push that door open when you’re trying to get through the house.
#5 Shoulder Press with Dumbbells
A lot of the major muscles, you got to think with the chest, shoulders or chest, back, hamstrings, quads, and then also your shoulders. The same thing gripping up some dumbbells.
The big thing here with the shoulder press, and I have videos on this as well to get the most out of it, this is one exercise you really don’t want to lockout because if you lock it out, you’re getting it into your traps. You’re popping up to your shoulders, you’re coming up, and it’s about 85 to 90% of the way up, and then right back down. Go ahead and try it on your own. Then go ahead and do one where you lock it out and you can feel that pressure transfer right into your traps. Popping that straight up really getting those front deltoids.
Pop in the comments right below if you have a favorite dumbbell exercise that you love, that way I can see it and check it out. And I’m excited to see what you guys have to say.
What is the best time to workout? Or is there the worst time to workout for weight loss to get the fastest results? What do you think the answer is? There is the best time to workout. And the best time to get the best results, whether it’s muscle growth or fat loss when your core temperature is at its hottest. Because your body’s warmed up, it’s ready to go, you’re amped up, your oxygen levels are anyway through your body, your glycogen is completely restored and you’re ready to crush it. Therefore, the best time would be late afternoon into the evening time slot.
But there are key factors, also that I feel are more important than even that that gives you the best results. I can get one or two workouts in an evening for that peak performance but the consistent time schedule will actually make it better. And it increases your abilities to get the best out of that because your body starts to get used to getting up at that time, waking up early before work, waking up before everyone gets up, and taking care of it then.
There are ways to increase, there are ways to actually give you that peak performance in the morning. What you’re going to do is obviously you need to seek a doctor and if you can’t have caffeine, then you need to find other means to get yourself woke up.
A lot of times, I’ll have a shot of caffeine in the morning to get myself going. This way, my body’s revved up, ready to go, blood pumping, and everything’s moving. So, one – caffeine, two – I think that you’re warming up. This is not just your dynamic warm-up going into a workout that I’ve told you about in the past. To get that core temperature up and rolling, get a good jog, elliptical, Bowflex, rower, or something where your core temperature is at a peak or a height, or obviously elevated so that way, your body’s up, and its blood is flowing and you’re ready to go.
Another thing is another good supplement which is niacin, a vasodilator. It helps open your veins, that way your blood gets pushed in and out of where it needs to go pre-workout and during your workout also.
Those are a few different ways to manufacture the same outcome as if you would have in the late afternoon. Because at the end of the day, I feel that 90% of the people out there have a more consistent schedule in the morning, when it’s literally just waking up and getting it done as opposed to hoping that everything lines up for you to be able to get it done in the evening time. There’s a lot of factors that can come along with extra work calls, sales calls, different things, crap hits the fan and all of a sudden you’re running all over God’s creation, and a child gets sick. Something happens that takes you off a course.
In the morning, yes, some nights you might not go to bed perfect, some things might not align, but at the end of the day, you just hit that alarm clock, you can get up and get going. And I feel like your energy level throughout the rest of the day is much better, which means your metabolisms firing a lot harder if you do that first thing in the morning. Opposed to in the evening, when it gets you going again and then all of a sudden you’re trying to fall asleep because sleep is a big factor for weight loss, muscle gaining, and all those types of things as well. Sleep is as big a factor as getting the right food in and working out at that time of day.
Did I confuse you? I don’t mean to confuse you, but one – I need to find a time that you can be the most consistent, most important – two – obviously, core temperature and your body’s ability to perform needs to be elevated so you need to find that happy medium.
If you need to do it in the evening, God bless ya, that’s good. You can knock it out but you need to create that same type of outcome of core temperature, blood flow circulation, and getting that quick-burning carbon right before you go, typically, I would do an apple or banana.
Not only is the workout the most important, but also what you do after the workout. Your body is hungry, it’s starving, and you have to make sure you get that protein shake in you immediately following your workout. All right, so that’s a quick added tip.
So the best time to workout statistically, performance-wise, body result-wise is in the afternoon and evening, but you can make it the same in the morning if you do those things that I said.
Caffeine, or something to wake you up and get your body going because it helps with pain and, obviously, energy too. It blocks your sensories of pain, therefore, you’re able to push a little bit harder.
Niacin to help circulate that blood and open your veins, it’s a vasodilator.
Getting a good core temperature elevated, which actually, gives you that best peak performance to get the best results, which means weight loss, metabolism-boosting, muscle gain, and all of those key things.
Hopefully, you guys found this tremendously informative and you got some great nuggets for it. And like I said, I even throw in the bonus: drink your protein shake after your workout!
Today, I’m gonna be sharing with you a beginner workout that you could do at home or at the gym, made simple. This is going to be just like if I was right there with you for this training session teaching you not only the workout itself, sets, reps, exercises themselves, but also those careless gym mistakes that a lot of times new people make when going into the gym or starting a new program on their own. Alright, we’re going to go through proper technique, simple things, so that way you don’t get hurt and also just silly errors that you could possibly make.
We’re going to start off by doing two sets of four exercises and repeat each set three times. While doing the exercises, I’ll explain the sets and reps and all that fun stuff, so let’s play!
Set #1
1. Lat Pulldown
Alright, so we’ll start with the Lat Pulldown for 12 to 15 repetitions.
DOs
Make sure you put your hand on the top of the weight stack as you change your weight, especially when you are using a lat pulldown bar or any type of a heavier bar on a cable machine.
Usually, at a gym, you will have the two rolly pads that go over the top of your knees, you sit down on the chair, either adjust the seat or adjust the rolly pads to make sure they’re nice, and snug on your legs holding you down.
As soon as you get that set, grab the bar with your shoulder apart, and sit down.
Exhale as you pull the bar down towards you, then slowly release it up. A lot of times when people are starting with me, I will only have them go about 95% of the way up just because they’re learning how to engage their muscles and you always want to keep your muscles under the tension.
DON’Ts
Common gym mistakes people do are they’ll put the bar on if it’s not on already and they’ll walk over to change the weight for the bar and pull the pinout and the bar weighs more than nothing. When this happens, the lat pulldown bar will hit you in the back of the head a lot harder.
When releasing the bar, don’t just let the weight fly up. That’s the biggest NO NO mistake. You’ll be hurt, you’ll have your shoulders ripped out of the socket, you’ll get injured in general.
2. Dumbbell Bench Press
12 to 15 repetitions.
DOs
Several things about just getting set up properly, for your bench press, you always want to hold the weights, set them on your thighs, and then have a seat with them.
Whenever you’re grabbing weights, you always want to make sure your body is tight.
Roll back the right into position, press up the weights, and just like I said about 95% of the way up so that way you keep that muscle under tension.
Hold the dumbbells at about a 45-degree angle because it helps to force those elbows into the right position, at least until you start to get into that groove and understand exactly where those dumbbells are supposed to go, right next to your chest.
Press the dumbbells right over your chest, bring them down, then drop them down to the ground
DON’Ts
Sitting down and trying to grab the dumbbell by swinging them up into play position. You’ll get hurt getting into and out of position for the exercises, not so much the exercises themselves.
Another BIG NO NO mistake is laying down and trying to grab the dumbbells at an exposed position where you’re trying to pull them up to your shoulders, it’s not healthy.
You don’t want to ever just grab the weights relaxed because you’ll end up hurting your back.
Don’t hold the dumbbells up and stand up with them and let them swing all over the floor.
These are some major things that I see people do improperly.
The biggest thing that kind of derails people, obviously, lack of motivation. If you get injured, it’s going to really set you back and then you’re going to be frustrated because you’re not going to know how to workout, working around your injury, and all those types of things as well.
3. Single-Arm Dumbbell Row
12 to 15 repetitions for your left arm, and another 12 to 15 repetitions for your right arm.
DOs
Place your right knee and right hand on the bench, then grab a dumbbell with your left hand. Make sure your body is tight when grabbing the dumbbell, holding a firm grip.
Drive that elbow straight back, dragging your arm right along your side.
Run a nice controlled motion, driving it up, controlling it all the way down, 95% of the way down so that you don’t overextend your shoulder.
DON’T
Don’t try to rip it up all the way up and don’t overextend when you come down.
Swap out opposite knee and hand, driving that elbow straight up as well, not overextending.
4. Lying Leg Lower
12 to 15 repetitions
Grab a mat real quick, set it up on the floor, and lay down.
DOs
Place your hands under your butt: top of your butt or part of your back.
Bring your knees in, both feet simultaneously up and lower them down.
Keep your back snug on the floor. As soon as you feel that back arch, you’re going to drive those knees in.
As you get stronger, you’re going to be able to go deeper into that leg lower, it’s just about making sure that your back stays snug on the floor.
You can also do one leg at a time, keep getting a leg bent until you’re able to keep that back snug on the floor.
DON’T
Don’t arch your back up off the floor.
These are some of the biggest home or gym mistakes that people make when starting to do these exercises. I’m trying to help you so that you don’t make those gym mistakes and that way you stay injury-free. You would go through these four exercises three times, with 12 to 15 repetitions each. Make sure you’re jotting these weights down so that way you know exactly what weights you’re using and make sure you’re increasing them as well.
PRO TIP
A lot of times you think you’re getting strong, you’re feeling good, and you want to jump up way super fast, but you’re just starting to work out. Your muscles might be able to adapt, they’ll get stronger, faster, but your tendons and joints and all that stuff are going to adapt as fast. So just give it some time, especially if you’re just starting out, that way you don’t get hurt. I would say give it some time like three to five weeks, paying that range just depending on how long it has been since you haven’t worked out before. And then after that, you’re going to have some fun, you’re going to get in shape and that fit lifestyle.
Alright, the next four exercises are going to be a Shoulder Press, a Bicep Curl, an Overhead Tricep Press, and a Step-up.
For demonstration purposes, you’ll notice I use the same dumbbells, but it’s just because I’m demonstrating. You’re going to have different weights that go with each exercise because each muscle power is going to be stronger or weaker or vice versa.
Set #2
1. Shoulder Press
DOs
Set the dumbbells into your knees to help them throw up onto your shoulders. Now you’re in position, head and neck are resting on that pad, back’s nice and flush.
Stay snug on that bench and just drive them up, keep the tension in your shoulders by 95% of the way.
Make sure you’re going straight up over your head, look up with those dumbbells, make sure they’re going in the right direction.
DON’Ts
Don’t overextend your shoulders because even when you get good at them, if you extend all the way up, you’re really just driving that tension rightinto your traps.
Some people do when shoulder pressing is they’ll push forward, or they’ll push backward. Don’t overextend your shoulder trap because you want to keep all that tension on that front part of your shoulder.
2. Bicep Curl
Arms are beside you and your knees are together because you’re going either be bumping your legs, or we’re gonna have to go super wide with your hands.
DOs
Make sure your knees are together, stay nice and tight to your body and make sure to curl straight up.
Let those dumbbells hanging down beside you, you want to get a good full range of motion on this one.
DON’Ts
Don’t roll your shoulders into the dumbbells to help get the weight up.
Don’t tuck your elbows back beside you to shorten that range of motion.
Don’t use your wrists because your forearms are going to get wave fatigued faster than your biceps well. So, if you’re coming up curling your wrists, you’re really engaging those forearms, and your biceps aren’t going to get the work that you’re trying to get them to have. Keep your wrists nice, steady, and straight, squeeze those dumbbells tight so that way you’re not using those also.
3. Overhead Tricep Press
A quick way to pick this dumbbell when you go into an overhead tricep press would be both hands on the dumbbell and flip it up onto your shoulder so that way you can get into position. It’s just resting on your shoulder like so you got your hand there for a little bit of support, you’re gonna take your other hand behind you, and grab a diamond position. Let it slide off of that shoulder, you’re in position, your elbows are nice and tight to your head. And you’re gonna drive this dumbbell straight up and straight out.
Why do I have my feet offset? You do this because especially as you’re new and your core is not as strong, you’re not going to be able to go in with your feet side by side as far as arching your back and you get pressuring your lower back.
DOs
Make sure you get your staggered step or even to the point where you can put a foot up on a dumbbell rack or up on the bench. This is going to help you to support that lower back as well. Good extension on that triceps, the back of the arm.
When you’re done with it, bring it to that shoulder, reach around and grab the dumbbell right to the floor.
4. Step-up
There are all kinds of different size boxes, or steps, or benches.
The proper positioning of the shoulder, hands behind your back to help keep your shoulders nice and tight, head up as always looking up and ahead of you. If you look down and go take this into your lower back, you’re just not in a good position, you’ll build into using dumbbells and barbells for awaited step-ups.
DOs
Make sure you’re getting the right box, and how to choose your step.
If you put your foot on the box, you want about two inches behind you because you want your back leg nice and tight to the box.
Step up onto the box, and straight down.
DON’Ts
Don’t use a box that’s too high because you couldn’t do it well. Things that I would see are either your knees swaying in an hour, depending on which part of your leg is weaker, sway in or out depending on what’s going on. Or another thing is, if you go to step up,and you notice that you’re putting your other foot on that box too fast to help push you up. Make sure that you’re not using that other leg to help get you up, you want to get a good full extension with the leg before the other leg touches the box.
Some people, as they get tired, they’ll start to step way far back, because they must try to start shooting themselves up onto the box using that lower or that back leg as well.
Those are a couple of key things that people will do improperly if the box is too high.
What do you do if the box is too easy for you? This is when you add a dumbbell, so you’re trying to really build that leg strength. You would hold dumbbells, trying to get the leg stronger so you can move up to the next level of boxes.
You don’t really need to go much higher than your knee being at 90 degrees. I’m not saying you can’t, I’m just saying that your first main goal is to get into that position where you can do a 90-degree step up because that’s actually what you want to do when you get into those squats as well.
Alright! Hopefully, all of this information really hit home with you, you learn a lot. I know that when anybody starts a regimen, they’re always fearful so they run to the cardio machines as opposed to coming into the weight room. I want you to feel comfortable about coming into the weight room and getting started the proper way.
This is a workout program, you can pretty much do it three to four times a week. You can do this for three to five weeks, just as you’re getting acclimated into this type of environment. Then post-workout, especially if you’re trying to burn some extra fat, you want to make sure you’re jumping on a cardio piece of equipment for at least 15 to 20 minutes afterward. Your heart rates already up, you’ve gone through a great strength training workout right onto that cardio so you can continue that burn to get the most out of it.
I hope you guys do the best. I really strongly encourage you to at least get started. Get started to take care of yourself and hopefully, this information helps and you feel like a pro in that weight room.
Send these gym mistakes to avoid to some people that you feel that would help too because there’s a lot of people that you probably know that are scared to get started and just go into a weight room and to start running on the treadmill and start going down that whole route opposed to actually making their body stronger and more well balanced.
People are always asking, what is an active recovery workout?
A lot of times when you’re beaten up at the gym and you just need a day but at the same time you really don’t want to take a day off just because of the fact that you have a great routine going. So just gonna show you a little bit of what we do for active recovery, and what I teach.
We’ll all run through like two sets of four exercises, three different circuits, and about 24 to 30 minutes worth of good active work. There’s gonna be a 12 seconds break in between that’s just to get to the next exercise.
Active Recovery Workout: Circuit #1
1. Treadmill Run
I’m gonna start off with a treadmill run. It’s going to be a treadmill jog.
How to:
Get on the treadmill while it’s running
Walk up the sides
Hold on the sides and just let your feet kind of lower onto it
Run for one minute
Get off the same way by grabbing those handles, stepping off to the side
Tips:
Just like anybody would, you’re not going to go too hard, too fast. Everybody’s levels are different. So just get it loose.
Alternative:
If you can’t run on a treadmill, go on the elliptical, use the rower. There’s plenty of things out there to use, you can use a jump rope. It’s just about getting that cardio up.
Take a 12-second break.
2. Alt Step-Ups
How to:
It’s just stepping upon a box.
Tips:
You don’t need to go fast, just step up, swishing legs, it’s all to your guyses level.
Benefits:
It will help you literally move your body to get that blood flowing and circulating.
It helps get that blood circulating through those legs.
Alternative:
If you don’t have a box, you can do step-back lunges. You can do high knees running in place. And you don’t need to go this fast either. You can just step up swishing legs, it’s all to your guyses level. It’s just about
3. TRX Fallout
How to:
Arms in front of you
Make sure to keep your arms and body nice and straight, falling out under those toes
To make it easier, move forward. To make it harder, move backward
Benefits:
It engages the core.
Alternative:
If you don’t have a TRX strap, it could just be a plank.
4. Hyperextension Side Bends
How to:
Your bottom line goes forward.
The top leg goes backward. stay nice and sideways.
Make a switch to the other side after 30 seconds
Alternative:
If you don’t have a hyperextension machine, you can just hold a dumbbell to your side. If you had your dumbbell on your right hand, you’d be reaching towards your left knee to work that oblique.
All right, there we go. We’re back to the treadmill. Like I told you, we’re going to repeat it.
After the first circuit, take a one-minute break…get some water!
Active Recovery Workout: Circuit #2
1. Heavy Rope Slams
How to:
When you pick up the rope, stretch them out.
Walk-in until the ropes are almost touching your toes, which gives you enough length on it to give it that nice way
Keep that core tall
Tips:
Try not to move or you will be slamming down into it in picking up and using your lower back. It’s all about using your core strengths by staying nice and tall.
Alternative:
If you don’t have heavy ropes, you can grab some dumbbells, or a kettlebell and do some kettlebell swings.
2. Army Crawl
This is a fun one. Army Crawl in a plank position.
How to:
Keep that butt nice and flat
Crawl forward to the top of the mat (if you’re using a mat)
Crawl backward
Stick and hold
Benefits:
It engages the core, big time.
3. V-Ups
V-Up is like a Jack-knife.
How to:
Both legs out
Back snot on the floor
Reach up for those toes
Tips:
Exhale on the way up when reaching up for toes…breathe it out.
Alternative:
If you can’t do a V-Ups, just a regular suitcase crunch.
Benefits:
It helps you get a good contraction on those abs.
4. Ab Wheel Rollout
How-to:
Keep your arms out in front of you.
It’s very little arm movement, it’s pulling back from your lower abdominal region. So you’re all out, pull back from your abs.
Everyone who is turning this into an arm exercise, or they’re rolling out their arms and pulling back with their arms, that’s definitely not right. I’ll keep those hips tucked under. I would say like when you gets banked not that you still get spanked, I’m sure but…I’m sure everybody remembers.
So that was our four exercises for our second circuit. Now, back to the top which is the heavy rope slams.
Are you having fun doing this active recovery workout?
If you’re looking for ideas on how to change up your workout routine, if you’re looking on how to stay healthy, how to keep that body healthy, how to live fit, not only nutritionally but with your workout. Always try to keep people in mind, we’re all busy. As you know, the majority of my clients are entrepreneurs, business owners, high achievers. I’ve always been teaching time-saving strategies.
So, if you want to know more about the 7 Figure Body Blueprint, my Ignite Meal Planning System, and my Accelerated PT method, definitely reach out to me.
You can either contact me or Work With Me and that way I can show you how to either get the most efficient workouts, most efficient meal planning, and how to keep your body healthy.
If you didn’t yet see it, go back and check out the intro to the accelerated beginner weight loss workout routine that way you can get all the descriptions of the exercises themselves so you don’t get hurt doing them. You can see how to get set up for this actual workout routine. And you know, you get all of that stuff. And then you can just go back to this one and actually do the workout with me.
Alright!We’re going to start off with five sets of five reps of goblet squats, five reps of weighted hyperextensions, and 40 reps of heavy rope slams. And then we’ll go to the next circuit, 5 reps of lat pull down, 5 reps of bench press, and 1-minute spin bike.
As I said, it shouldn’t take that long to get through the workout and get the benefits of the strength and power with the cardio mixed in to get the fat loss and the weight loss. And then we’re going to follow right up with 20-minutes of cardio so that we continue that fat loss increasing those results because it’s all about the accelerator results.
All right, let’s not hold back anymore. Here we go.
Circuit 1: Goblet Squats, Weighted Hyperextension, and Heavy Rope Slams
Round 1: We’re going to start with 5 reps of the goblet squat, picking the dumbbell up or kettlebell, whatever you’re using.Tapping that butt down.Stay on those heels.
Right to the 5 reps of weighted hyperextensions. See, nothing’s jerky even though you’re moving fast through it. It’s all good control, muscles are engaged.
Then 40 heavy rope slams.
Round one is done. Repeat up to round 5.
Circuit 2: Bench Press, Lat Pull Down, and Spin Bike
Next, we got the 5 reps of bench press, 5 reps of lat pull down, and 1-minute of spin bike
You might have a jump rope, sliders, something else cardio wise.
Here we go. We can do this.
Start round 1 and repeat until round 5.
Hopefully, you guys enjoy this workout. Make sure you guys do your 20 minutes of cardio after like jumping on the rower, treadmill elliptical, stair climber Bowflex.20 minutes of cardio, heart rates already elevated. Continue that fat burning and telling you right now, this is the fastest way to get those weight loss results.
For more tips, subscribe to Brent Kasmer Youtube channeland smash that notification bell so you’re notified as all the new stuff comes out.
If you want to work with me, I may design something specific to your needs, your wants, and your goals to get the best, fastest, most efficient stuff out there.
And it’s on the internet so it’s gotta be possible, right? Cooking, food prep, workouts, all of these things, they are possible.
It’s just teaching you and understanding the differences of all of it.
If you just want the workout, go check out the best leg workout, no soreness, but all the benefits. I also have that video in there for you too, as well, so that you can go ahead and try to write it yourself.
So…why is this even a topic? It’s because people freaking hate doing legs workout because they hate getting sore. They’re like, “Man, I really just don’t want to do this, because I don’t feel like not being able to walk up the stairs falling over and not being able to pick up stuff because my legs hurt.”
But they know that there are benefits, you don’t want to sit there and just do upper body because then you look a little goofy. You want to make sure you’re hitting your legs at the same time because it also has major benefits, like by doing a legs workout, you get the most growth hormone produced through your body, because your body has to work harder to heal such a big muscle, and all the other smaller muscles in your body. There’s a lot of benefits to it as well.
Here’s how you do it.
There’s a couple of different strategies for working out, in general. There are strength and power versus hypertrophy. There’s volume versus frequency. And there are many other techniques as well but those are a couple of the different ones that people are most familiar with, for one. And two, it’s the difference between soreness and non-soreness. The difference between saying, “Oh, you know what, I did a little bit of work, you can feel a little bit, but it’s not like, crippling or you just don’t want to move and don’t want to get out of bed, just want to lay in Epsom salt baths. No one really wants that at the end of the day.
Some people love being sore. It’s cool. It’s fine. Whatever it is, if you like being sore, go do the opposite of what I’m trying to teach.
To not get sore, strength and power are a great form of not getting sore. Hypertrophy is a good way to get sore. So the difference between them both is low reps versus high reps. And volume is just meaning you’re doing tons of sets of body parts. That way, you shouldn’t train it more frequently throughout the week than if you’re doing a high volume training program, meaning, 16 to 20 to 25 sets of a body part such as the chest, legs workout, back, shoulders, etc.
The people isolate a single body part and they just hammer away at it. It’s like an old school bodybuilder but it’s out there. It’s a technique. It’s in a lot of magazines, people read it, they’re like, “Oh, I love how he or she looks and that’s how I want to train.” So they take their program and they annihilate their body and hopefully don’t get hurt.
But if you take that power work, and you take a higher frequency and less volume approach, and that’s how you’re going to get all the benefits without being immobilized. You’re going to take that low reps like five to six sets of a body part, or four to six sets of a body part, you’re going to train it more frequently through the week like 2 or 3 to 4 times through the week to get fantastic results without that full-body stiffness and not being able to move.
I really hope that you found this content valuable and you understand exactly what I’m trying to teach you.
If you just want the program, go check out that program specifically such as best leg workout, no soreness, and all the benefits. Go check that one out to get that.
If you’re just like, “Hey, you know what, I just want you to write my programs. I want you to write my meal plan. I want you to teach me the fastest ways to do everything because I don’t want to waste time anymore, then work with me. Just tell me a little about yourself, you’re gonna have a little form in there to fill out that way I understand where you’re at injuries, ailments, type of work that you do, so that way I understand how to fulfill all of those things to make it the easiest for you.
Today, I’m sharing with you the best cable chest workout.
And I’m giving you sets, reps, and everything so you can take this cable chest workout with you right now!
I’m super excited to share this with you!
Why? Because people are not only trying to get the most out of their chest workouts, but are also always trying to hit multiple muscle groups at one time. And that’s exactly what this chest workout allows you to do!
So, this chest workout is going to be four different tri-set circuits, which means each set is going to have 3 exercises in it.
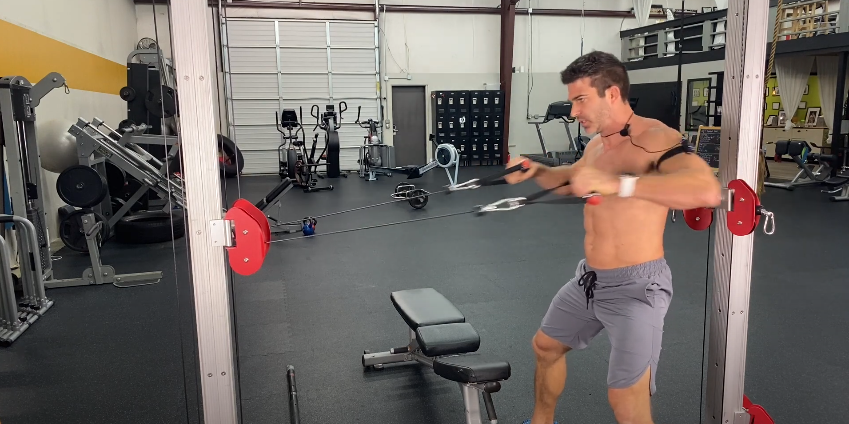
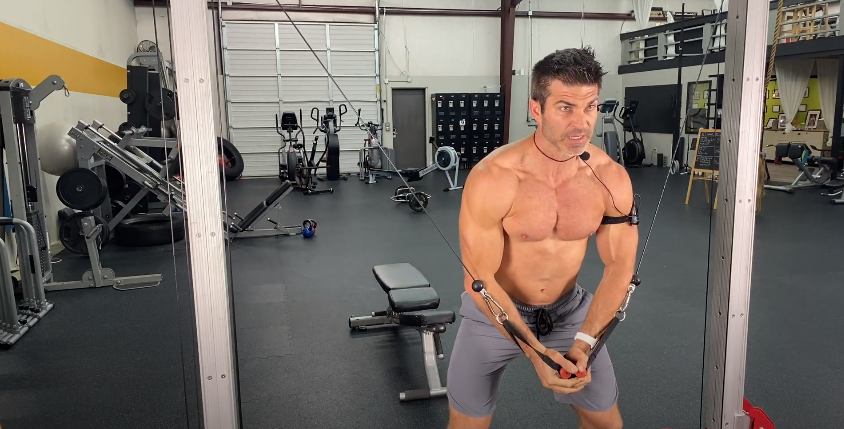
And we’re starting off with a cable row. But I’m sure you’re asking right now, why are we starting with a cable row?
Well, a lot of times people improperly perform chest exercises such as the bench press, chest dip, etc.
BUT, the key to performing chest exercises and workouts correctly is being able to hold your shoulders back and down.
Unfortunately, if you’re always pushing forward, it makes it near impossible for you to start pulling your shoulders back.
So when trying to get into a great chest workout, you have to do chest exercises first to pull those shoulders back and and down so you can get the most out of the actual chest exercises themselves.
So the first circuit of this cable chest workout includes 15 repetitions each of a cable row, cable chest fly and bench press.
Cable Chest Workout – Circuit 1
Cable Row – 3 sets of 15 repetitions
Do what you can, but don’t make it overly easy or be ridiculous with your choice of weight.
You don’t want to burn your muscles out before getting into your bench press.
And after 15 reps, you’re going to go right into your cable chest fly.
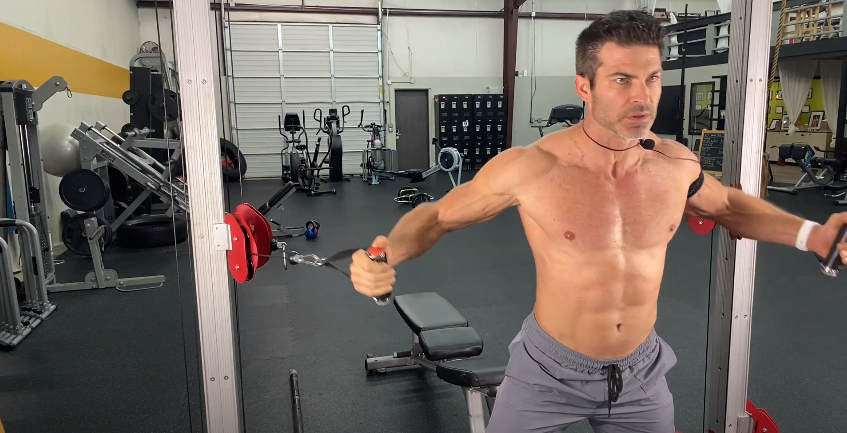
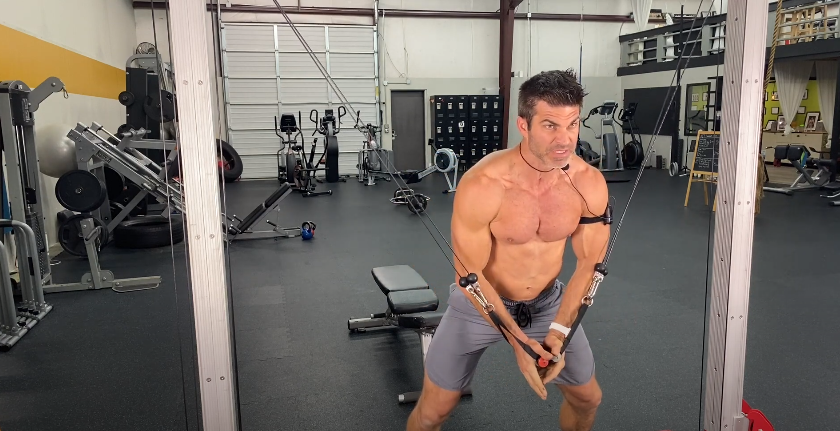
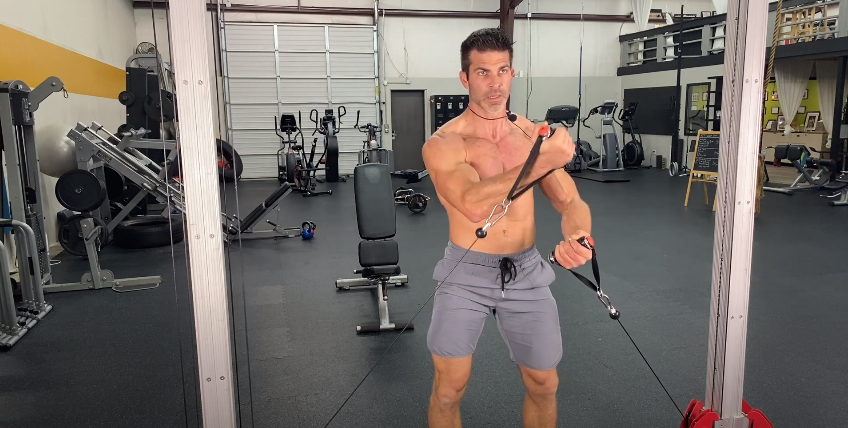
Cable Chest Fly – 3 sets of 10 repetitions
The same thing, most people do the cable chest fly exercise improperly. And the reason and how you can do a chest fly improperly as you want to, they want to put on their max rep to wait for a chest fly.
A chest fly is an isolation movement. With this movement, you’re trying to get blood flow to the muscles. You want this exercise to be challenging, but you don’t want to MAX out. This is going to allow you good form throughout the entire range of motion. Again, you’re just trying to get good blood flow going to your chest muscles. Make sure to squeeze those handles together with each rep and stay nice and tall the entire exercise.
Keep in mind, you’re not trying to drive it into the upper part of the chest. Instead, you’re trying to engage that major pec muscle. So when you squeeze those handles together, keep your arms slightly bent while driving your elbows together to finish off the movement. This will give you the best form when doing your chest fly to keep that major pec muscle engaged.
And after 15 reps, you’re going to go right into your last exercise of your tri-set, which is the bench press.
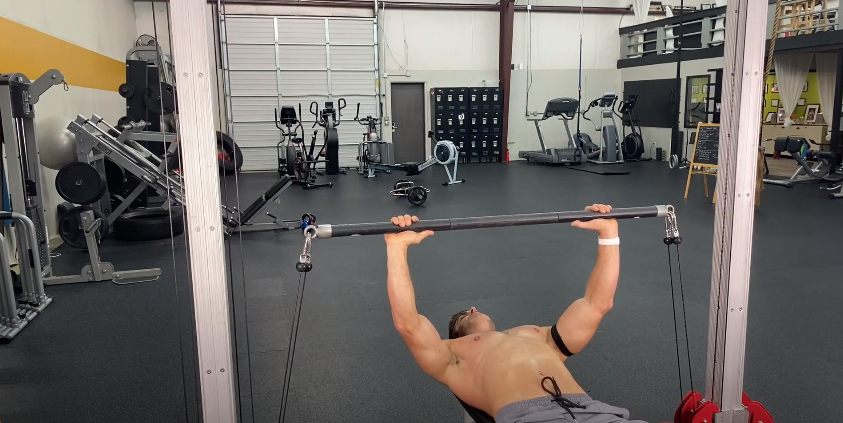
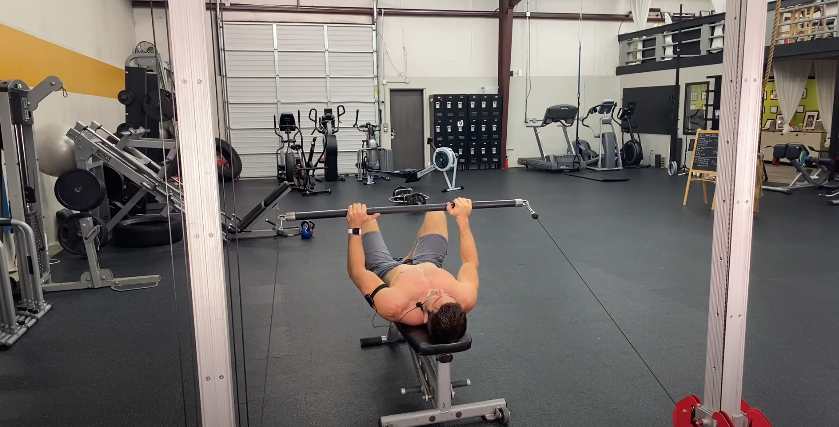
Bench Press – 3 sets of 5 repetitions
While I’m showing you these cable chest exercises you want to keep two things in mind.
I’m giving you guys the ability to do these exercises with just cables. But there are some exercises I definitely feel should be done with a barbell and free weights. I do have a bar that I can hook onto my cables so I’m able to do a bench press.
When you do anything using a smith machine or cable machine, you want to be able to find the center point and then come down from it before releasing the weight. This way you’re not pulling from one side or the other. Once at the center point, you can then drop the cables all the way down to the ground.
If you’re wondering what the heck I’m using, these are flexlines, and I have an actual whole video on the flexline unit. They’re all done with air compression and are freaking awesome. It applies weight through air pressure. I have a plus button on one side to add weight and a minus on the other to drop weight. And it’s got a small computer screen telling you how much weight you’re using, the amount of repetitions you’ve done and how much energy you’re expending.
Now we’re gonna get into our bench press. The key, is to load it up, which makes it nice, taking it up, and driving. If you do have a barbell bench, and obviously, I would recommend that, but this is a great way to use that cable machine to stay in one spot. We’re going to be doing five reps there, we want that to be supermax out heavy.
So Circuit 1st Cable Chest Workout includes 15 cable rows, followed by 10 chest flies, followed by five bench presses.
You see how we’re kind of loading, we’re squeezing, driving the blood flow in there, and then almost 90 95% of your max. Great way to drive that blood in, and get that chest all jacked up pumped, and that way you can get the best out of it.
All right, we’re gonna move into the second circuit.
I got templates here for you. If you’re wanting this best cable chest workout, just message me, put it in the comments section, or reach out to me personally. DM me on any social media platform and we’ll get this over to you.
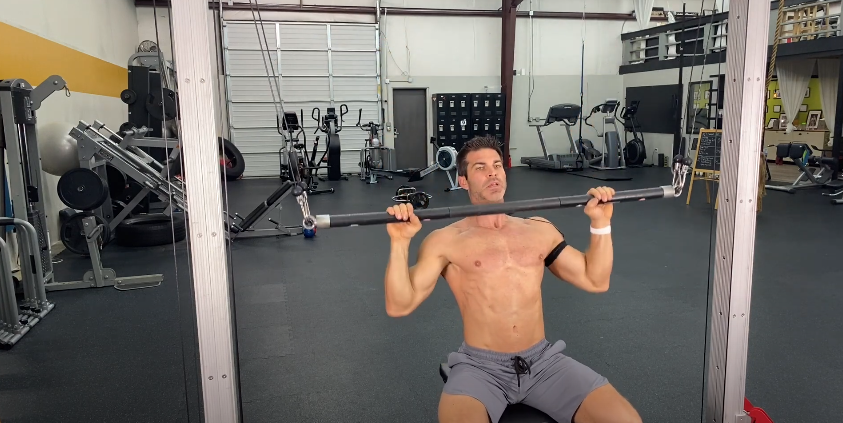
Alright, so the next exercise of this cable chest workout is the wide grip lat pulldown.
Super excited that I just took that bar off here right now for the wide grip lat pulldown.
The same thing, just like I told you with the cable row, you’re pulling your shoulders back and driving your shoulders down, that way, you’re able to get the shoulders back before you go into a heavy bench press with the fly combination.
Now, we’re working on pulling those shoulders down and engaging those lats. It’s the best way to get all those lattisumus or lat muscles pumped up and engaged.
The biggest thing about this cable chest workout is that there are two ways to do it. There’s the seated wide grip pull down, which is okay, or I’ve done a whole series on this too with the whole six top tips to get your first pull up. If you’re not able to get pull-ups yet, do all of your wide grip pulldowns, chin-ups, chin downs, from your knees because this simulates you if you’re actually pulling up. The biggest thing was doing pull-ups is not only the strength of your lats and arms, and all those things, it’s also your core. It’s a major core exercise.
I know it’s surprising.
Always looking up like you’re getting ready to go pull yourself up over the bar, pulling down, engaging those lats, keeping those shoulders pulled down, you’re gonna be doing 15 of these also.
All right, so 15 wide grip pulldowns, making sure you’re grabbing that bar securely. You don’t want to use a hook grip because I also have videos on that as well talking about one of the most common gym injuries. A lot of times people get what is called a tennis elbow and it’s because what happens is they’re using that hook grip, and it just tweaks that one finger real funny. All of a sudden, it triggers that pain in your elbow, that people have the hardest time getting rid of, honestly.
So…wide grip lat pulldown 15, followed by eight decline chest fly.
Decline Chest Fly – 3 sets of 15 repetitions
Just like when I talk about how you’re hitting any specific muscle and you’re trying to really work the whole chest and that’s why this is one of the best cable chest workout that you can do is because you can hit that angle.
To know the angles of the different chest muscles workout, this is the decline chest fly. You won’t be coming underneath that sweep, it connects up and wraps down underneath and into the insertion point right in the middle of the checks. So, you have to get that angle.
It’s the same premise when you’re doing your dips. So when you’re doing your dips, you’re leaning forward just a little bit. You want to make sure you’re nice and tall, leaning forward in that dip position. You’re just really coming straight down and feeling that chest engage underneath and lifting up. The same thing as I did with the chest fly workout, as you’re coming down, hitting those handles, and then feeling like you’re driving those elbows, squeezing your elbows together to finish off that movement, squeeze, you know, engaging that.
Alright, so you’d be doing eight of those. All right, now we’re going into the decline chest press.
Decline Chest Press – 3 sets of 15 repetitions
I actually love this exercise, especially with people that either (a) can’t do dips yet, and (b) just trying to really get that squeeze instead of doing a dip.
The cool thing with this machine is I’ve got two cables here so I can, in essence, hook in both cables into these handles to make this twice as hard on both sides. You can hear me letting that air in and out. I do this so I don’t get injured.
It’s that same motion. We’re set up for a dip and my elbows are bent just like I would be doing a dip. The coolest thing about using the cable is you get that squeeze that you can’t get when you’re doing a dip. You get that squeeze that optimizes. When you’re trying to get that depth, you find that same spot, you feel that bottom, your checking gauge, coming up bending those elbows, keeping the shoulders driven down and squeezing, eight reps, squeezing.
We cannot get that tension when you’re doing the actual dip itself. You see how focused eight reps, squeezing that chest together at the bottom, and I mean, you can really add that pressure to those exercises.
Now, the key thing is that you’re actually using a plate wave which most people will use because they’re not comfortable to have these, you want to make sure you stay tight when you get those weights in place. That way, you’re not exposing your shoulders too much to see how that kind of crawled from one side to the other, locking that in so that way you can get the weights in the right spot without trying to grab heavyweights out wide and really hurting yourself.
Alright, so we have the wide grip pulldowns, driving their shoulders down, getting your lats engaged, the decline fly, and then the decline press down. Alright. That’s our second circuit of Cable Chest Workout.
Our third circuit is one of my favorites.
These are all my favorites actually though, I love training.
So, it’s going to be a cable pullover.
Cable Pull Over – 3 sets of 15 repetitions
Do you have to have a bar? No, I mean, these are obviously things that since I have and I want to show it to you. I actually did see one of these originally at a hotel gym and that’s why I ordered a bunch of them.
Grab your bench and make sure it’s centered. Come in and grab the center point of the cable, roll it out about three to four feet and we’re going to do a pullover. You can do these with barbells and dumbbells. Also, the same thing, I think it’s better with the cable because of the fact that you had that consistent resistance.
Alright, you got your arms locked in and then isolated motion and you’re pulling over, engaging. A hole is going around your chest out so you want to pull that move. You feel your whole chest rounding. It also has that serratus anterior underneath your armpits, keeping those engaged. We’re doing 10 of this. Some good stretches and a good pullover.
With this Cable Chest Workout and a cable machine, you have that resistance always pulling backward. You’re always engaged, or as if you had a dumbbell boom hit to the spot and there’s no resistance here. Your highest resistance point is when it’s completely right up and down, and your body is all the way extended but you lose that resistance as you’re pulling it up and over. The cables are fantastic. The best exercise for that pullover motion.
Cable Chest Workout – Circuit 3
Incline Chest Fly – 3 sets of 15 repetitions
It’s not a heavy movement also, but you want to make sure, just like I said, with the decline fly, you understand where the insertion origin points are. Therefore, you can really isolate that actual muscle itself.
The same thing with the inclined fly, you got to find that motion. That way you can kind of feel and get that muscle memory, the connection with your central nervous system, to where that’s supposed to hit. Feel where it hits and then you grab the handle and you see my hand, how’s the supine grip, and you want to find that point and you’re always kind of moving forward and backward until you find that point and you just want to be like, “Oh, there it is.”
The biggest thing with this Cable Chest Workout is people want to try and twist their bodies, go heavy. It’s not about going heavy, it’s not. You just want to find that motion, find that movement, and isolate this by doing a single arm.
We’re going to do 10 of these also.
So, this whole Cable Chest Workout circuit includes 10, 10, and 10. 10 incline flies, 10 pullovers, and 10 incline presses.
Cables are amazing for a lot of these motions, or resistance bands for that matter. Because when you get to that point, it’s still got great resistance kind of pulling you back other than using a dumbbell, for something like this.
Alright, so this is why the cables are typically a lot better for especially flys. Plus, the big thing too is you’re going past that center point and getting that full contraction on that muscle. You cannot beat that. I mean, at the end of the day, to get the most out of your cable chest workout and your exercises, to get a full contraction like that, it’s the best. When I say these things too, it’s not like I said never do dumbbells again, never use a barbell again, not even close to what I’m saying. Just saying these are great to do because of the fact that you’re getting the best bang out of it.
Alright, as you can see in this Cable Chest Workout, this is a pretty high incline. Since I isolated that upper chest, I want to take it, and just pound it out. The reason being is, the same thing with these cable machines, you can use the handles for these as well. Get that great contraction pushing them in together, just like I did with that decline press but I can go heavier when I use the bar. I can go heavier, but the greatest resistance against it. Just using that bar, and getting it set up right, make sure that’s nice and center, pulling it in so that we want to go straight up with it. It’s gonna be hitting that upper part of my chest and myself in there though.
The same thing, bringing to my thighs, lapping it up, and driving that back into the bench, tucking those toes behind your knees, and just driving yourself back. It’s the same thing as 10 presses. Grab that bar super tight. Squeeze that chest up.
When you actually do this cable chest workout, you are dying at this point. Trust me.
I actually got it yesterday. Driving those elbows, squeezing that chest, really rocking it out.
That’s the third circuit of your Cable Chest Workout. We’ve got the pullovers, followed by the incline fly, followed by the chest press, all in the cable machines.
This last circuit of this Cable Chest Workout is like a burnout circuit. It’s fun. It’s challenging. You’re just kind of burning out the chest, finishing it up. We’re going to be doing several movements.
There are three exercises on it.
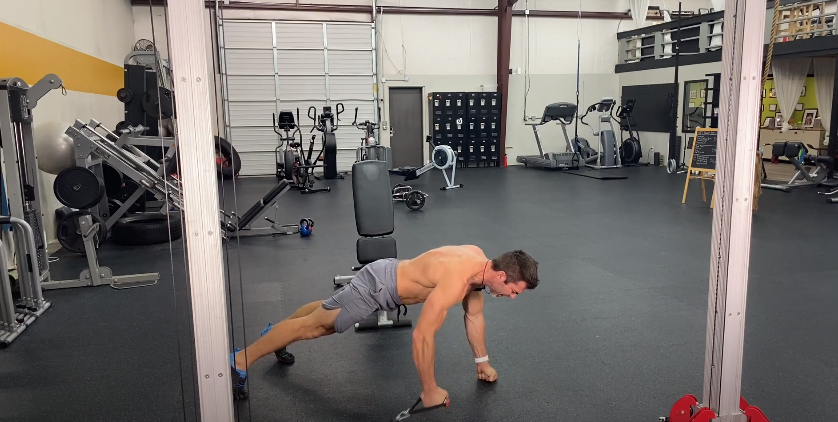
We start off with a crossover push-up.
Crossover Push Up – 3 sets of 15 repetitions
We’re going to go into a push-up position. I do these from my knuckles. If you have a dumbbell, you can do a dumbbell on one side.
From my knuckles, I’m going to do a push-up and then you cross over, cores engaged, getting that chest pop to finish it. I go high and low with it. Five on each side. Push up, squeeze, squeeze, push up, squeeze, squeeze, push up to five on each side.
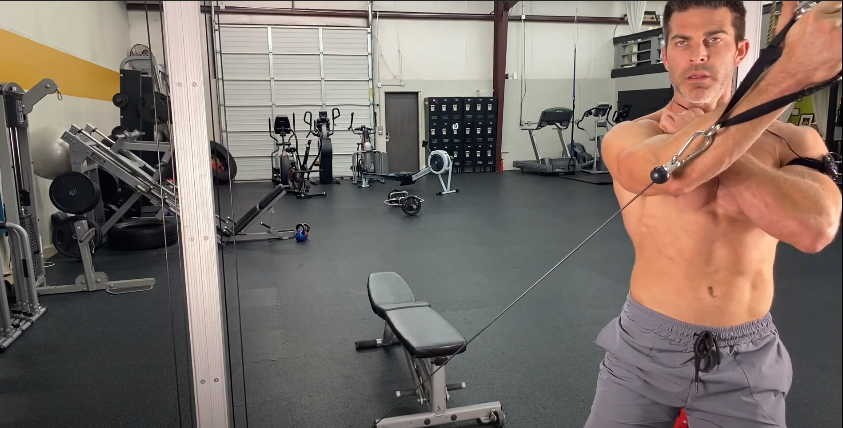
Cable Uppercut – 3 sets of 15 repetitions
It’s not your cardio uppercut. We’re trying to burn your body up and work your core. We’re trying to pop that upper chest again. You want your arms 90-degree bend, coming up, small movement, just across the body. 10 per side. Your arms don’t unbend or bend anymore. Cores engaged, shoulders are locked in tight, and just hitting that upper chest. You can see what is burning out.
This last circuit we’re doing also is just like two to four sets. It’s kind of up to you and how toasted you are. I’ll see you don’t wanna get hurt. But we want to blow your chest all the way out. So we’re doing it today.
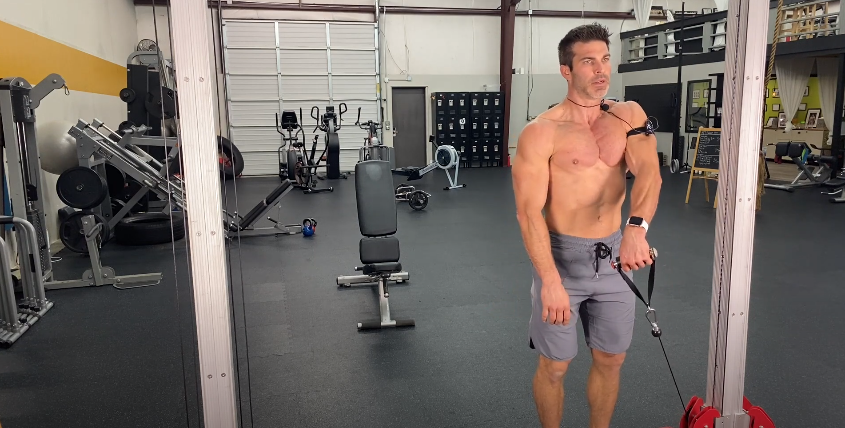
Upper Chest Shrug – 3 sets of 15 repetitions
Staying in tight. You got the cable, and you’re just trying to pop that upper chest up.
This is great to do in front of a mirror or if you don’t have a mirror, just put your hand and make sure you can feel that upper chest popping up.
It’s a little heavier than exercise.
It’s not ridiculous, though.
This is the last exercise for the best cable chest workout.
If you guys want sets, reps, all that stuff, no guesswork, handpicked and typed up and handed over to you, just contact me. I wouldn’t get this over to you unless you want to take notes which is always awesome also.
If you don’t feel like trying to put together and plug all these programs together and figure everything out on your own, you want to get the best. That’s for you. What you’re trying to do? What you’re trying to accomplish? This might not be exactly what you’re trying to accomplish. Because to even get that good cable chest workout, to get that good chest pumping, to get that chest looking the way you want to look. You have to be at a lower body fat percentage just to get it popping out.
To get yourself to that 15 or 12 percent body fat if you’re a guy, or 17 to 21 percent body fat if you’re a woman, to get to that range, you need help, and you don’t want to guess and keep trying to figure it out and waste time. Message me, hit me up, say you want to work with me, let me get you connected with the 7 Figure Body Blueprint.
It’s freaking awesome, man, we use it, ignite meal planning system, super simple. If it’s not simple, you will not do it. Also, I got the accelerated PT method, which is a thing that I created, working with 1000s of clients, getting them the ridiculous results that they didn’t even think was possible at, 40, 50, 60 years old.
It is possible. I promise you that.
I got tons of comments and say, “Oh, I don’t have the right body type for that.”, “I don’t have the right body frame for that.”