Category: Lower Body Workout

How to Workout Your Legs Without Muscle Soreness

What’s up my fitness family! Today, I’m going to share with you how to do a legs workout without getting sore.

Is this possible? Yes, it’s possible!

That is why I’m teaching you a topic on it.

And it’s on the internet so it’s gotta be possible, right? Cooking, food prep, workouts, all of these things, they are possible. 

It’s just teaching you and understanding the differences of all of it. 

If you just want the workout, go check out the best leg workout, no soreness, but all the benefits. I also have that video in there for you too, as well, so that you can go ahead and try to write it yourself. 

So…why is this even a topic? It’s because people freaking hate doing legs workout because they hate getting sore. They’re like, “Man, I really just don’t want to do this, because I don’t feel like not being able to walk up the stairs falling over and not being able to pick up stuff because my legs hurt.”

But they know that there are benefits, you don’t want to sit there and just do upper body because then you look a little goofy. You want to make sure you’re hitting your legs at the same time because it also has major benefits, like by doing a legs workout, you get the most growth hormone produced through your body, because your body has to work harder to heal such a big muscle, and all the other smaller muscles in your body.  There’s a lot of benefits to it as well.

Here’s how you do it. 

There’s a couple of different strategies for working out, in general. There are strength and power versus hypertrophy. There’s volume versus frequency. And there are many other techniques as well but those are a couple of the different ones that people are most familiar with, for one. And two, it’s the difference between soreness and non-soreness. The difference between saying, “Oh, you know what, I did a little bit of work, you can feel a little bit, but it’s not like, crippling or you just don’t want to move and don’t want to get out of bed, just want to lay in Epsom salt baths. No one really wants that at the end of the day.

Some people love being sore. It’s cool. It’s fine. Whatever it is, if you like being sore, go do the opposite of what I’m trying to teach.

To not get sore, strength and power are a great form of not getting sore. Hypertrophy is a good way to get sore. So the difference between them both is low reps versus high reps. And volume is just meaning you’re doing tons of sets of body parts. That way, you shouldn’t train it more frequently throughout the week than if you’re doing a high volume training program, meaning, 16 to 20 to 25 sets of a body part such as the chest, legs workout, back, shoulders, etc.

The people isolate a single body part and they just hammer away at it. It’s like an old school bodybuilder but it’s out there. It’s a technique. It’s in a lot of magazines, people read it, they’re like, “Oh, I love how he or she looks and that’s how I want to train.” So they take their program and they annihilate their body and hopefully don’t get hurt.

But if you take that power work, and you take a higher frequency and less volume approach, and that’s how you’re going to get all the benefits without being immobilized. You’re going to take that low reps like five to six sets of a body part, or four to six sets of a body part, you’re going to train it more frequently through the week like 2 or 3 to 4 times through the week to get fantastic results without that full-body stiffness and not being able to move.

I really hope that you found this content valuable and you understand exactly what I’m trying to teach you.

If you just want the program, go check out that program specifically such as best leg workout, no soreness, and all the benefits. Go check that one out to get that. 

If you’re just like, “Hey, you know what, I just want you to write my programs. I want you to write my meal plan. I want you to teach me the fastest ways to do everything because I don’t want to waste time anymore, then work with me. Just tell me a little about yourself, you’re gonna have a little form in there to fill out that way I understand where you’re at injuries, ailments, type of work that you do, so that way I understand how to fulfill all of those things to make it the easiest for you.

Legs and Core Workout

Today, I have the legs and core workout for you. 

I want to make sure that you guys get the description so that way you understand not only the exercises, and how to do them and how not to do them wrong, or how not to do them improperly.

Let’s go ahead and knock this out.

If you have not yet already, check out my video on dynamic warm-ups because whenever you do any exercise or exercise program, you want to make sure that your body is warmed up.

Alright, we’re gonna go ahead and do a…

Step Back Lunge

Step Back Lunge exercise, legs and core workout

You’re gonna do all eight reps, all on the one leg. You’ll see how you’re stepping back and you want to make sure that when you’re doing this, you get a good step back. If you don’t want to use dumbbells, don’t use them, you make sure you have the proper form first. You only want to be sure you’re driving up through the heel of the front foot and make sure when you step back, your knee is going to be behind your toes.

This is one of the safer lunges to do. A lot of times, if you’re starting off, it’s a good one to do, you’re stepping away, you’re not lunging into it or you can actually push it near the top of your toes.

Good-Morning

The next exercise is a good-morning.

Good Morning exercise, legs and core workout

You need one or two things:

  1. You either hold two dumbbells in front of you, you’re gonna have stiff legs, and you’re going to keep pushing your butt back and it is very similar to your stiff-legged deadlift. But the good thing with this is you’re really engaging your core because you have your weights at a farther away from the access of what you’re trying to use. So since you had enough at your shoulders, your core is much more engaged because of where the dumbbells are placed. 

2. Or you can grab a dumbbell and just do one dumbbell and make it heavier. 

Good-morning is very similar to the stiff-legged deadlift, it’s just that the weights are up higher, either on your shoulders or in front of your shoulders.

Alright, those are the first two leg exercises of our legs and core workout, we’re going to do…

Ballistic Calf Raises

Instead of just doing calf raises, we’re making them ballistic, and you’re hopping from side to side. 

When holding dumbbells and hopping from side to side, you’re also working your obliques and core as well. But with this one, make sure that your shoulders are back so that way you don’t hurt yourself when you’re doing it because if you’re all forward and your shoulders are forward, the tendency to possibly hurting your back. 

Always be watching yourself in the mirror, pay attention and mindfully of what you’re doing, that way you guys don’t get injured.

Alright?

The next ones are…

Reverse Crunch

Reverse Crunch exercise, legs and core workout

The biggest thing with this, if you don’t want to engage your lower back, you also make sure your back is flat on the ground. You want to keep your hands under your butt so that way you keep your back and grow and you’re literally just popping your hips up and you only come down and not bring your feet all the way down because then lower back arches. You want to make sure that you keep that lower back driven into the ground, popping it up. If you do want to bring your lower legs down to make it more advanced, only go as far as you notice before your lower back comes off the ground.

So mindfully, you’re going into these exercises.

Goblet Squat

I like holding the dumbbell like this, preferably. You can use a kettlebell dumbbell, doesn’t really matter what you use as long as you’re using a weight.

Goblet Squat exercise, legs and core workout

Alright, so goblet squat, just like a squat. The core is super-engaged though because you’re holding yourself upright. Each one makes sure you stay in your heels and do a good squat. When people are starting with me, I usually put something behind them so that way they can sit their butt back and tap it to the box or stab or couch or chair, whatever you’re using. 

A goblet squat, holding the weights like that, you’re gonna go ahead and sit your hips back into the exercise. Stay on your heels, keep your head up, staring at a focal point. So get a focus point out there, stare at it, keeping your head up, keeping that core engaged, driving through your hips. Core super engaged which is great.

The next exercise for our legs and core workout is…

Single-Leg RDL

You can do this without holding on to something. It’s great for balance. It’s just like a stiff-legged deadlift, except you’re doing just one leg. The biggest thing with this is keeping the dumbbell super close to your leg, push your butt back, keep your body square. Don’t twist into it to try to get deeper. Keep your back straight, push your butt back.

Single-Leg RDL exercise

Also, I try to have people even honestly, knee forward so it helps them to drag through their hips and engage their glute and hamstring. You want to lean your shoulders back and transfer those hips. Stretch it down, everything’s controlled, it’s not a fast motion, you’re not flying through this trying to get it done. You want to do everything properly, mindfully understand your body, and the mechanics of it so that way, you get the best benefit out of it.

All right, so you’re gonna do both legs, and then we’re going to do a…

Single-Leg Calf Raise

Whatever hand you’re holding, the dumbbell in is the toe you’re rising up on. If you need to find something, if you have a step, and you want to use a step, the biggest thing is keeping that knee locked, and getting a good range of motion with your heel going up and down. Good ankle mobility.

Dumbbell Side Bend

You want your feet together, shoulders back, and you’re reaching away from the dumbbell.

Dumbbell Side Bend exercise

I want to say 90% of the people do this wrong. They’re letting the dumbbell do all the work. You’re taking that dumbbell and you’re working opposite.

Curtsy Lunge

The same thing with goblet squats but this is a lighter exercise. When you do a goblet squat, it’s gonna be a lot heavier.

Curtsy Lunge exercise

Curtsy Lunge is stepping behind your foot, tucking your foot and kneeling almost where your heel is and coming up. You can do all 10 of these to the same side and then alternate, or you can alternate in between each one. 

This is great for hips. It’s driving through hips, building the glue, making all of it strong. 

Like I said before, if you’re not advancing and you don’t feel you can do some of these legs and core workout, definitely don’t use weights at first. You can get used to something and then move into a more advanced motion.

Hip Thrust

You’re just laying on your back.

Hip Thrust exercise

This can be a very heavy exercise. I teach all kinds of these like the barbell hip thrust, but this is just from the ground, driving your hips up, squeezing your glutes, so you’re pushing the dumbbell down in a downward motion so that way it stays up on your size when you’re doing this. Alright, so you just drive up, pushing through your heels, and squeezing your glutes and hips.

Slider Hamstring Glute Raise

I love sliders. It’s super easy to travel with and go anywhere. A good addition to make everything even more advanced.

So same thing, dumbbells on your hips, sliding in while lifting your butt. You’re not coming in and then lifting. You’re literally lifting, engaging the whole hamstring along the way and the insertion of wear ties in your glute, and then the finishing movement is a major glute squeeze at the end. Just keeping that there driving your hips up, then you drop your hips, slide back out, keeping your toes straight up. So your legs are flat, toes are straight up, and you’re pulling it in, you’re lifting before you start, lift and pull it sliding into you. 

And the last one for this entire program is the…

Half a Turkish Get-Up

You want to hold the dumbbell directly over your chest.

Half a Turkish Get-Up exercise

The cool thing about this, to really get that core activated is you’re going to roll to the side, your obliques are locked up, and you want to finish with it above your head. The same way back down, elbow flat. 

You’re working this hole of abdominal and oblique on the one side and the five of them and then five on the other side, the same thing rolling up onto your elbow. The dumbbell rotates and stays up and then finishes it all the way up top. 

It’s a tough exercise.

You can do this at home, you can do this at the gym, you can really honestly do this anywhere that you have dumbbells or any type of weight. Hopefully, you guys enjoyed these legs and core workout.

If you have not yet already, definitely subscribe to my YouTube channel, Brent Kasmer, so that way you’re notified when new workout and exercises stuff comes out.

If you want a program designed for you to get the most out of it, to get the best effect in the quickest amount of time, reach out! This is what I do, this is what I help people not waste any more time, get what they need to get in and done and exactly what they’re looking for to get the best benefits out of it. So hit me up, reach out to me or DM me on any of the social platforms and I will see you soon.

10 Best Barbell Back Strength Exercises

What’s up my fitness family! 

Today I’m gonna show you the 10 best back strength exercises using a barbell.

So, let’s jump right in!

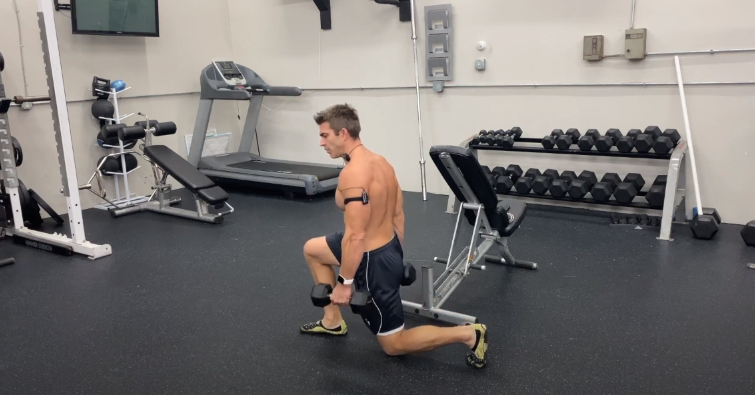
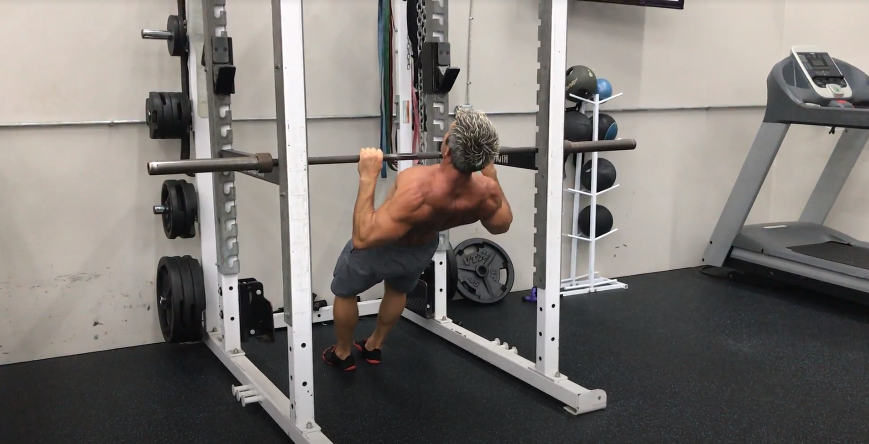
1. Barbell Chest Supported Bent Over Row
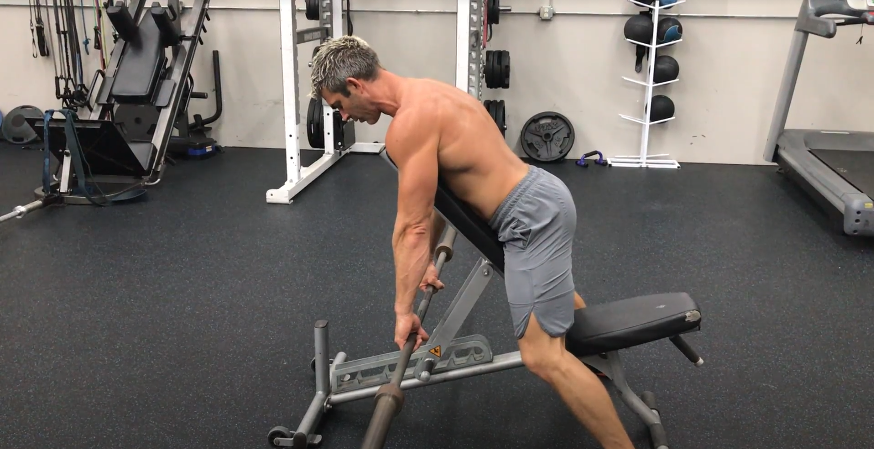
chest supported bent over row for back exercise

I like this!

A lot of my clients are not young bucks anymore so we’re all dealing with injuries and ailments. This gives them the ability to work, but at the same time, not putting their lower lumbar at risk.

Lower lumbar is the lower part of the back, make sure that you don’t get hurt or tweak anything, and you’re able to stay in a stationary position bent over coming up and squeezing and really working those steps, alright?

The steps are right in the middle of your back and you’re squeezing up, squeezing it. I just want to show you guys these exercises, everything’s to whatever your ability is. Squeezing those rhomboids, your scapula, and back down. Good control both ways.

This is a great back strength exercise we’ve started with. This is fantastic for people that have any back injuries, it gives them the ability to work, and get those back stronger without injuring yourself any further.

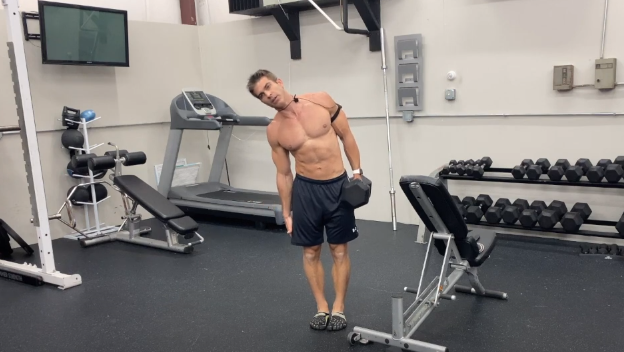
2. Bent Over Scapula Shrug

bent over scapula shrug for back exercise using a barbell

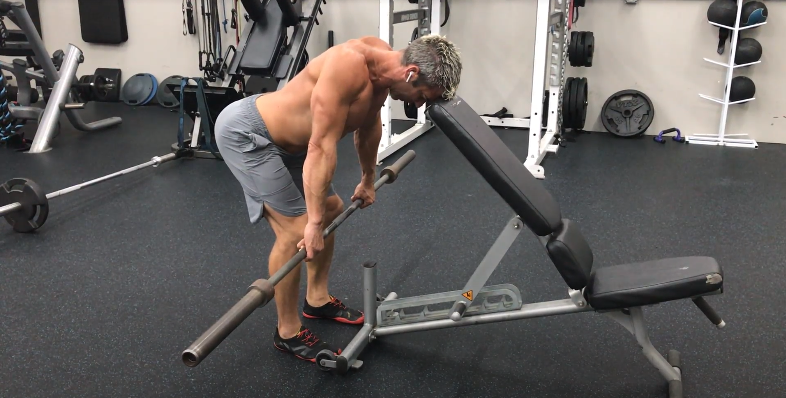
This is a scapula shrug. So this will be a heavier weight, and you’re just going to relax. Let your shoulders relax in the long game, and then you’re going to shrug the barbell up. It’s the same thing working in that middle part of your back, working that scapula and your rhomboids, and then relaxing, okay?

Pulling the barbell up, shrugging it, and relaxing it back out. You can really see how it pulls in and tightens up that middle part of your back. A great way to hit it, you go hard and heavy with this back strength exercises.

So that would be your scapula shrug, alright?

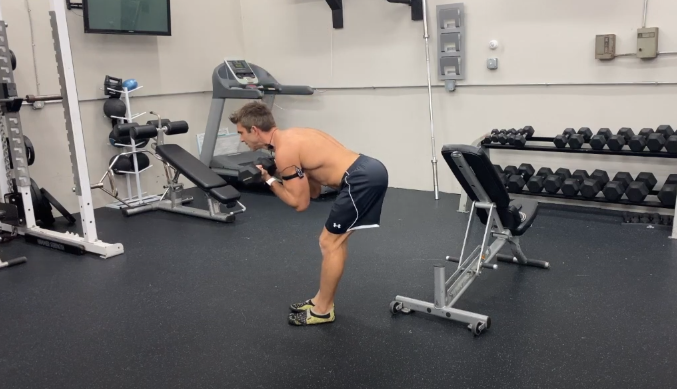
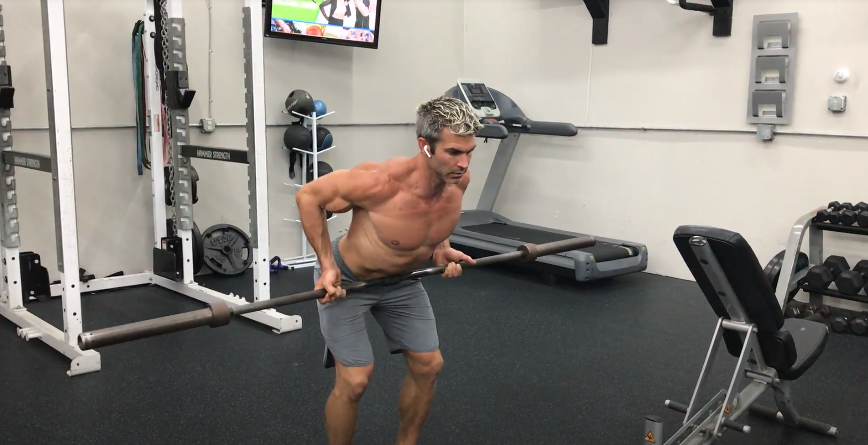
3. Barbell Bent Over Row

barbell bent over row for back exercise

Now we’ll go into these barbell variations or your typical ones that most people know about.

So you have your barbell bent-over row, you just pinch forward. Whenever you’re doing these back strength exercises, you have to stay safe, you gotta keep your back tight. The thing that I do when I teach my clients is anytime you get tired, and you feel your stuff starting to relax, that’s when you just want to stand up at the bar or just drop the bar. You want to live to fight another day, you want to work out, you make yourself better, get stronger, make more muscle, but at the same time, you don’t want to get injured because that puts you 10 steps backward.

Pinch that back, nice and tight, keeping it straight, and bent over. This is coming right to your sternum, right between your bellybutton and your chest at this angle. This is a barbell pronated grip and you’re just pulling it upright to that spot I’ve been sharing with you and controlling all the way down. You got to stand nice and tall, then squat and set it down keeping your back nice and tight. 

4. Supine Bent Over Row

10 best back exercises using a barbell, supine bent over row

Supine is the underhand grip, the same thing as bent over supine row.

This one is coming more towards your belly button. You feel those elbows stay nice and tight to you and you drag them back, it’s coming into your belly button.

Just like that, alright?

In the back angle, pinch forward, sticking that block back and out, and pulling that belly button with that supine grip. 

5. Barbell Isometric Bent Over Row

The next one is an isometric hole. 

You bend over row, pop it up and hold it. Stick and hold it for five or ten seconds then give you that squeeze and then relax. This one you would do for typically like one to three repetitions.

The isometric holds, they’re brutal, but it’s a good way to change up your program though, and just to get something different. It’s a good finishing move.

6. Barbell Inverted Row

10 best back exercises using a barbell, barbell inverted row

The cool thing about this is you can change the height of these for any level of advanced or beginner, depending on the person.

So the higher it is, the lesser tense it is, easier. And then the further down or the further up you put your feet in, the more invested you are, the harder and more difficult this is.

But this is also another great way to build yourself into pull-ups as well.

This is the barbell inverted row – relaxing those arms, pulling your chest up towards the bar, and relaxing down.

All of these back strength exercises, working your back muscles, your rhomboids, your scapula, your lats, pulling yourself up, exhale as you pull up, and then inhale as you come down.

That’s a lot already!

My back’s getting work, I don’t have any weight on here.

7. Meadow Row

10 best back exercises using a barbell, meadow row

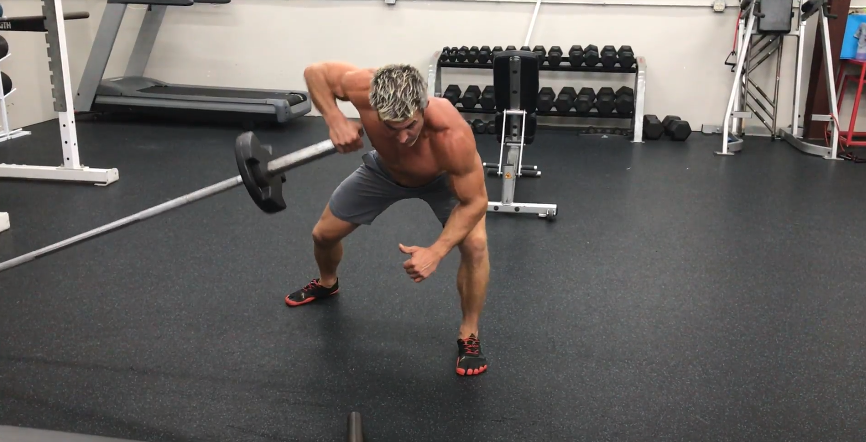
Now, we’re gonna be doing the landmine row. This is the meadow, one of my favorites.

You’re coming to the end of the bar, and what you’re doing is you’re lining up to the middle of your chest and looking into the bar. The bar is a wedge into either the corner of a room or a metal contraption within the gym or garage that can hold the bar at an angle so that way you can lift and pull, and it’s not gonna slip and slide and go everywhere.

Alright, so you’re gonna line up, your foot’s nice and straight on the end of the bar, your back foot is at an angle where the collar is or the first plate, and you’re going to grab the end of the bar with your elbow on your knee.

It hits just a lot better than a dumbbell row when you would normally do a rhomboid pull or cable pull. It’s a great variation, you will feel a difference if you add this into your program, I promise you. 

So grabbing at the end of the bard and ripping it up towards your shoulder. Not that you have a choice because that’s where it’s gonna go anyways, the bar’s tied into the wall, you’re just pulling it up, and it’s coming at your shoulder.

The same thing in a different angle, outside foot, lined up outside the bar, inside foot is at a 45-degree angle where the collar or where the first plate is on the bar. Grabbing the end, the end is lining up in the middle of your chest and you’re dragging it up straight towards your shoulder. It’s coming right across your chest, straight up to that shoulder.

If you trap caps, rhomboids, all of the above to the whole middle of your back, the top part of your back, great back strength exercises.

8. T-Bar Row

10 best back exercises using a barbell, t bar row

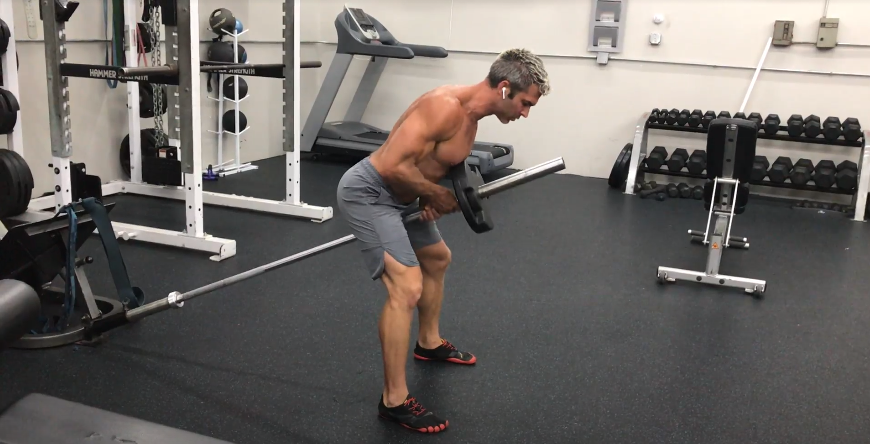
Then you have your traditional T-bar row. 

The same thing, it’s in the landmine position, the bar is in the corner of the room or against that metal area so that way you’re not slipping and sliding. You’re gonna stand about four to six inches behind the collar, you’re straight in the bar, you’re going to squat down, and pick up the bar. You do that to keep your back safe. So you’re back’s coming, you don’t want to leave your back and want to make sure you keep it nice and straight, good control, and tighten it up.

If you feel yourself arching at all when you bend over, either set it down or pick it right back up until you feel like you’re nice and tight again. Pinching your butt back, and you’re gonna pull the bar towards your chest area, elbows are going out hitting that rhomboid area of your back again.

Squat down, setting the bar down, keeping your back nice as long as you drop your butt down to the floor, and setting that bar down. 

That’s your T-Bar Row.

Wow, that was number eight already!

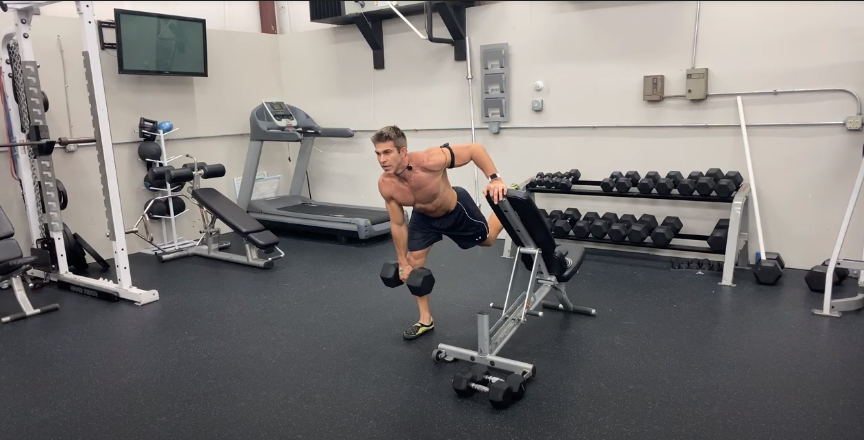
9. Single Arm T-Bar Row

10 best back exercises using a barbell, single arm t bar row

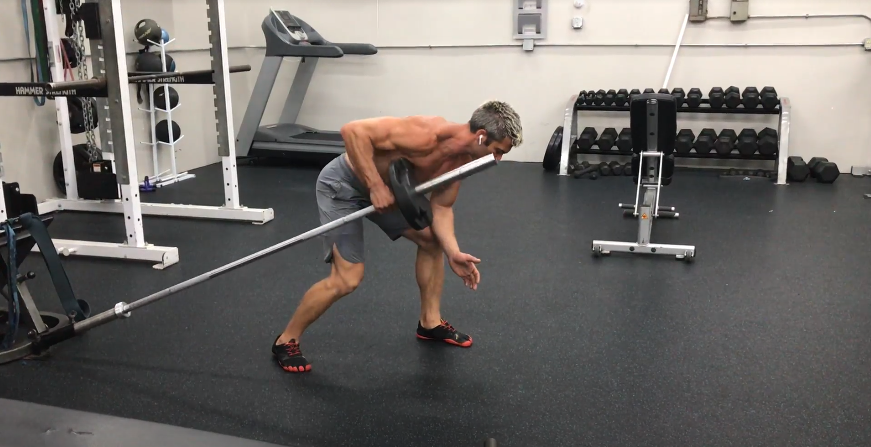
Now we’re gonna go to the single-arm t-bar row. Same thing, just like you would line up for a lot more pull.

For that metal row, you’re gonna wind up on the side of the bar, the back of the bar is against the wall, you’re lining up the side of the bar, you’re going to place your outside elbow on your knee, your inside leg goes back, and you’re grabbing right behind that collar again.

This is very similar to the dumbbell bent-over row or a single-arm cable row except for the angle of it. It’s all about different angles, different areas of the back, and pulling it up. You really feel this in your collar a lot, driving at your elbow straight down. 

The great thing with this in the landmine position is it forces you to do the right thing. 

A lot of beginners start off and they’re trying to do a dumbbell row and they’re curling it kind of, they’re doing a lot of things. This helps force that position so that way it’s done properly.

Learn the technique, let your central nervous system pick up on those cues. That way, when you’re doing those other back strength exercises, you feel more confident, and you’re “Oh, that’s how it’s supposed to hit it.” Alright?

So those are the three exercises with the landmine, having that barbell wedges in the corner.. 

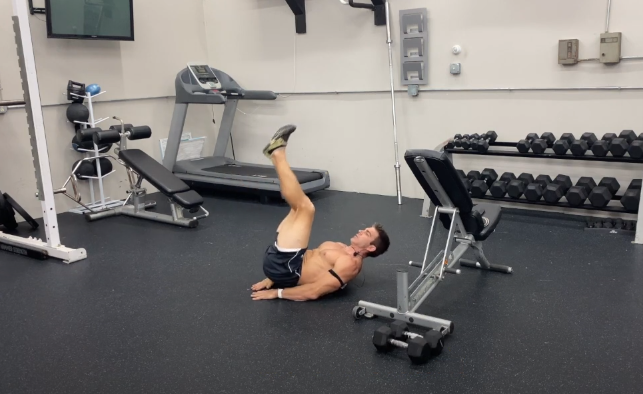
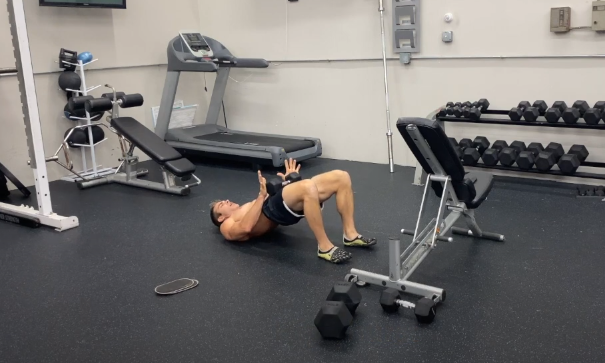
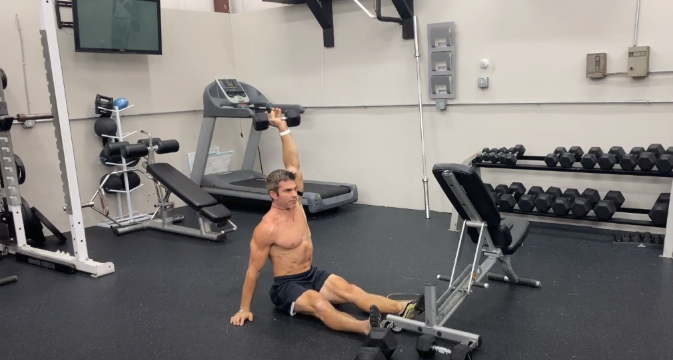
10. Barbell Straight Arm Pullover

10 best back exercises using a barbell, barbell straight arm pullover

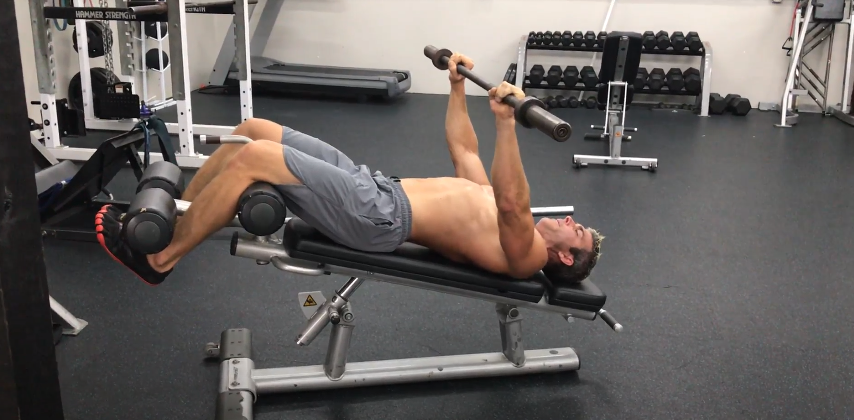
This is one of my favorites, the barbell pullover.

It’s a straight arm pullover, but we’re on a decline bench. Your feet are up on the decline, laying down, holding that bar up, going about a little outside of the shoulders, and I prefer unhooking my thumbs. I’m just going straight arms straight back, really crushing those lats and your serratus anterior. All of these finger muscles in your lats that connect your chest and your heart together, they look really pretty.

Stretching back, good stretch, and pulling over, only going to allow your chest but the reason I like it on the decline is just the amount of range of motion that you get when you’re doing this. It’s just much better than if you’re on a flat on a bench. 

So that’s your barbell pullover on the decline. 

Those are the 10 best back strength exercises using a barbell

Hopefully, you guys feel like this is some great information. 

I can’t wait to see some of the comments. I love reading all the comments that you guys post. It really helps me come up with not only good quality information to share with you guys, but it keeps me moving and finding out what you guys are looking for out there as well. 

I got a lot of experience and just love pouring it into you so that way you’re getting the best out of your workouts and staying safe and not being injured. 

So that’s key, positive progression.

Knee Cap for Pain Relief | Simple 5 Minute Stretches to Relieve Pain Now

Today I’m gonna teach you about kneecap for pain relief. So just treatments that you can do for your kneecap to get pain relief. So if you’re feeling pain in your knee, these are some treatments that we’ll be able to do, perform and you can do this literally anywhere. I’m just gonna be using the floor here. Okay?

So my name is Brent Kasmer. I’m with Brent Kasmer Fitness. And if you’re tired of trying to figure things out on your own, and you really want someone just to help you, you know, this is when you would reach out and you know, DM me and say, Hey, Brent, I really want to like focus on getting in good shape. And I’m, you know, I’m tired of hurting myself or I’m worried about hurting myself, and just, you know, direct messaged me or personal messaged me and, you know, we can set up a phone call and get things rocking and rolling.

CLICK HERE TO DOWNLOAD BRENT’S FREE TRAINING CLASS

Knee Cap for Pain Relief

Alright, so, first things first, is obviously you know, you’d have discomfort so there is knee pain. So you’re just gonna try to sit, you know, sit on the floor, and if you can’t get down on the floor, you can sit on a couch, you could sit on your bed. You can do this in your bed if you need to. But your biggest thing is you want your knee to be relaxed for one, okay? And our goal is to add pressure. So you want to add pressure to we’re trying to get mobility in our knee cap, per se. So you want to see the knee move, so you won’t be able to push it forward. So you’re seeing you use my thumb though, can you see it?

Move, but you’re trying to get that kneecap to move forward, and then use your fingers to pull it back. Do you have to use your fingers and thumbs? No. And you’re just gonna do this 5,10 repetitions. It’s not fast, you’re not jarring it. If it hurts when you’re doing it. Don’t do this, okay? You never want to make it more painful. So we’re just trying to get some mobility and your kneecap, your kneecap is supposed to float on top of the knee joint, so just floating it back and forth, and then also it moves laterally as well. So I’m not sure you will see that at all. So moving it so same their thumb on both sides, bracing up underneath and you can put a pillow under there. It also helps your leg to relax. So just pushing from one side to the other and just relaxing and it’s not a big movement, just pushing it from one side to the other. And then you can see if you can just kind of wiggle it around on top also.

Okay, so just trying to see and create that motion underneath that kneecap. So you would do that to the one knee, even if this is the knee that’s bothering you, and this one’s not and then just kind of play with the other one as well. So that way, it’s the same thing, same repetitions. Just trying to create that movement with your kneecap will make sure it’s bass in loose up there. And the more you do this, the looser it will get. And, you know, like I said, it’s up and down and also laterally across the knee joint as well.

The next one we’re going to do is just some isometric holds. So we’re going to tense your thoughts, we’re tense on quads, and then we’re going to tense our hamstrings and just hold it for isometric contraction. So you just want to make it nice and tight. So you’ll have your toes pointed up. You can do these both legs at the same time, just bracing yourself and you’re gonna feel like you’re driving your knee down flat into the ground. So sometimes I’ll have clients that can’t ventally flex their quad. Give them something to put underneath their knee to help them feel like they’re pushing it down and driving. You can almost see like you just saw my foot come up off the ground. So just sitting there, and you’re just tensing your quads, the top part of your thigh. Driving that knee into the ground, and then relax, now, hold this for like 5,10 seconds. 10 seconds might be a long time, so at least five seconds. So just counting 1,2,3,4,5 and if you’ve done this after a big leg day, and your legs are cramping, stop, so you want to make sure you’re trying to tense those quads. So you would do this three to five sets as well.

Okay, so tensing your quads was an isometric hold the hamstrings, you would have a bend and your hamstrings and your legs and bend in your knee. And you’re gonna have your feet angled up, and you’re gonna have your heel driven into the ground. So you’ll do this with one leg just to kind of feel it because it’s mindfully trying to help you to engage that hamstring. So just leaning forward and feel like you’re pulling your heel toward your butt, but this is driving it into the ground. All right. to squeeze, and then relax, same thing five second hold, squeeze, bear down on that muscle and then relax. And the same thing will do this three to five sets, five second holds, and then you’ll switch and do the other leg. So, so far, just a recap. You got mobility of the kneecap of the overtop of the knee joint, you know, just making sure you’re moving it up and down, laterally across the knee, creating that space, tensing the quads, tensing the hamstrings, learning how to engage them, engaging these muscles, taking pressure off the kneecap, also. So we’ve got four or five there right there.

So force treatments already, and then we’re going to do some stretches also. So a couple key stretches or some we’re going to do is a hamstring stretch first. So we got hamstring. So a couple things that tie into the knee and knee pain is your IT band, your hamstrings, quads, calves and your TFL. So all of these things kind of tie in to cause knee discomfort. Alright, so we’re just going to run through a couple quick stretches on all of these things. And hopefully this helps you to relieve that pain in your knee. If anything hurts, I’ll keep recapping do not do it. If it hurts, don’t do it.

Alright, so for the quad stretch, you’re gonna lay on your side. Same thing, you could do this in your bed. I’m gonna show you there’s a couple ways to do it and you’re just gonna grab your foot and pull it towards your butt. So driving that heel toward your butt. And you don’t want to grab your toes. You want to grab your shin, okay, so right above your ankle, grabbing your shin and driving that heel towards your butt. And this is it’s not comfortable, and you should feel that stretch in the front of your leg. Another way to do that, also pulling the same foot back behind you, and you’re not going to lay on the floor. You want to make sure you’re laying back so you don’t want your knee to come up off the ground. So you want to keep your knee driven into the ground, and you’re just gonna lean back till you can feel your quadricep stretching. So lean back until you can feel it and just hold that and breathe. So same thing about 10 seconds or I call it three long, deep breaths. So it’s like because when you exhale, you’re going to relax a little bit more so you’ll be able to get a better stretch on your quadricep or whenever you’re stretching.

Okay, so those are two quad stretches. The next ones are going to be hamstring stretches. So one you’ll do these are ones he’s going to do on the floor or bed or wherever I said you’re sitting at, you’re going to take your opposite hand and reach for your  toes. So this is actually going to kill two birds with one stone because this stretch is not only going to Stretch your hamstrings can actually stretch your calf as well. You know this, the toes muscle also ties into the knee as well. So you’re going to use this back arm to help push you forward and take your opposite hand and grab your foot with it. To grab that the toes are top part of your feet, you’re going to pull those back to you. So you’re like well shoot, I can’t get to my feet, it’s not a big deal. You can use a band or you can use a belt or towel or a pillowcase, you know any type of you know, something that you can wrap around the top part of your foot and you’ll literally just crawl down at towards your toes also. So you want to put it across the ball your feet and then just crawl down that towel or belt or whatever it is that you have on there as well.

If you don’t need your hands supported beside you to help push you forward to reach your toes, then you’re the best stretch you can possibly get on this is with both hands. So just putting both hands on it in return forward and you’re trying to pull those toes, which is going to help stretch your calf muscle out as well. And you’ll feel that pulling behind your kneecap. Alright, so that’s your hamstring stretch also with the calf stretch, you know from the floor, the other one would be with just both feet out in front of you like this and you’re going to crawl down your shins. And this is a really good stretch for this as well as you can brace your feet up against a wall or a hard surface and it’ll force your feet back towards you as you are reaching towards that. So you’ll feel this stretch really pulling so hard in the back of your legs, you know, you’ll feel the actual muscles that tie into your knee as well. So those are some quick treatments that you can use for knee pain. Hopefully, you find that these helped you and hope you find relief from them. You know, again, these are tricks or this is knee cap pain relief.

CLICK HERE TO DOWNLOAD BRENT’S FREE TRAINING CLASS

Knee Cap For Pain Relief

So, my name is Brent Kasmer. I’m Brent Kasmer fitness and if you feel like you need help and you have some issues and ailments that are going on and it’s holding you back from making progress, you know, with your workouts and figuring out how to make modifications and stuff like that, then definitely dm me, pm me, and, I love to help you. All right, so take care. See you the next video.


Sitting Hurdler Stretch

HURDLER STRETCH 10 In SeriesWhat’s up my fitness family?

Today I’m going to be teaching you the sitting hurdler stretch. 

CLICK HERE TO DOWNLOAD BRENT’S FREE TRAINING CLASS

Sitting Hurdler Stretch

We’re going to be doing the same thing, diving into those hamstrings. We’re working on longing those hamstrings. 

So hopefully all these different exercises are helping you if you have not seen the previous ones, my favorite one is the one with a strap. 

So strap the hamstring stretch on the strap, the supine one, that’s my favorite hamstring stretch. But I’ve got a whole series in there for you guys, so you can use them all. And if you’re not sure if you have tight hamstrings, go back and check that tight hamstring test. 

Alright, so the hurdler stretches, you want to make sure you’re one foot is back behind your butt. So I’m going to go ahead and rotate it like this. So you’re back behind your back, and you’re gonna take your opposite hand and you’re going to reach forward towards your toes. You’re going to use this other hand off the other side, the one that you’re going to use the same arm as the leg that is a bunch of tongue twisters here. 

So the same arm and leg is forward to help push you. So to help you lean further into that stretch of the hamstring to grab those toes and pull it back, so you want to make sure your foot is as straight as possible, okay. And if you can’t get to your toes, you can use a belt or strap or a towel or something else to help you get over those toes are going to use that hand to reach forward, grabbing those toes and pulling them back towards you. 

The same thing, try to make sure it’s straight. If you’ve mastered that and you’re able to grab your toes parently I wouldn’t say comfortably but if you’re able to do it, that’s when you would take both hands, and you want to make sure you’re tall in your torso, leaning forward and grabbing those toes. You’ll feel that pool all the way down the back of your leg. Same thing, try to keep that straight directed into the right position. Grabbing that, three long breaths, and you’re going to switch your legs with that right leg will come out around. 

You’re gonna tuck that left leg back behind you gonna use your right arm to push yourself forward and grab those toes. stretching the hamstrings out if you’ve got them pretty comfortably. Take those both hands and breathe out and reach forward. 

All right. So that is the seated hurdler stretch. And that will end my series on the hamstring stretches for this whole series. 

CLICK HERE TO DOWNLOAD BRENT’S FREE TRAINING CLASS


BK Tight Hamstring Series 1 10

So hopefully, all these videos are helping you guys. Make sure you like it and hit that notification bell so that way you’re notified as the new stuff comes out. And you know, definitely subscribe. So hopefully all this stuff helps. We’re gonna loosen up those hamstrings, relieve those back problems, knee problems, and you’re gonna be a better new person. 

Alright, see you in the next episode.


CROSSOVER LEG STRETCH

CROSSOVER LEG STRETCH 1

What’s up my fitness family! Brent Kasmer here with BKPT. Today I’m going to show you the crossover leg stretch. 

All right. So if you haven’t seen in the previous episodes, I’ve taught you how to test your hamstrings to see if they are flexible or inflexible. I’ve also set the symptoms of tight hamstrings and also showed you a series of different stretches to get into this. But this is just another stretch to get your hamstring right.

CLICK HERE TO DOWNLOAD BRENT’S FREE TRAINING CLASS

Crossover Leg Stretch

So the biggest thing is keeping that knee locked. So you want that leg to stay locked. So keeping that knee pushed back. So using this front lay to cross over this the back leg, you’re actually stretching the back legs hamstring by keeping that knee locked back and you’re going to lean forward. You never want to bounce and throw yourself into it. You want to make sure you just three nice deep, long 111breaths.

And as you exhale, you’ll be able to extend a little further but want to make sure that you’re using this leg. To keep this knee pinned back, so you’d be using the right leg to pin your left leg back. 

And that would be how you would stretch the left hamstring. Three long breaths, about 10 seconds. So nice in and out and it’ll switch legs. So stand all the way up, adjust your body, walk that knee back, end straight and just do the same thing, three long breaths. And you can feel yourself getting a little bit deeper into those stretches. 

CLICK HERE TO DOWNLOAD BRENT’S FREE TRAINING CLASS

BK Tight Hamstring Series 1 10

So that would be your cross over leg stretch. Alright, so there’s another one for you to get those hamstrings nice and loosened up. So hopefully all these videos are helping you and you’re gonna have nice elongated hamstrings. 

All right, Brett Kasmer BKPT, signing out. See you next episode.

Seated Butterly Stretch

SEATED BUTTERFLY STRETCH

What’s up my fitness family? 

Guess what, today I’m going to show you the weighted butterfly stretch, which is way better than just a plain butterfly stretch. All right, my name is Brent Kasmer, BKPT. 


CLICK HERE TO DOWNLOAD BRENT’S FREE TRAINING CLASS

Seated Butterly Stretch

And if you haven’t seen the previous episodes I’ve gone through like gluteal stretches, hamstring stretches, hamstring stretches with a towel, all kinds of different techniques and stretching those hamstrings out. So make sure you check those out. 

And then if you’re not sure if you have tight hamstrings, we showed you the hamstring test. So make sure you go back and check that one out also, but here you go. So this is the weighted butterfly stretch. So you’re gonna sit down, you’re going to go into a butterfly stretch. So if you’re not familiar with the butterfly stretch, you’re just grabbing those toes, pulling them in towards you, keep your torso nice and tall. 

Use your elbows on the inside of your thighs to push down your thoughts. Okay, if you’re not getting enough with those elbows, guess what? Let’s grab some weights. We’re gonna pull those knees in nice and tight. Take those dumbbells and just set them on your knees, forcing those out. So you want to make sure you’re taking long breaths, it helps you relax and not fight against the weights, you’re just breathing in and out. And then that is your weighted butterfly stretch, just don’t get stuck in that position. 

All right. So hopefully these stretches are helping you out. That’s a great stretch to really get that inside of your thought. The biggest thing with this is a lot of times you won’t force yourself into a painful situation. So adding that extra resistance helps you to stretch a little bit further. 

So one other quick tip. Don’t ever stretch cold muscles. Always warm up first before you’re stretching.

Alright, so these are some quick tips for you. Make sure you check out all those previous episodes to learn how to stretch out those hamstrings, right and test the hamstring make sure you’re in it’s tight, something like that.

CLICK HERE TO DOWNLOAD BRENT’S FREE TRAINING CLASS

BK Tight Hamstring Series 1 10

Alright, see you next episode. 

WALL HAMSTRING STRETCH VIDEO

WALL HAMSTRING STRETCH VIDEO 7 In Series

What’s up my fitness family we are doing the wall hamstring stretch today. So if you haven’t seen my previous videos, my name is Brent Kasmer BKPT. 

I have several videos out for testing to see the hamstrings. I also have tight hamstring symptoms. So I want to show you a real quick stretch that you can do against the wall.


https://youtu.be/VMsnk_HRgb4


CLICK HERE TO DOWNLOAD BRENT’S FREE TRAINING CLASS

WALL HAMSTRING STRETCH 

You can do this in your house office, wherever you’re at. Just so great way to make sure that you get those hamstrings, okay. 

So when you sit down and you’re against the wall, you wanna make sure you’re sitting with your hips up against the wall, and then you’re just gonna swing your legs up against the wall like that, but you want to make sure your butt is on the floor. 

So make sure your spine is not rolled up. You want to make sure you’re nice and flat with your cheeks up against the wall, and you try to keep your toes pulled down toward you, like looking at the upside-down.

Keep your toes pulled down towards you try to keep your legs nice and flush against that wall, elongating those hamstrings. Okay, so you know, just makes you go into the right position it just really, it forces it so that way you can’t cheat. 

CLICK HERE TO DOWNLOAD BRENT’S FREE TRAINING CLASS

BK Tight Hamstring Series 1 10

Alright, so that is your lying hamstring stretch against the wall. Hopefully, this helps you guys out it, make sure you check out the previous videos. So that way you learn all the different stretches to get those hamstrings. Because this is something that people suffer from a lot of your back issues, hip issues, glute issues, knee issues, you know, a lot of time is derived from the hamstrings.

All right, see you in the next episode.


THE PERFECT LEG WORKOUT | Build Big Strong Legs

Perfect Leg Workout To Build Massively Strong Legs

What’s up my fitness family today

 I’m going to share with you the perfect leg workout to build big strong legs. 

Awesome. My name is Brent Kasmer, this is BKPT. I’m excited to share with you this great workout today. Hopefully, you guys have no problem putting this together. This is fantastic. And the reason why it’s so good is that it hits all different angles,  fast-twitch muscle fibers and slow-twitch muscle fibers and you’re really engaging in and bringing them all into play by doing this. 


CLICK HERE TO DOWNLOAD BRENT’S FREE TRAINING CLASS

THE PERFECT LEG WORKOUT | Build Big Strong Legs

So alright, so here we go. Pay attention. I like starting off with those hamstrings first to the back of the legs. Because most people, most of my clients have very inactive hamstrings and glutes. So this really helps people to like to tie them in, get them rocking and rolling first, before going into the quad which most people are already quad dominant. Alright, and it really kind of gets him moving in there. Feels a lot better. 

So this is what I call the 5-15 40 routines, you’re gonna be doing 40 reps of an exercise,15 reps of an exercise, followed by five reps. So obviously 40 is not going to be as heavy, it’s more of an endurance purpose, but you really want to get that blood pumping to the muscle. Okay, so we’re gonna start with 40 glute raises. So these are those barbell hip thrusts, and I talked about so much these should be in your program, I mean, several times a month for sure. All right. 

We’re going to follow that by 15 single legs, it’s an isolation movement, single-leg, hamstring curls, really working those hamstrings. You know, that way it’s isolating them and then finishing up with five barbells, stiff legs. Alright, I’m going to demonstrate all three of these. And then I’ll show you the quad exercises that we’re going to do. So the hip thrust if you have not seen these before, I’ve done tons of different demonstrations on them.

So that way because I just feel that they’re very important people have very underactive glutes, so, you just want to make sure the key factors are one pad, solid bench, so you want something flat behind you. So that way your, you know, shorter blades are right up against it. So this is a big thing. So make sure you get a good little picture that you can ever make sure where I’m at. And you want to roll this bar up, you want to make sure it’s centered so you’re not picking it up off-center, picking it straight up. So you want to bring those knees in, tuck your body nice and tight, and you’re driving straight up. So push it straight up and your hinges on the bench. Okay? 

So we’re doing 40 repetitions of the barbell hip. So try not to take a break. When you are doing a high repetition exercise like 40 or whatever you’re doing like a high repetition one. Same set it down. You don’t make it all the way to 25, don’t take more I always say, a good rule of thumb, don’t take more seconds to break than you have reps left. So if you have 25 left 15 seconds right back at it so that way you’re not taking too long of a break. 

All right, so this is a single leg and like a kneeling leg curl. So a great piece of equipment. Not everybody has one of these, but I’ll show you the two ways to do it, if you don’t have one. So you’re hooking your foot in here, keeping your body nice and tall, and just curling this up to your buck. Okay, keeping that side on then the biggest thing with this one is not tasting. A lot of people want to twist and try to pull this up. So you want to make sure you keep your side nice and flat up against that pad, your whole body nice and straight and online and curling this up to your buck, or as far as the range of motion is that you can get. So if you can’t get to your butt’s not a big deal. Just go to wherever you can actually physically get to where you’re not like trying to throw the rest of it up there. The other key component is keeping that toe tucked up underneath, so don’t point your toe out. So keeping it tucked up underneath, not pointing the toe out is another key component. 

So you would do 15 per leg on this one. If you don’t have a single leg curl, and I talk about these bands all the time, so you would just take a band and you can tie it around like a post, I’m using one of those things a hanging knee raise pad for this if you don’t have one, you don’t need one. If you just have the band, the band itself is fine. I just use this stuff all over the place. So you know hooking your healing here and you would just crawl forward and just curl it to your buck as far as you can. Coming up, curl. Same thing, if move then floaters go back a little bit. So that way I can keep my body nice and flat and just curl it towards my butt.

Alright, so 15 of those. The last one is the barbell stiff like a deadlift in this circuit. So, with the barbell stiff like a deadlift, you want to walk up to the bar. So that way you know it’s up against your shin. When I first picked this bar up, I always held it by preference. Under grip, affiliate, get a stronger grip that way, you can hold it over if you want, but I just feel like you can hold more weight with the over-under grip. So you want to pick this bar up first. So squatted down, keep your back nice and tall. And then you want good control. Hinge your butt back. So you’re pushing your butt back, sliding it down your shins up, squeeze through your hips, slide it down your shins, squeeze through your hips. So you really, really want to focus and feel you are supposed to be working. If you can’t feel it, back off a little bit to get them engaged muscles.

So 5 – 15, 40 there’s the routine for the hamstrings. We always throw in some burpees in between, we only do 10 burpees or squatting down, kicking your feet back 10 burpees, and then we back to the top. So I would do three circuits of these 40 barbell hip thrusts, 15 single-legged leg curls per leg, and then five stiff-legged deadlifts with 10 burpees. Three sets. Alright, the next circuit, we’re going quads now, so we’re going to go 40 leg presses, the same thing, you want to challenge yourself. So you don’t want to be super easy where it’s just you could just go ahead and knock them out and not even think about it. You want to quit, you just have to mentally be strong and push through it. Alright, so 40 repetitions on the leg press 15 barbell back squat, and then we’re going to finish it with five step-ups per leg. And of course, 10 burpees. 

So leg press, I have a 45-degree angle leg press or it’s plate weight added. So you would lay down, get your feet set, pushing and you just want a good range of motion. So when you’re doing a leg press, you only want to come down as far as it’s before your hips. Want to pivot up there. Yeah. So coming down until your hips want to pivot up. So you want to stop toward a range of motion it is but you know, you’re not rolling your hips up and elongating that spine at the bottom of that lumbar area. 

Set a target.

Has anyone ever had a lower back problem? So 40 leg presses, followed by 15 barbell back squats, I like my preference is setting a box up. So I like tapping my butt to it, it gives me an idea where I need to go. So when you find a box, you want to make sure that it’s a good 90 degree angle box. So that way it gives you a target.

So getting in I always tell people, no, make sure you have your fingers lined up so that when you get under the bar, you’re always centered. That way, if you pick the bar up off to the one side, you know you don’t want the bar tilted to the other side. So getting up underneath it, picking it up, walking in the faculty, feel that box right at your feet. Set always,  want to keep your head up, looking forward, keeping that spine aligned. Just touch. You don’t want to sit and relax in that box. You just want to touch right back up. Touch right back up. 15 squats and you want to tense the size of the top. So when you get to that top part, squeeze your thighs and engage them up. 

Alright, so that would be your 15. I’m gonna go to dumbbell step ups. So I’m taking that same box. So 20 inch box, or do some dumbbell step ups. So keep your head up, shoulder blades back, and we’re gonna do all five on the one leg, and then you’ll switch. Alright, so you don’t have heavy enough dumbbells. To do a dumbbell step up. For five.

You could always do a single leg Leg Press. With the leg press so you’re nice and heavy. Or you can do a barbell step up. So putting a barbell on your shoulders and doing a step up with the barbell. So this is a good way to add that strength and endurance to engaging both muscle fibers, getting those strong legs. So everybody always wants nice strong legs. It’s the biggest muscle in the body that helps get those hormones up. You know, get you guys going so that way you can work harder on everything else as well. So, all right, this is the perfect leg workout.

Trust me, I promise you’re gonna love it.

You know, I can’t wait to hear you know, the success you had with it once you’ve tried it. So definitely make some comments, thumbs up, like the video, share it, make sure to subscribe to the channel. 

CLICK HERE TO DOWNLOAD BRENT’S FREE TRAINING CLASS

Perfect Leg Workout To Build Massively Strong Legs 1

I want to make sure you guys are getting the best information out there. And then definitely mash that notification bell that way you’re notified as the new stuff comes up. I look forward to seeing you in the next video.


LYING GLUTEAL STRETCH AGAINST WALL


LYING GLUTEAL STRETCH AGAINST WALL 1

What’s up my fitness family! Brett Kasmer here! 

Today with BKPT wanted to teach you a little bit about a lying gluteal stretch against the wall. So if you’ve seen my previous videos, I have the first one to test if you have tight hamstrings, I also have tight hamstring symptoms to make sure that that’s what you’re actually treating. And I’ve also had a whole series now on different types of stretching for your hamstring. 

CLICK HERE TO DOWNLOAD BRENT’S FREE TRAINING CLASS

LYING GLUTEAL STRETCH AGAINST WALL

But this one’s the line gluteal stretch against the wall. All right, so you’ll walk up tight to the wall. You’re gonna sit down, and what you’re gonna do is gonna swing your legs up onto the wall, okay? So if you’re trying to stretch your right leg, your muscle, you’re gonna take that right foot, put it across your knee, so like it makes a finger, here’s gonna slide that heel down the wall, and you’ll use this to push your butt down and push this into your body. 

So this is your lying gluteal stretch against the wall and you will do the same thing with your opposite leg. So take it, put it across your knee, slide it down the wall and just use your foot against the wall to push your body, your foot towards you. You’re trying to drive this knee towards you. And you’re just going to try to push your hips into the floor. So even though the C minor up in the air, you want to try to push those hips down to get into that muscle right there.

CLICK HERE TO DOWNLOAD BRENT’S FREE TRAINING CLASS

BK Tight Hamstring Series 1 10

All right, so hopefully that helps you guys out.

That’s your line gluteal stretch against the wall. All right, see the next video. 

Archives