Category: Full Body Workout

HOW LONG TO SEE RESULTS FROM WEIGHT LIFTING | You’ll Never Believe It

HOW LONG TO SEE RESULTS FROM WEIGHT LIFTING Youll Never Believe It

What’s up my fitness family? Today I’m gonna be sharing with you how fast you’re going to see results with weightlifting. Guess what? My name is Brent Casper, BKPT. So thank you for joining me.  If you’re tired of trying to figure things out on your own, and you really want some professional guidance so that we are done wasting time, and you just are getting results, definitely just messaged me.


CLICK HERE TO DOWNLOAD BRENT’S FREE TRAINING CLASS

HOW LONG TO SEE RESULTS FROM WEIGHT LIFTING | You’ll Never Believe It

But let’s get on to the topic. So how fast is it until you see results when you’re doing some weight training? Ah, once when somebody comes to me and they’ll ask you this question. I always rebuttal it with how long does it take you to get over the common cold. It could be three days it could be five days, it could be seven days, it could be one month.

Typically when people are starting off when they’re strength training, It’s it varies. You know you see results right away, you’re gonna see improvements especially, it depends on what level it is that you’re coming in at. So if you’re coming in and you’ve been doing tons of stuff on your own already, and you’re starting something new, or you’re not starting something new, you know, obviously, the gains aren’t going to be as drastic. But you’re going to see results, you’re going to see things when you’re doing things properly.

So if you aren’t seeing results, and you’re not visually seeing things, change with your body, one, take pictures along the way. Because if you’re counting on yourself to see yourself in the mirror every single day, it’s hard to notice the results until somebody else tells you, Dang, are you doing something different? You know, because they’re going to notice it because they haven’t seen you in a while, where it is that you’re seeing yourself every single day. So you’re not going to see the change as much until it’s drastic. And you see like, you know, you dropped you know, 10 pounds. Have fat or you’ve dropped like a significant number, were opposed to somebody that just notices you like, every two weeks, like oh man look like you’re doing something differently. 

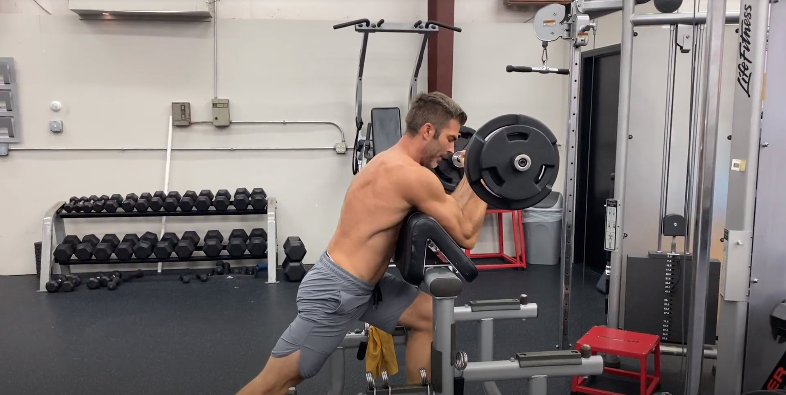
But if you’re not seeing change, if you’re not seeing those numbers, if you’re not seeing visual changes, then something needs to change with what you’re doing nutritionally with your weight training, whatever it is that you’re doing, because you should see change all the time. Other big questions are when people are with me, and they’re lifting on their own, so they don’t have somebody there to spot them to help them get an extra rep or two, and they’re doing an exercise and you’re like plateaued at a certain point. So if you’re doing curls, per se, and you’re doing a easy bar curl, and, you know, anytime you’re doing small muscle groups, and you’re stuck and you can’t get 10 reps on this, you know, take two second break, shake, get out picking right back up and finish your reps. So that way you are putting more resistance against your muscle because you always want to make, you know, you’re trying to change yourself, you’re trying to make positive changes to try to increase your weights and what you’re using. So you want to be like running up the numbers and like, you know, you want to know where you’re at. 

So that way you can, you know, increase it five pounds, increase the 10 pounds, you know, so you’re steadily making improvements, because that is what’s going to make the most change in your body is by putting more resistance against that, but you want to make sure you’re safe when you’re doing it using proper technique. You know, you want to make sure you’re doing everything correctly. So that way when you’re doing it, you’re actually you know, challenging the muscle the way you’re supposed to. So there’s two ways to change your muscle, right, you know, adding more resistance, so if you’re going to increase the way or like that’s like I’ll just show setting it down and doing you know, take 10 seconds and finish Your repetitions, or just increasing the amount of reps that you’re doing with the same weight. So if you’re used to doing 12 reps with 50 pounds, then do 15 reps or do 20 reps. I’m just somebody that would rather do less repetition. So I like to stay in that six to 12 range, and always increasing my weights. So all a lot of times, make sure that I’m if I’m stuck at a certain point, I’ll set it down, take a few seconds. 

I’m not saying to take five minute breaks, don’t sit that Don’t be that person that’s sitting on equipment, checking text messages, check in, you know, who’s talking to them on Facebook, while you’re trying to, you know, wait five minutes before your next reps. So you know, 10 second break, pick it right back up, finish out your set right away. So making sure you’re making the progressions you need to make. So hopefully that stuff helps you should be seeing significant changes immediately. I don’t know if you saw in the last video that I posted though, that, you know, when you’re starting a new program, you don’t want to jump too hard too fast, you know, with weights because your muscles might be ready to increase, but your joints aren’t ready yet. 

CLICK HERE TO DOWNLOAD BRENT’S FREE TRAINING CLASS

So this is only if you’re just starting something new. Make sure you go back and watch that video. So that way you can see what I was stating on those things, but always making positive progression. So make sure that you are seeing those results. Make sure you are seeing those numbers change because you should see it pretty fast. All right, so hopefully that tip helps. I look forward to seeing you next video. All right. Take care.

HOW TO IMPROVE MUSCULAR STRENGTH | Increase Bench Squat & Pullups

How To Improve Muscular Strength

All right, what’s going on everybody? How is my fitness family. Today I’m going to teach you how to increase weightlifting. And what I mean by that is how to gain strength.

Now once you guys get a lot of questions, people want to put on some massive amounts of strength, you know, whether it’s on their benchpress, whether it’s on their squat, whatever it may be. And this has been the hands down best program for slapping on some serious strength. I use this with a lot of my athletes and I also use this with a number of other clients just when they come in, and this is their goal is to get stronger.

My name is Brent Kasmer, this is Brent, BKPT baby. And I want to go ahead and knock this topic out for you guys. So that way you just get you get down to the nitty gritty.


https://youtu.be/paO_6fy8VZ8

CLICK HERE TO DOWNLOAD BRENT’S FREE TRAINING CLASS

HOW TO IMPROVE MUSCULAR STRENGTH | Increase Bench Squat & Pullups


All right, so this would be a squat program for putting on a massive strength, you know, in your legs, which is a big, huge, important You know, this helps increase your growth hormone. This helps you get stronger everywhere. So Don’t slack on the legs, all right. But you can use this protocol with any body part. So if you’re trying to slap on some serious strength in this specific body part, whether it’s your bench, whether it’s your arms, whether it’s your back, you know, whatever it is, this is the best protocol to do this. And this is a progressive. So it’s a progressive program. And what I mean by that is, we’re going to do is you’re going to start off with the least weight, working your weight to the most weight, but you’re going to do it also with exercises, you know, as well. So for instance, you know, when you’re squatting or your goal is to get stronger at the squat. We’re going to start off with front squats. Obviously not gonna be doing the same amount of weight as you would for your back squats. So we’re gonna start off doing sets of five, and we’re going to superset this with hip thrusts over here. So I’m going to show you the exercises, but then I’m also demonstrate you how you would progress it up.

So front squats, there’s two different grips here. So you can do the cross arm grip, or you can roll your wrist back and do your traditional. That’s your athletic front squat. But we’re gonna go ahead criss cross your hands. I’m an old man. So this is how our front squat elbows up. Key is keeping those elbows up nice and high, squatting down, driving up through your heels. All right, it’s definitely hard to talk when you’re front squatting, because the bar is on your throat. So you would do a set of five there and you would jump into a set of hip thrusts. And on the hip thrusts, you can use a kick thrust pad, or you can just use a neck roll. What you’re going to do get hit up against the bench here, pull this back to you. The biggest thing is making sure it’s centered. Okay, so making sure it’s centered, rolling up to your hips, pull your knees in tight, and pin it up through your hips. So you’re using your shoulder blades on there, just might come around on the shoulder blades as well. So you want to make sure your shoulder blades are on the bench, and you’re pivoting through your hips. So don’t lock your head down and just roll your back. You want to make sure you got a good range of motion, driving through the hips. So you would do 10 of these.

So five front squats, 10 hip thrusts, alright, and you would go right back into your front squat, and you would add weight. So depending upon how light you started as how high you would jump, but we would do five sets of five. Okay, so you would go five more reps 10 more on the hip thrust and weight, five or five on the front squats 10 more on the hip thrust until you get five sets of front squats in. Once you get to that peak point,your last set of your five on your front squats. That is where you would start weight wise for your back squats. All right, so say I ended with 185 to 225 whatever it may be, for your front squat set of five and you’re borderline failing. That’s where you would want to start your back squats. Okay. So, going into your back squats. This is just a bar. It’s across your traps. When I have somebody jump in here for back squats, you would make sure your fingers are lined up on the bar properly. That way when you get duck up under the bar It’s you, your body is centered. So feet together picking the bar up. Always I like having that box behind people. So that way they can sit down and touch that box. The biggest thing with the box squat is you don’t want to relax your spine to always stay tight. Just down, touch, right back up. Alright, so you would do five,back squats, right back to your hip thrusts, okay.

So once you get done with your five sets of this, so same thing, so say you started at 185 because that’s where your front squat ended. And you typically squat like 405 pounds, you know, you would want to incrementally jump that up faster, to make sure you’re at the right point, you know, so that way you’re at 315 – 405, and you get to that part real fast. When you’re doing your back squats, same thing 10 hip thrusts in between also five sets back and forth, you know, incrementally getting stronger with your back squats.

The last exercise that you would do. So now you’ve done five sets of front squats, five sets of back squats, all with, you know, sets of 10 hip thrusts in between. So your body your booty is warmed up, I’ll tell you that I promise you. Then we’d go into the top half squat, top half squat. Same thing, this is just getting your body, your spine and your erector spinae which is around like alongside along your spine, protecting that used to heavy weight. So if you’re used to squatting four or five and you want to get to a 500 pound squat pretty quick, the best way to do it and the safest way to do it is to get your body used to at least holding that way and moving it so that way, when you get into a good deep squat, it’s already ready for it.

So every week, you want to progressively get stronger with this. So you would start at that 405 pound range, wherever it were, or wherever you ended with your back squat, and you go into a top half squat. So that just means that you’re, you’re picking this bar up on your back, feet together, picking it up over the hinge, you’re gonna come back, and it’s just a small movement. So this is a very heavy exercise. Boom, up and squeeze tense the size of the talk. This is just getting your body used to heavyweight, heavyweight heavyweight and you will be able to increase this really fast. So say you’re used to squatting 405 I mean, you’ll be up at like the five 600 pound range, just giving you an idea of throwing numbers out there. Like that’s not where you’re supposed To be that’s fine, you know, everybody’s at their own limit, I’m just saying it’s significantly higher than where you would end with your back squat. Okay, so then you would strip it all the way down. At the end of this, you know, five sets, same thing, five sets of top half squats, superset it with your five sets of hip thrusts, which those are 10 reps. So you’d literally be doing 30 hip thrusts, so and that weight never changes, you always want that at a good weight for you to do 10 the entire duration. So it really gets those boots engaged that way or using the proper muscles when you’re squatting.

So all of these exercises so you see the progressive so it’s front squats, back squats, because you can progressively get heavier because it’s a progressive, you know, movement through it. So hopefully these things help you and you understand what I’m talking about. If not, you know, shoot some comments to me. That way I can help you out you know, to To further understand it, but you can do this with every single body part, this is how I get my athletes super strong in the gym. That way you get the best results and the best outcome like I mean, I have clients that I’ll slap on like 200 pounds in their squat within a six to seven week incremental time. So you know, this is this, this will help you get those massive gains. So this is that the today’s topic was increasing, you know, your weight training.

CLICK HERE TO DOWNLOAD BRENT’S FREE TRAINING CLASS

HOW TO IMPROVE MUSCULAR STRENGTH

So I want you to make sure you take this, you know, and and use it and implement it and watch yourself get massively stronger. So, all right, Brett Kasmer here. If you’re tired of trying to figure things out on your own and you want a specific goal, you want a specific outcome, message me ask me, I’ll help you. I want you to get the best results in the shortest amount of time. That’s what I’ve been helping


15 Minute Beginner Resistance Band At Home Full Body Workout

Beginner resistance band exercises

Today I’m going to be teaching you a 15 minute beginner resistance band full body workout. 

This is a full body workout for beginners and a great way to get started using resistance bands. 

We’re going to be hitting chest, rhomboids, some legs, and abdominals. 

Are you ready? 

15 Min Full Body Resistance Band Workout At Home

2 x 15

Resistance Band Rows

Resistance Band Chest Press

Step Back Lunge with Resistance Bands

Abdominal Twist with a Resistance Band

Resistance Band Bicep Curl – 2 x 15

Standing Tricep Press with Resistance Band – 2 x 15

Resistance Band Squats – 2 x 15

Plank – 2 x 30 sec.

CIRCUIT #1​

Resistance Band Rows

1.  Loop the band around the tree and grab the handles like holding a bar. 

2. Hold a squat position by leaning your back a little bit. Keep your back nice and tall, and roll your hands beside your body.

3. Pull the handles back, squeezing your back nice and tight. 

4. Pull those handles until they are next to your side and elbows are behind you then slowly release.

5. Do 15 reps. 

Resistance Band Chest Press

1. Grab some outdoor stools and put them side by side, making them wide enough.

2. Grab the band with elbows bent at 90 degrees and elbows at shoulder height.  

3. Pull those handles and extend both arms forward and down until arms are straight.

4. Slowly lean backwards and bend arms back to the start position.

5. Do 15 reps. 

Step Back Lunge with Resistance Bands

1. Grab the band and hold it down beside your knee. Step on the band with one foot.

2. Step back with your left foot and lower your body until your back knee almost touches the ground.

3. Slowly push yourself back to the starting position. 

4. Repeat and then switch sides.

Abdominal Twist with a Resistance Band

1. Hook the band around the tree and stand in front parallel with the tree. 

2. Grab the handle with one hand.

3. Position your arms in front of your body with your hands in tight to your chest. 

4. Twist your upper body away from the tree. 

5. Pass the one handle through your other hand.

6. Do 15 reps.

CIRCUIT #2

Resistance Band Bicep Curl

1. Stand with both feet on the band and grab the handles with palms facing forward.

2. Curl your hands up, squeezing your biceps and keeping those elbows in front of you. 

3. Slowly release your arms back, keeping your wrist nice and straight, squeezing those handles.

4. If it’s too difficult, just step on the band using your one foot only to get lesser resistance on the band.

5. Do 15 reps. 

Standing Tricep Press with Resistance Band

1. Step on the band as far up as you want to make it tight and go behind your body.

2. Grab handles with both hands and lift them up until your arms are fully extended with palms facing the roof and elbows pointing forward.

3. Bend your elbows and squeeze your triceps.

4. Slowly lower the handles behind your head, keeping your spine nice and alive.

5. Do 15 reps. 

Resistance Band Squats

1. Step off the band right in the middle.

2. Shoulder width apart, wrap around the bands behind your shoulders.

3. Sit back onto your heels and squat down.

4. Do 15 reps.

Plank

1. Lay down on your mat and do the plank position.

2. Bend your elbows and rest your weight on your forearms.

3. The goal is to keep your body nice and straight from your shoulders to your ankles. 

4. Hold the plank for 30 seconds or tuck your toes up while keeping your body nice and stiff like a board.

15 Minute Beginner Resistance Band At Home Full Body Workout
15 Minute Beginner Resistance Band At Home Full Body Workout 1

Each week I’ll be bringing you amazing tips and tricks to kick your at home workouts into hyperdrive so you can still increase your muscle mass, burn fat and improve your overall health. 

Wanna share this because your workout buddy needs some help at home with their workouts too, click the link below to share this with them on facebook!

Every week I post 3-4 new workout videos and free resources on my blog.

Coming soon, I’ll be offering a Live Lifting Logics Q & A on my FB Page so make sure we’re connected on Facebook

www.facebook.com/brentekasmer

Once you connect with me, make sure you introduce yourself to me and the community! 

Can’t wait to see you on the inside!

BK Pointing to the Front 2 1024x1024 1

How to Increase Your Arm Strength

Today, I’m going to teach you how to increase arm strength

I am excited to share with you this today!

Let me give you a couple of quick tips you can implement right now. 

Everyone loves nice arms and they’ll go in, they’ll do some curls, they’ll do certain things, and they’re trying to increase just how their arms look.

But today, I’m gonna share with you a couple of secrets that maybe you’re not doing that you could really quickly implement in your arm strength workout real quick.

Here we go!

I’m going to start off with the fact, just one quick tip is, when you’re doing a bicep curl, you’re not going to be able to curl an obscene amount of weight, or even if you did, it wouldn’t probably be that great pf for so you’d be using a lot of other muscles other than just your biceps. 

Chin Up


bicep and tricep, arm exercises, build bigger arm muscles, chin up exercises

People don’t think about it but a chin up, your secondary muscle that’s working, use your bicep. But if you keep your body in an erect position, up and down, you’re really going to engage your biceps a lot more and harder because you got to think like you’re curling or you’re pulling up whatever you weigh, 180, 200, 220 pounds. You’re engaging that bicep a lot more with a lot more resistance than just doing a bicep curl. What I do, and actually, we did that this week, as part of the accelerated PT program is we did a heavy chin-up or underhand grip pull down. 

Underhand Grip Pull Down

If you can’t do a chin-up, no big deal, you can do an assisted chin-up or doing an underhand grip pull down, so if you’re sitting down, underhand grip pulldown. 

You would also superset that with a bicep curl. You can either do any type of bicep curl, whether it’s a preacher curl, incline dumbbell curl, something where you’re really isolating the bicep, but you’re hitting it hard and heavy with a heavily loaded exercise, and then following it up with something more of isolation, where you can really just kind of isolate the bicep, and just make sure all the blood flow is going into the bicep. 

About tearing down muscle, the only way to attend to that muscle and put that much resistance against it is by doing something that you can do a lot of weight on.

Alright! So there’s one quick tip for the bicep.

I’m going to give you a quick tip for the tricep, and then like I said, I’m gonna give you two.

Floor Press

For your tricep, it’d be the same premise, doing a bench press, or something heavy, where you’re using the tricep as a secondary body part that’s working. Something you could put a heavy load on, and then going into a more of an isolation movement, a great power exercise for the tricep.

bicep and tricep, arm exercises, build bigger arm muscles, floor press exercise

So, there’s a close grip bench press that’s really good but there’s one better. I actually learned this one in high school, when Mike Metzer, a world-class bench presser back in the olden days, taught me how to do a floor press.

It’s the same grip if not a little bit wider than your bench, but you’re only coming down halfway. Floor, press obviously can be on the floor, you’re going to come down to your elbows 90 degrees, and then you’re locking it out. Okay? So coming down 90 degrees, locking out. 

Why is it a floor press even laying on a bench press?

All I did is I’m fortunate enough, I have a power rack so I just raised the floor. I brought the bars up to a point where if my elbows would be touching the floor. You can load it up, you can make it super heavy, you’re pretty much at 110 to 120% of your bench press. If you bench 225, you could probably put like 245 on there and still get a few reps. It’s a good way to increase your bench press as well. 

Tricep Kickbacks

You would follow floor press with isolation movements such as tricep kickbacks, or rope press downs, or reverse grip tricep press downs, a good isolation movement. 

An isolation movement means a single joint is moving a post to a compress joint movement where multiple joints are moving. 

Alright! Those are two quick tips, power movement superset with an isolation movement.

Tricep Pressdown

The second tip for your arm strength is a negative motion.

What’s the negative motion?

It is where you’re going to be doing resistance, you’d be doing a tricep press down.

bicep and tricep, arm exercises, build bigger arm muscles, tricep pressdown exercise

You’d want to be doing a little bit heavier than you can really do. You’re just going to hold it there and come back, super slow like three to five seconds, use some force, get it down there, and then you’re going to come up in a negative motion, three to five seconds. Nice and slow. You would do that for three to five repetitions. It’s like five is 25 seconds under tension where your muscles are really strained out.

Preacher Curl

bicep and tricep, arm exercises, build bigger arm muscles, preacher curl exercise

Now, you’d be using isolation movements, such as a preacher curl for the biceps, and you would curl it up. It’s a little heavier than you can do, and then you would come down nice and slow. A lot of times you’ll be stuck so you don’t want to use some extra body weight to get it up there but then you’d be coming down nice and slow with good control. This is where a great spotter would come in, and help you out. Same thing, three to five seconds, good negative motion, that’s what’s going to help you to increase that muscular strength of your arms. 

Hopefully, these are some great tips. Take this as it is something that you could add to your workout programs.

If you guys really don’t know what to do, and you’re really tired of spinning your wheels, just message me. This is something I’m very gifted at, is working with people just like you who are looking to try to make gains and are trying to figure out what’s going to work best for them. These are some quick tips to increase that arm strength.

Starting Strength 5×5 Full Body Workout Build Muscle & Break Plateaus

The principal of the 5×5 workout strength program or stronglifts (sl) 5×5 training program is obvious, each workout includes 5 reps of each exercise in the set for 5 sets. We prefer to do these sets as supersets.

As for the 5×5 exercises done, the 5×5 method recommends working each body part at least twice a week. This means compound exercises should be mostly used with a few isolation exercises to fill in gaps.

These types of workout programs can be done for those looking for fat loss, increasing muscle gains, and building overall strength.

In order to create the best 5×5 workout routine or 5×5 lifting program, you want to use compound exercises as much as possible with isolations to hit muscles not fully worked.

Here’s some tips to prove useful when using the 5×5 routine:

Warm-Up

Warm-up exercises are recommended because of the heavyweight in this powerlifting routine. Lifting weight with warmed up muscles will allow you to lift more than you would with cold muscles. To warm-up your muscles, simply do a set with about half of the weight that you will do for the normal set.

Adding Weight

The key point to this workout is remembering to increase the weight used each week. Since the number of reps and sets don’t change, every week you should add at least 5 total pounds (2.5 lb. plate on each side) for each exercise. That is how you make progress, by forcing yourself to add weight each time in the gym.

You’ll notice a couple of weeks after forcing to add the 5 extra pounds that the previous weight will seem like baby-weight.

Switching Exercises

These exercises are not set in stone, other exercises can be substituted. Three reasons you might want to substitute different exercises in are:
you don’t have access to certain equipment,
some exercises may be too difficult at the moment (weighted pullups),
or you just completed a routine that included some of these exercises and want a change of pace.

The benefits of 5×5 training vary, so the people that would benefit vary. A 5×5 program is a simple routine that is aimed for building functional strength. Thus a great and probably the best benefactor of 5×5 training would be a beginner.

Beginners start off weak and should be focused on increasing their strength first of all, something that 5×5 does best. Add in the fact that the routine is simple and it makes it all the more attractive to a beginner.

However a beginner isn’t the only person that would benefit. Seasoned lifters will find success in this program because of the ability to switch their routine up.

It is common knowledge that muscles strive to adapt to the environment, and is the reason they grow when worked out. It is also known that doing the same routine for a long time will accustom your muscles to the exercises, decreasing their growth. This means an experienced lifter can have a welcomed change in routine by switching to 5×5. It is even a greater benefit when used during the bulking months, where more muscle outweighs a leaner body.

The people who would not benefit are those that are in a cutting phase. While muscle size and strength would still be gained when doing 5×5, it is not the optimal routine because the low reps focus solely on strength.

These workouts were customized by Charlotte’s Best of the Best Personal Trainer for the past 7 years. Brent Kasmer is a Certified Online Trainer, ISSA Advanced Master Personal Trainer, Sports and Conditionist, as well as Nutritionist.

He has a talent of completely transforming and reshaping clients’ entire bodies from fat to fit in a short period of time.

He takes pride in teaching those just starting out, intimidated by the gym to grow to love it, working out and mixing HIIT training with weight lifting to shorten their time at the gym!

Make sure to Subscribe Everlasting Change and Click the Bell on our YouTube Channel to be notified when the next fitness or nutrition video drops!

We’re currently working on a monthly online membership site that takes you from beginning to end on everything weight loss related. To sign up for our early access VIP list, click this button!

Take The Everlasting Changes 30-Day Plank Challenge

Take The Everlasting Changes 30-Day Plank Challenge

If you’re ready to challenge yourself physically, there is nothing better than taking on a plank challenge. Planks are notoriously difficult to do, but they are one of the best exercises to tone your body, build your strength, and get you closer to your fitness goals. At Everlasting Changes we are here to challenge you with a 30-day plank challenge. If you’re ready to take this challenge on, here’s everything you need to know.

Health Benefits Of Doing Planks

Planks are an isometric core exercise that really work strengthen to your core. They work your abdominal, back, and shoulders. They also help strengthen your traps, delts, quads, glutes, and pecs. It’s truly a full body exercise. Planks also help relieve back pain, increase your flexibility, and improve your balance.

How To Do A Proper Plank

The 30-day plank challenges use the classic plank form. Here’s how to do it.

1. Assume a position much like a pushup. If you are just starting out, you may want to do a modified plank by resting your elbows on the ground directly under your shoulders with your arms stretched straight in front of you.
2. Straighten your back. You want to keep your whole body a straight line from your head to your toes.
3. Tighten both your glutes and your abdominal muscles to hold the pose.
4. Stay on your toes and press your heels back.

The most important thing is that you maintain the straight line. Then hold this position for the recommended time.

The 30-Day Plank Challenge Schedule

Here is the 30-day plank challenge schedule.

● Day 1: 20 Seconds
● Day 2: 20 Seconds
● Day 3: 30 Seconds
● Day 4: 30 Seconds
● Day 5: 40 Seconds
● Day 6: Rest Day
● Day 7: 45 Seconds
● Day 8: 45 Seconds
● Day 9: 60 Seconds
● Day 10: 60 Seconds
● Day 11: 60 Seconds
● Day 12: 90 Seconds
● Day 13: Rest Day
● Day 14: 1 Minute 40 Seconds
● Day 15: 1 Minute 50 Seconds
● Day 16: 2 Minutes
● Day 17: 2 Minutes
● Day 18: 2 Minutes 30 Seconds
● Day 19: Rest Day
● Day 20: 2 Minutes 30 Seconds
● Day 21: 2 Minutes 30 Seconds
● Day 22: 3 Minutes
● Day 23: 3 Minutes
● Day 24: 3 Minutes 30 Seconds
● Day 25: 3 Minutes 30 Seconds
● Day 26: Rest Day
● Day 27: 4 Minutes
● Day 28: 4 Minutes
● Day 29: 4 Minutes 30 Seconds
● Day 30: 5 Minutes

Once you complete this schedule, talk to your personal fitness trainer to help you develop your schedule for the next 30 days.

Call us now for 3 risk-free, complimentary sessions. We include a 30-day guarantee on all of our packages.

Seven Workouts That Burn More Calories Than Running

Seven Workouts That Burn More Calories Than Running

Running is one of the best workouts to burn calories. An average sized person burns around 400 calories an hour when running. However, not everyone is a runner. Some of us simply don’t enjoy the workout, no matter how bad we want to burn those calories. Luckily, there are some other workouts that burn calories at a higher rate than running that our personal trainer in Charlotte. Here are some things to try:

1. Jumping Rope: Your childhood favorite exercise is also one of the best workouts for burning calories. In an hour of continuously jumping you can burn a whopping 800-1000 calories. That’s burning about half of what most healthy people eat in a day.

2. Kettlebell Swings: Kettlebell swings like jumping rope burns serious calories. At 1,212 calories per hour, investing a set of kettlebells is well worth it! They are pretty intense so don’t expect to immediately be able to swing for a full hour.

3. Boxing: Boxing is a great calorie burner. The average boxer burns 650 calories an hour. If you’re worried about getting hit don’t worry, you can burn the same amount of calories without ever stepping into the ring. A punching bag will help you burn as many calories as an opponent.

4. Burpees: Burpees are known for their strengthening capability. They are a favorite among people who love to train hard. They aren’t just great for building strong muscles fast, they also burn 563 calories per hour! Burpees are a perfect workout for those looking to lose weight because not only will you burn a ton of calories during the workout, the more muscles you build, the more resting calories you will burn.

5. Rock Climbing: Rock climbing burns 500-900 depending on the difficulty of the climb. If you don’t live near the mountains, don’t worry. You’ll burn the same amount of calories on an indoor rock wall.

6. Dancing: An intensive cardio workout, just like running, dancing 450 calories an hour. However, dancing is way more fun than running. No matter what style of dance you enjoy, if you move your feet to the beat, you’ll also beat calories.

7. Rowing: Rowing is a whole body workout and burns 450 calories an hour. Luckily you don’t have to row crew to get these benefits. Just hit the rowing machine at your gym.

If you aren’t a runner, no worries. You can still burn a lot of calories an hour with some of these workouts. If you’re interested in getting started with one of these, talk to our personal trainers in Charlotte. We’ll help you find the calorie burning workout that is right for you and make sure that your form is correct you don’t injure yourself. Call now for 3 risk-free, complimentary sessions. We include a 30-day guarantee on all of our packages.

How To Use A Foam Roller After A Workout

How To Use A Foam Roller After A Workout

If your muscles are sore or tight after a workout, a foam roller massage can help. Foam roller massages, also known as myofascial release, can help reduce muscle stiffness and tension after a hard workout. Here is how to use a foam roller after a workout from our personal trainers.

For Your Lower Body

Find a clear space where you can stretch out on the ground. It’s a good idea to lie a yoga mat down to make yourself more comfortable. Then lie down to begin.

● For your legs: Sit on the floor with the foam roller placed on the underside of your knees. Lean back and rest your weight on your arms. Then roll the foam roller slowly back and forth under your legs to release the pain. Next flip over into a plank position with the roller under your ankles. Then slowly push your body back rolling over the foam roller up your shins and calves.

● For your hips: Position yourself in a side plank with the roller under your hip. Try to divide your weight between your arms, legs, and hips. Then slowly and carefully, lower your body so the foam roller rolls across you hip. Then lift your body to bring it back forward. Repeat on both sides until your pain is relieved.

For Your Back And Torso

To use a foam roller on your back or torso, you will also need to lie down.

● For your back: Lie with the foam roller placed under your lumbar area. Then pushing with your legs and arms, slowly roll your body down the roller until you reach your shoulders. Then slowly move your body back and roll until it nestles again in your lumbar region. Repeat until muscle tension is released. Use the same exercise for your torso.

For Your Upper Body

For your upper body, you will need a clear table or bench and a wall.

● For your shoulders: Place the foam roller against a wall. Then lean your body against the roller. With your legs lift our body up and down rolling the roller up and down on your shoulder. You can do this exercise facing forward and sideways, depending on where the pain exists. Repeat until your muscles loosen.

● For your arms: Place the foam roller on a table. Then place your wrist on top of the foam roller. Push your arm forward while you slowly roll the roller back and forth. Turn your hand upside down and repeat. Do this exercise until you feel a release.

Foam rollers can really help release the lactic acid that builds up in your muscles after a workout. Be careful though, when you first roll your muscles it will be sore and painful. However, it will help alleviate any pain in the long run.

For more tips on how to recover from a hard workout, talk to your Everlasting Changes personal trainers. We’ll happily demonstrate how to use a foam roller and give you advice on some other ways to reduce pain.

Call Now for 3 Risk Free, Complimentary Sessions. We include a 30 day guarantee on all of our packages

4 Workouts To Keep You In Shape While Traveling This Summer

4 Workouts To Keep You In Shape While Traveling This Summer

Summer vacation season is here, and while you’re traveling from place to place enjoying the sunshine far away from your private training, you don’t have to let all your efforts go to waste. Vacation is for fun, but you’ve worked hard and want to keep up with your fitness, so what fun sorts of exercises can you do while you’re away that will leave your trainer impressed when you get back? 4 workouts you can do equipment-free while traveling anywhere this summer are:

1. 20 minute full body – This 20 minute full body workout requires little room and no extra equipment, and it works out your entire body from the top down. First begin with 10 push ups, and finish off with jumping jacks until you reach minute 1. Once 60 seconds have elapsed, do 10 spider lunges and finish off with jumping jacks until you reach minute 2. At minute 2, begin with 10 jumping lunges, and finish off with jumping jacks until minute 3. Finish off the workout with 10 walkouts, and repeat the circuit 5 times.

2. Fast full body – This full body workout should be done as quickly as you can, and it can be repeated as many times as you like or feel comfortable with. Start the workout with 10 jumping lunges, then go into 10 spider lunges. Repeat as many times as you’d like before taking a 1 to 2 minute rest. After your rest, part B of the workout begins with 10 pushups and follows with 10 walkouts. Repeat as you would with part A.

3. 20 minute core – If you’re trying to keep that beach body in shape for the summer, this 20 minute core workout is perfect for staying on track during vacation. Start with 30 seconds of spider lunges, follow with 10 seconds of rest. After resting, perform 30 seconds of side lunges and also follow with 10 seconds of rest. Last, plank for 30 seconds, rest, and start the circuit over again. This circuit is recommended for 8 reps or around 20 minutes.

4.Quick lower body – This quick lower body circuit targets the glutes and legs for power and toning. First, start with 10 squat jumps, then follow with 10 side lunges. Rest for 2 minutes, and move on to part B with 10 jumping lunges and 10 glute bridges. Repeat both parts A and B 8 times, or as many times as you feel comfortable.

With 3 risk free complimentary sessions and a 30-day program guarantee, if you’re looking to start your fitness journey this summer, simply call us today.

Archives

Sign up for your Freebies below!