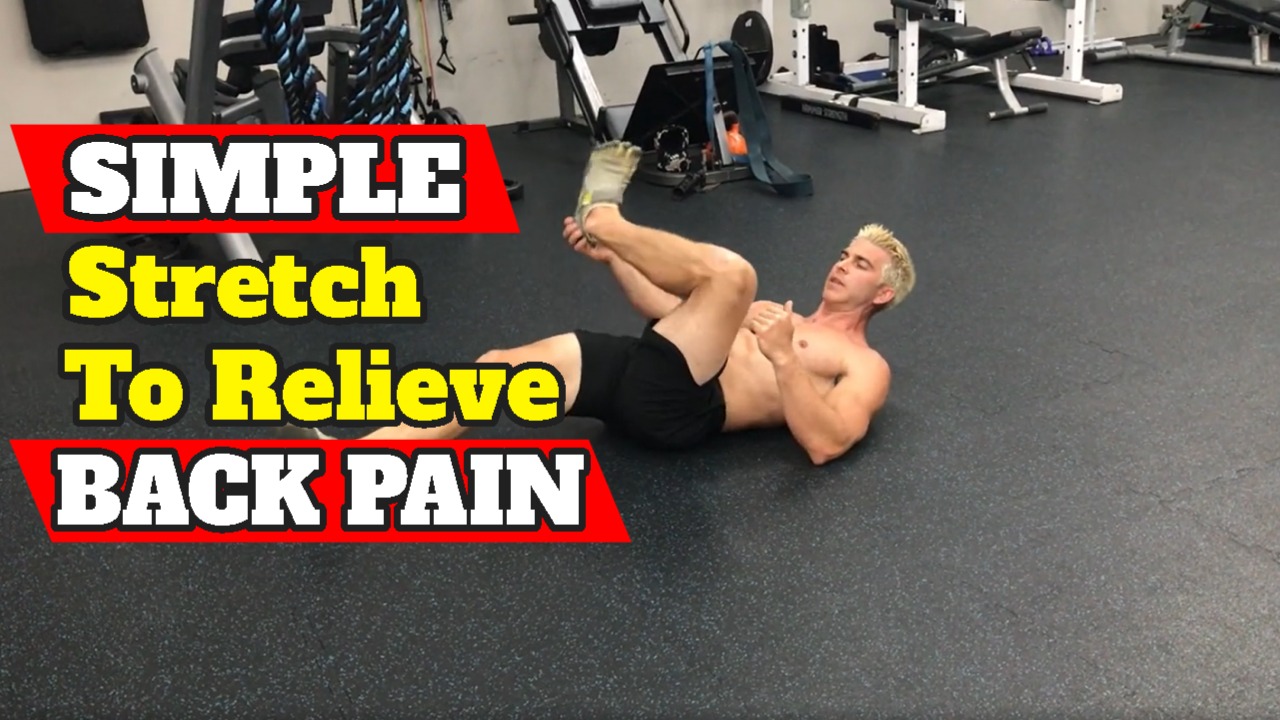
Today, I’m gonna be teaching you the lying glute stretch. All right. So there’s plenty of ways to do all these different stretches. So I’m just running through these for you one by one.
So if you have not seen some of the previous information, I’ve done a whole series now on symptoms for hamstrings, testing your hamstrings, and then these are all stretches for your hamstring. So depending on what your issue is, here is a line glute stretch.
So there are a couple of different ways to do this. One, you’re gonna pull your knee up to you, and you’re just gonna kind of pull this knee towards your opposite shoulder. So you want that foot in, whoo hot cheeks. So you’re just gonna pull that knee in across your body. So this is coming towards your opposite shoulder. And you’ll feel that stretch in your glute. All right? So and if you don’t feel it there, guess what? You’re probably not doing it right. So you want to make sure you’re checking the angles, twist, you know, folding that leg over, and then pulling it to you.
Alright, and you can also do this in a figure four pose, what’s that? sounds dangerous. So, that’s when you pull this foot up like this. And you’re gonna take this knee and drive it into your ankle, and then that is what’s gonna pull towards you. So you’re pulling that knee in, and it’s keeping this leg out, but it’s also the angle of it is really stretching that glute out.
Okay, so this is a figure four stretch, pulling that in just like that. Alright, so this is a lie on your back. So lying glute stretch. All right. So like I was sharing with you in the previous videos as these are hitting home and these are helping you.
Definitely subscribe to the channel, hit the notification bell so that way you’re notified as the new stuffs coming out. And if you need to check to see if you have tight hamstrings, definitely go back a couple episodes, check out the tight hamstring test, or if you’re trying to figure out if this is the symptom, go in there, see if you have tight hamstring symptoms.
All right, so my name is Brent Kasmer. And I look forward to sharing with you more information just like this and strength based training, so I’m a big time strength based trainer. So check out other videos that also pertain to what you’re trying to fix. All right, stay in the next episode.
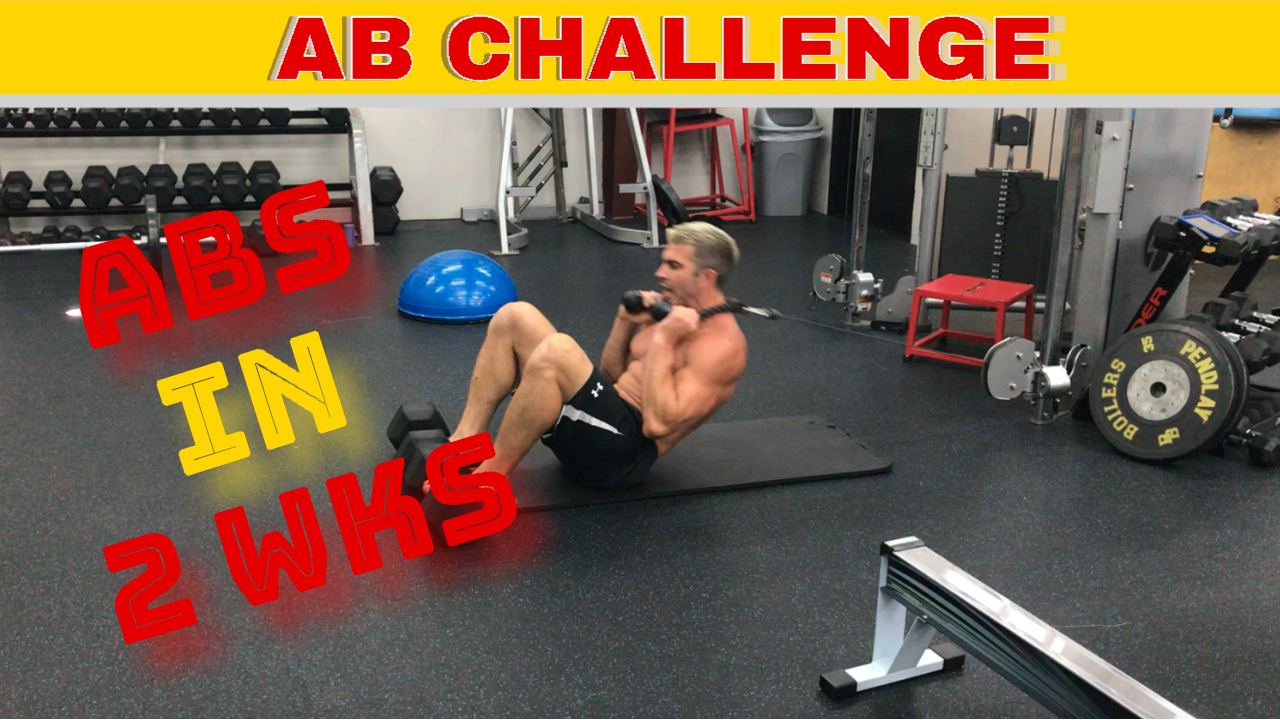
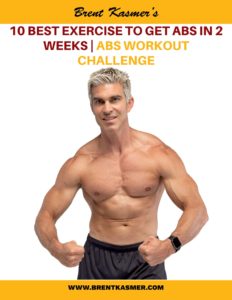
BEST EXERCISE TO GET ABS IN 2 WEEKS | Abs Workout Challenge
Ab Exercise #1: The Hanging Toe Touch
PRO TIPS:
Make sure to find an angle for your hands that doesn’t torque your shoulders too much. So you
Keep a slight bend in your elbows to keep your lats engaged
Fold up, touch and make sure to control your movement coming down so you swing.
Ab Exercise #2: Cable Crunch
This is a great exercise and the set-up is easy. Just throw some dumbbells on the floor. Slap the rope on the multi-functional cable machine. Lie down on your back with your feet under the dumbbells while holding the rope behind your head.
PRO TIPS:
Make sure to exhale on your way up keeping your stomach pulled in.
Keep your chin tucked to your chest.
Only go down 90% of the way and then go right back up to keep those abs engaged and hard the whole time.
Ab Exercise #3: Body Saw
So with the bodysaw, I just use sliders.
However, if you DO NOT have sliders you can simply use socks on your floor or towels under your feet.
While in a plank position with your hands on the floor, you’re going to shift your body back as far as you can and then back to your starting position.
PRO TIPS:
Keep your hips level or slightly above your shoulders in height (off the floor).
Slide back to where your shoulders are right over your elbows.
Make sure to keep your abs engaged through the entire movement.
This is a great exercise that allows you to work your way from a beginner to more advanced.
Ab Exercise #4: Rower Pike Ups
We’re going to do Pike Ups using the Concept II Rower.
However, you can use trx straps or even sliders.
But for some reason, this hits my abs the BEST!
So we actually use this a lot.
Pulling the seat halfway over to you, you’re going to get into a pushup position and place your feet on the seat.
Literally just pulling your feet in (like a tuck) towards your chest, your butt is going to move into a Pike-up position and then you’ll simply allow your feet to fall back into a push up position.
PRO TIPS:
Keep good control through the entire movement.
Make sure your abs are held in tight and engaged.
This is another great exercise that allows you to ease into it and work up into a more advanced movement quickly.
Ab Exercise #5: Landmine 180
So I have a bar on the floor. You could put it in a corner of a room. You can use a tire I’ve used a tire before sticking the ball in the tire, come in, hold this bar up straight over your head, grabbing the end of it, I interlock my fingers. Take a double shoulder with stance, keeping my arms locked in position, and you’re just going to rotate from hip to hip. There’s two ways to do this. You can go all the way like this, like I am, like a 180. Or you can just do one side and then do the other side. This thing is fantastic. Engage hard. Alright, so that’s the landmine one ad.
Ab Exercise #6: Stability Ball Jack Knife
Are you guys keeping tabs on this, you don’t have to, you know, we’re going to get the template. So if you just ask for a template, we’ll give you one. So this is a via or pike up, or Jackknife or whatever you’d like to call it, but We’re passing this stability ball back and forth. So this makes you slow down a little bit. Because you’re going to come up, hand the ball off to your feet, come back down, come right back up, grab the ball, back down. Great exercise sucks, which makes it good. Okay, so it’s the pike up, passing the stability ball back and forth.
Ab Exercise #7: Barbell Ab Rollout
All right, here we go, we’re going to go to the appab rollout. So this is a scanning roll out. I’m using a barbell with the plates on it. So you can make this as heavy as you want. Or you can even use an app. So I don’t even use sliders on my hands. Okay. So grabbing the shoulder with the part, keeping my legs as straight as possible. And what you’re going to do when you do these, you’re going to roll out Your first time you want to stick it right underneath your chin or mouth, just to kind of feel how hard it is to engage, and then you can work your way out as far as you can and coming back. So it’s not an arm exercise, you’re not going to roll out and use your arms to pull back. You’re pulling back from your abs, okay? So when you roll out, you want to roll out, but then pull, your arms are almost in that same stationary position. You want to keep the long non stationary position and tool. Know the difference now that you’ve watched this, so make sure you try that. Even if you’re doing the AB wheel from your knees. That’s a great thing. A great exercise.
Ab Exercise #8: Single Arm Decline Sit-up
All right, we’re gonna move to the decline setup. Anyway. So we’re gonna get your feet locked up top. How can a man Gonna grab this dumbbell. But the different thing that we’re going to do, this kind of works the opposite side of your abs, which kind of helps with that crossover. Alright, so you’re gonna hold this in your right hand, you’ll sit up, keeping it up nice and controlled on the way down. I’ll typically do three to five, I switch it over three to five, three to five, three to five, and you just kind of go back and forth. annihilating your core. See how I like that arm rotates up as they come up. So I’m not shooting it forward. It’s straight up, good control on the way down. So that’s a decline set up with a one arm dumbbell.
Ab Exercise #9: Bosu Alternating Jack Knifes
Alright, drumroll we’re getting close to the end, which means we got the best ones. So let me think here 12345678 Here we are. the bosu ball. I hate this thing. All right, these hurt so bad when you do them right. So, we have alternate jackknives. So install the Jackknife there. So this you want to make sure the ballsposition right in the smaller back. Okay. So my left legs out. The key to this is keeping this right arm nice and tight your head, really trying to open up the side of your body. Okay? know when you’re coming up, exhaling out, oops, sorry. Come up, exhale out. And you’re gonna tap that toe. Keep your chin tuck the whole time so you don’t want a lot of head movement. So keeping that chin top, coming up, slapping that foot. This one if you do 20 reps, reach that no matter what it hurts. So 20 keep it tight to your head, you’ll know that you start getting tired that will start to flatten it out, bring it in, really you want to feel it rather than alongside your head on the way up. So, just reaching up there, if you need to balance with your head on the floor, if not, no big deal. I’m gonna try to not do that. All right.
Ab Exercise #10: Table-Top Crunches
So now we’re gonna come back to the most you all forget the tabletop crunch. Pretty fun. All right. So number 10, the tabletop crutch, so it’s just like a suitcase crunch on the ground. sec, you’re balancing on the stability ball or bosu ball. So good balance and yes, crunch it up. But you could feel it as you try to stabilize your body on that ball. So it makes it super hard, nice difficult exercise and then banging out some reps. So just coming up, you can’t drop down and do these super fast because they’ll fall off this hole your balance, don’t open up too much. Just keep it contracted and just pulsing it together.
Those are the 10 best exercises to get abs in 2 weeks.
I truly hope you guys love this.
Definitely intermix these into your workout programs.
If you’re having a hard time trying to figure out what to do and how to do it, it’s time to seek out a professional so you can stop wasting your time.
You know, I love helping people…
I love putting programs together…
And I am always trying to put out the best content for you all.
Definitely sign up for one of my freebie resources such as a workout or a 10 best list for the area you’re most interested in perfecting.
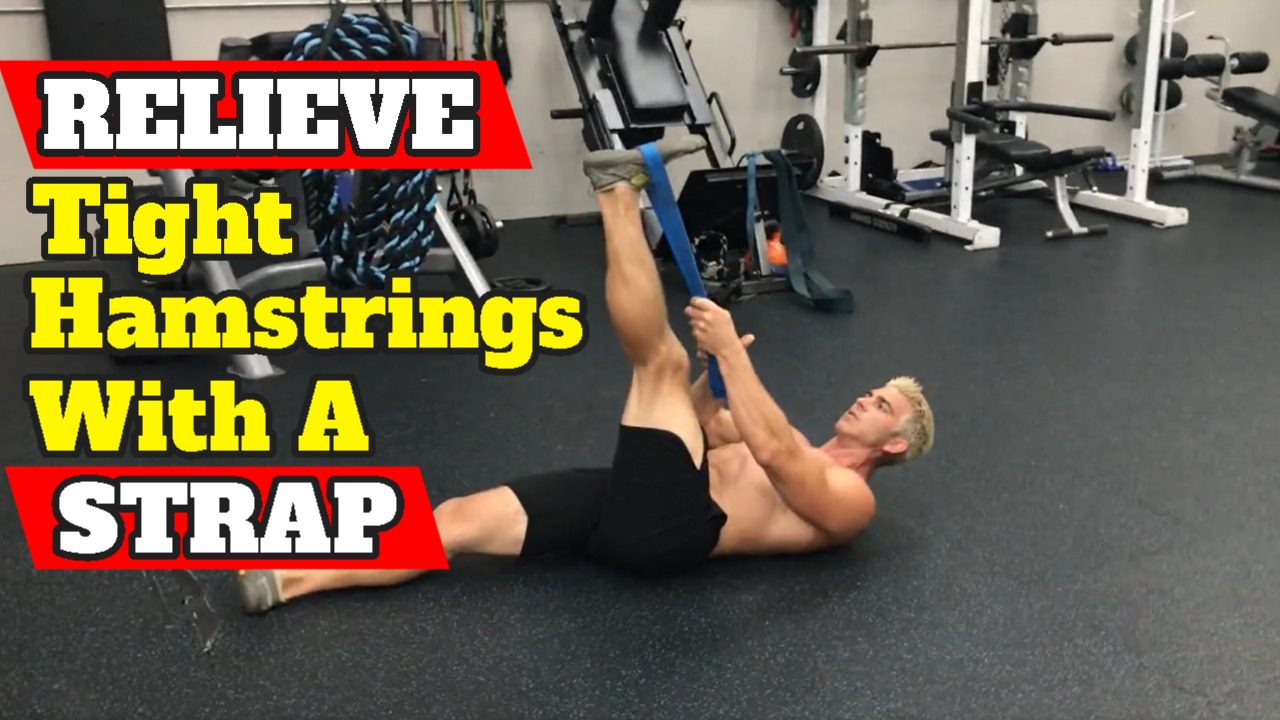
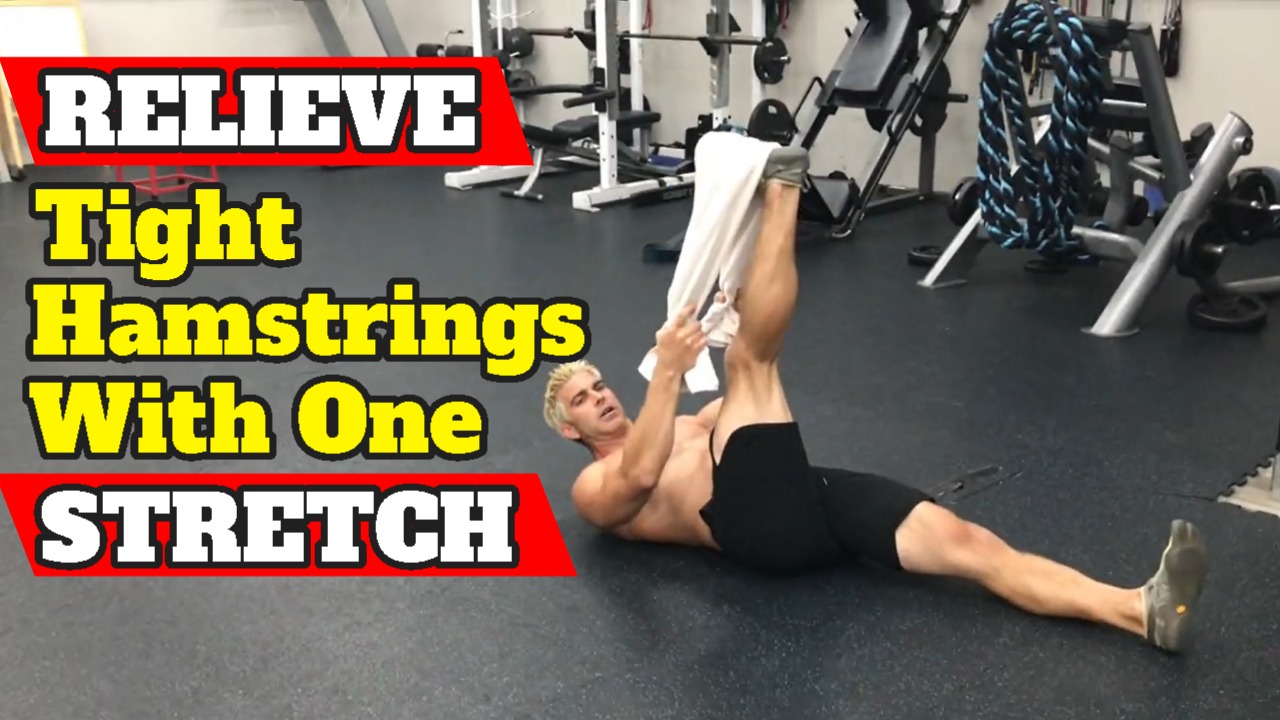
So today I’m gonna be sharing with you a supine hamstring stretch with a strap. So there’s tons of different types of straps out there. In the previous episode, I just used a towel and then the one before I showed you how to test your hamstrings and see if you have symptoms of tight hamstrings as well.
So in this one, I’m gonna show you how to do a supine hamstring stretch with a strap. And then I’ll show you some other stretches and some of the next episodes so definitely subscribe to the channel. Click the bell so you’re notified as information comes out. I put out all kinds of content and strength based training, you know, teaching you the best techniques out there to get the fastest gains.
The reason this stretch is referred to as a supine hamstring stretch is because it’s performed while laying “supine” or aka on our backs. While staying on your back, you’re going to use the strap to get a really deep stretch on your hamstrings. It’s performed in a similar way to the tight hamstring test, which will let you know if you need to stretch your hamstrings. If you haven’t seen that video yet, you can check it out here.
The way you’d perform this hamstring stretch with a strap is to lie down on your back. Now while in the supine position, you’re going to raise your leg into the air. Now to strap your foot, while keeping one end in each hand on both sides of your leg you’re going to create a loop to slide around the sole of your foot.
BENEFITS OF SUPINE HAMSTRING STRETCH WITH STRAP
The best part about this hamstring stretch, o this is good because you can almost get a good PNF stretch here. So you’re gonna pop that leg up biggest thing is keeping that knee nice and straight, lock it out, pull that foot in. And then what you’re gonna do is you’re gonna go ahead and push against that strap. So about six inches, and then boom, let it come right back at you.
This is an amazing stretch, because each time as you know, push against it, and then come back at you, you’re gonna get a little bit further each time getting a better stretch on those hamstrings. So if it’s the one if you’re if you’re really working on your left hamstring because of the fact that it’s tighter and you notice that this is where most of your issues coming from. You still want to spend some time on your right leg also. So even If you you know, divided up, you want to keep yourself you know, symmetrical keeping that balance. Whoo, this one’s tight right now. So keeping that leg straight, pushing down. So fighting that resistance, and then let it come back at you. pulling hard in this is your supine stretches in a strap.
So hopefully this hamstring stretch with strap will help you, hopefully are resolving some of these issues that you’re having with your body. Also, these are trade things you can just pack in your bag when you’re traveling, to help with refuel, relieving and alleviating that pain, if you’re having back issues or knee issues, alright, so definitely subscribe.
Check out the other videos. If you had issues like I said and realizing if you have tight hamstrings or if it’s something else, check out the symptoms and then check out this tight hamstring test also, and then I’m gonna show you some more stretches here coming up in the next episo
What’s up my fitness family? Today I’m gonna be sharing with you how fast you’re going to see results with weightlifting. Guess what? My name is Brent Casper, BKPT. So thank you for joining me. If you’re tired of trying to figure things out on your own, and you really want some professional guidance so that we are done wasting time, and you just are getting results, definitely just messaged me.
HOW LONG TO SEE RESULTS FROM WEIGHT LIFTING | You’ll Never Believe It
But let’s get on to the topic. So how fast is it until you see results when you’re doing some weight training? Ah, once when somebody comes to me and they’ll ask you this question. I always rebuttal it with how long does it take you to get over the common cold. It could be three days it could be five days, it could be seven days, it could be one month.
Typically when people are starting off when they’re strength training, It’s it varies. You know you see results right away, you’re gonna see improvements especially, it depends on what level it is that you’re coming in at. So if you’re coming in and you’ve been doing tons of stuff on your own already, and you’re starting something new, or you’re not starting something new, you know, obviously, the gains aren’t going to be as drastic. But you’re going to see results, you’re going to see things when you’re doing things properly.
So if you aren’t seeing results, and you’re not visually seeing things, change with your body, one, take pictures along the way. Because if you’re counting on yourself to see yourself in the mirror every single day, it’s hard to notice the results until somebody else tells you, Dang, are you doing something different? You know, because they’re going to notice it because they haven’t seen you in a while, where it is that you’re seeing yourself every single day. So you’re not going to see the change as much until it’s drastic. And you see like, you know, you dropped you know, 10 pounds. Have fat or you’ve dropped like a significant number, were opposed to somebody that just notices you like, every two weeks, like oh man look like you’re doing something differently.
But if you’re not seeing change, if you’re not seeing those numbers, if you’re not seeing visual changes, then something needs to change with what you’re doing nutritionally with your weight training, whatever it is that you’re doing, because you should see change all the time. Other big questions are when people are with me, and they’re lifting on their own, so they don’t have somebody there to spot them to help them get an extra rep or two, and they’re doing an exercise and you’re like plateaued at a certain point. So if you’re doing curls, per se, and you’re doing a easy bar curl, and, you know, anytime you’re doing small muscle groups, and you’re stuck and you can’t get 10 reps on this, you know, take two second break, shake, get out picking right back up and finish your reps. So that way you are putting more resistance against your muscle because you always want to make, you know, you’re trying to change yourself, you’re trying to make positive changes to try to increase your weights and what you’re using. So you want to be like running up the numbers and like, you know, you want to know where you’re at.
So that way you can, you know, increase it five pounds, increase the 10 pounds, you know, so you’re steadily making improvements, because that is what’s going to make the most change in your body is by putting more resistance against that, but you want to make sure you’re safe when you’re doing it using proper technique. You know, you want to make sure you’re doing everything correctly. So that way when you’re doing it, you’re actually you know, challenging the muscle the way you’re supposed to. So there’s two ways to change your muscle, right, you know, adding more resistance, so if you’re going to increase the way or like that’s like I’ll just show setting it down and doing you know, take 10 seconds and finish Your repetitions, or just increasing the amount of reps that you’re doing with the same weight. So if you’re used to doing 12 reps with 50 pounds, then do 15 reps or do 20 reps. I’m just somebody that would rather do less repetition. So I like to stay in that six to 12 range, and always increasing my weights. So all a lot of times, make sure that I’m if I’m stuck at a certain point, I’ll set it down, take a few seconds.
I’m not saying to take five minute breaks, don’t sit that Don’t be that person that’s sitting on equipment, checking text messages, check in, you know, who’s talking to them on Facebook, while you’re trying to, you know, wait five minutes before your next reps. So you know, 10 second break, pick it right back up, finish out your set right away. So making sure you’re making the progressions you need to make. So hopefully that stuff helps you should be seeing significant changes immediately. I don’t know if you saw in the last video that I posted though, that, you know, when you’re starting a new program, you don’t want to jump too hard too fast, you know, with weights because your muscles might be ready to increase, but your joints aren’t ready yet.
So this is only if you’re just starting something new. Make sure you go back and watch that video. So that way you can see what I was stating on those things, but always making positive progression. So make sure that you are seeing those results. Make sure you are seeing those numbers change because you should see it pretty fast. All right, so hopefully that tip helps. I look forward to seeing you next video. All right. Take care.
So today I’m gonna be sharing with you a supine hamstring stretch using a strap. So there’s tons of different types of straps out there. And the previous episode, I just use the towel and then the one before that I showed you how to test your hamstrings and then also symptoms as well. So in this one, I’m gonna show you how to do a supine hamstring stretch with a strap. And then I’m going to show you some other stretches and some of the next episodes so definitely subscribe to the channel. Click the bell so you’re notified as information comes out. I put out all kinds of content and strength based training, you know, teaching you the best techniques out there to get the fastest gains.
We’re on our backs. were laying supine. What you’re gonna do is you’re gonna take you’re gonna bring your knee in about 90 degrees, just like you would do with the hamstring test. You’re gonna strap your foot with the strap, okay, so the best part about this, so you use the towel, the towel is no good, okay, so this is good because you can almost get a good PNF stretch here. So you’re gonna pop that leg up biggest thing is keeping that knee nice and straight, lock it out, pull that foot in. And then what you’re gonna do is you’re gonna go ahead and push against that ban. So about six inches, and then boom, let it come right back at you.
So this is a very good stretch, because each time as you know, push against it, and then come back at you, you’re gonna get a little bit further each time getting a better stretch on those hamstrings. So if it’s the one if you’re if you’re really working on your left hamstring because of the fact that it’s tighter and you notice that this is where most of your issues coming from. You still want to spend some time on your right leg also. So even If you you know, divided up, you want to keep yourself you know, symmetrical keeping that balance. Whoo, this one’s tight right now. So keeping that leg straight, pushing down. So fighting that resistance, and then let it come back at you. pulling hard in this is your supine stretches in a strap.
So hopefully this information is helping you, hopefully are resolving some of these issues that you’re having with your body. Also, these are trade things you can just pack in your bag when you’re traveling, to help with refuel, relieving and alleviating that pain, if you’re having back issues or knee issues, alright, so definitely subscribe.
Check out the other videos. If you had issues like I said and realizing if you have tight hamstrings or if it’s something else, check out the symptoms and then check out this tight hamstring test also, and then I’m gonna show you some more stretches here coming up in the next episode
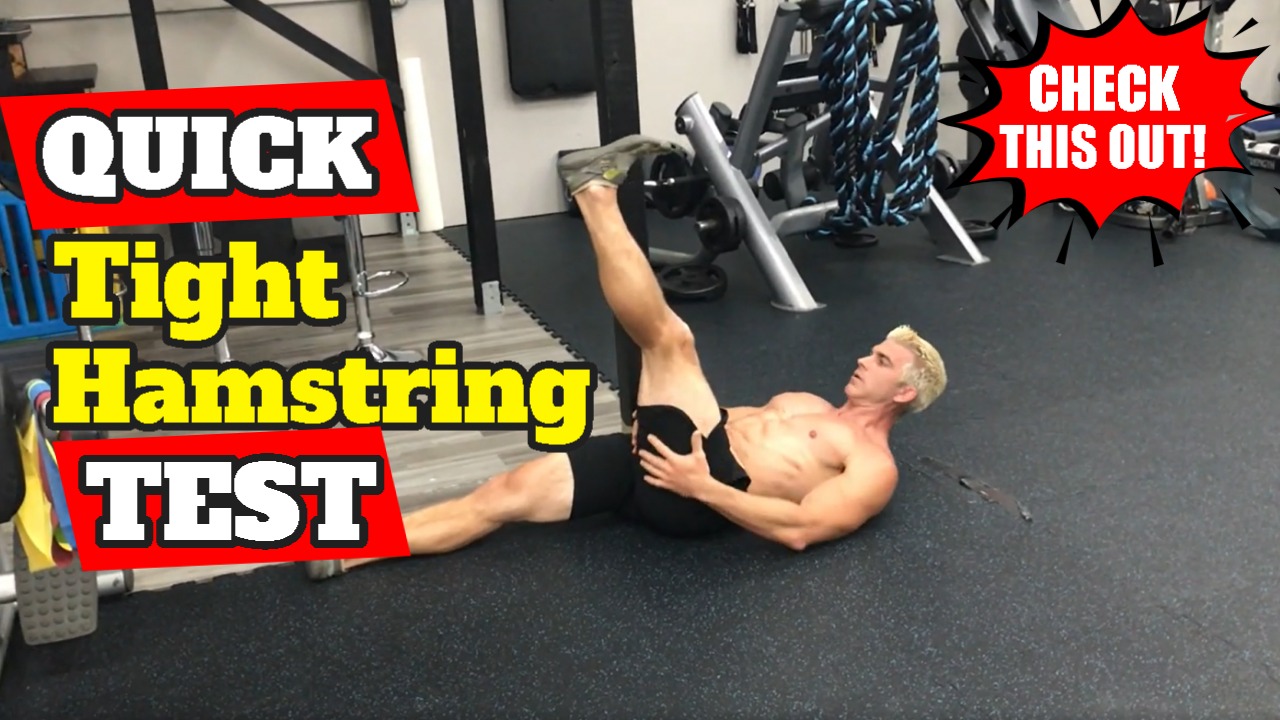
What’s up my fitness family today I’m going to show you how to do a hamstring test.
So tight hamstring test. So if you stay with me to the end, we’ll go through all of this stuff. But definitely if you want to know more about your body, how to take care of your body strength based training, at home workouts, definitely subscribe to my channel, I’m all kinds of pumping all kinds of information for you to get the best information out there.
Alright, so what I’m gonna do is show you a quick test. All right, so here we go.
What you’re gonna do is you’re gonna lay down, you could go next to a wall, I’m gonna use this post, just because you want something to measure a 90 degree angle. And obviously, if I’m laying on the ground flat on my back, you know, we got a post or a wall, you’re assuming that it’s a 90 degree angle. But you know, it doesn’t matter. You can use like a chair box or a couch or something also doesn’t have to be anything in particular. I’m just you just want Understand what a 90 degree angle is, because that’s how you’re going to test to see if you actually have tight hamstrings.
Alright, so I’m going to come here lay next to this post and I’m what am I doing on a line my hip up with it. And when you think about having tight hamstrings, um, you know, I don’t expect everybody to be able to go 90 degrees or beyond, but to know that if it’s tight, it’s going to be less than 80 degrees, okay? So if you’re just and you can get up to tractor out so that way, you could see what the measurement is for an 80 degree angle, um, but you want to be able to pull your leg up so it’s aligned with the post, and you want to be able to see so the other legs flat on the ground, and you’re gonna try to kick this leg straight up, alright.
So if you look at the angle of the post in your leg, is to find out if you have abnormally tight hamstrings. So it’s a great indicator, and you want to do with both legs. So it’s not like okay, cool, lay down and find an arm or right leg is good. Let’s go ahead and start back up, it’s not a big deal, because you can have, you know, different types of tightness in one leg than the other. And usually, if you have one side is heavier than the other, it can throw your body off your hips, knees, ankles, you know, all the way up to your shoulders. So you’ll do the same exact thing with your other leg just to see if it has a tight hamstrings, you would lay down, bring your knee up. So you want that 90 degree angle and see how far you can bring your leg up also.
So and you can, you know, use something on the wall, draw some lines, give yourself some diagrams, and there’s also some apps out there as well, that also measure, you know, to see how the severity of the tightness of your hamstrings so there’s a quick test To test the hamstring tightness, hopefully this helps you out.
Definitely check out the next episode because what I’m going to do is show you stretches to stretch your hamstrings. Alright, super excited to share all this information with you subscribe to the channel, you’ll get the best in strength training, home-based training, you know i and then also how to take care of your body.
Today I’m gonna be sharing with you a topic this is a lot of people that come into me tight hamstring symptoms. So, a lot, a lot of people will have back issues or they’ll have butt issues. And, I want you to understand the difference between the two because you want to make sure that you’re treating the right thing.
So if you have back issues, and you want to know if it’s your hamstrings, a good way to kind of understand the difference between the two is one where the pain is. So if your pain is there’s like this little heart area for you to actually sit down, that gets really tight and it hurts.
Typically, you’ll want to do different types of techniques for it as opposed to if you notice, like when you bend over like you have to roll your back a lot because your hamstrings aren’t letting go and they’re, they’re tight. So the back pain coming from tight hamstrings will, you’ll notice whenever you’re doing anything you’ll want to roll your back to to help you get into that position.
So, in the next episode I’m going to share with you how to do a hamstring test. So the right eyes want to know the symptoms. So the symptoms are whether it’s the hamstring, or your piriformis, or it’s right there or that they insert into that bone.
Alright, so definitely if you’re interested in not only learning about information for healing yourself and understanding more about your body parts and body, subscribe, click the bell, and then the next episode, so click the link below in the next episode. What I’m gonna do is I’m going to show you different tests to test your hamstrings.
Today I’m going to show you the best glute exercises to not only lift but tighten those glutes. Hey guys, Brent Kasmer, Brent Kasmer fitness and not only am I going to show you a series of exercises, but this is how I would put it together in a workout program also.
So let’s do this. Follow me along. Here we go. best exercises for your glutes.
BEST GLUTE ISOLATION EXERCISES | Eliminate Sag & Cellulite
Alright, so split squats. I like to do this on a Smith machine but I want to show you that don’t have that chain. And if you don’t have a bench, it’s a Bulgarian split squats. He has one leg up behind you elevated and the other legs out in front of you and how you judge the front is you would just put good phone calls. The live video. So you want to make sure you stay up and heal your butt. And you’re just pushing up to the field. Okay? But I feel this is what I want to spend machines, I want to show you on a set machine right here. Put the bar up on your shoulders, put your foot up on the bench and getting down. So I like to preference, this is a preference, put your foot flat on the bench. So there’s two ways to do it. You can put it up like this, put it flat like that and tilt it in. You will do a Smith machine, see the range of motion. You want to get a good range of motion, this back leg should be relaxed and you should primarily be driving through that. And then when you would stop, you’ll just switch your feeder out. Here’s what you do as well.
All right. So to get those boots fired up, I would do like 15 to 20 repetitions on that. Then we’re going to write to a barbell glute raise. So you would set this up at a gym just like I have it set up here. So you have all this stuff set up so that way you can just run right through your workout. Not only hitting it with some good strength, but also getting some good cardio in as well. So when you do a barbell glute raise, you enroll this right up on your hips. As you see I got a pad here. So you would use a if you don’t have a pad for glute raises, you would just roll up the pad or you can use one of those neck pads that you would squat lamp. So you just pull your feet in nice and tight backs like your shoulder blades are on the bench driving up through your heels, driving those hips nice and high. So pivoting on your back, same thing, 20 reps. You don’t want your head on the back and just arching your back. So you want your whole body moving, driving through those glutes. hips up. Alright, the same thing 20 of those as well. So split squats per leg, barbell hip hinges, barbell hip thrusts, glute raises, whatever you want to call them. All the same.
So we’re gonna take a man, stand on it nice and tall. Keep your legs straight. Seal My legs are straight. I’m just driving through my heels. It’s not a big motion, which is driving through your heels. Are you good? Go 20 to one side. This is a bandit. Sign. Walk when you go 20 just going back the other way. So you want some tight enlisted goods. You put these all together, and we’re not done yet. You fire those glutes up. So the big thing with this is, you don’t want to be hinged forward. You don’t want to be shrugging this band up when you’re stepping. So if you needed to make it tighter, you would just grab lower on the band. So that way your shoulders are back and you’re just driving through those heels. Okay. Good. So the next is a kettlebell swing. So right here, I’ll show you the proper technique of picking a kettlebell up.
So when you walk up to a kettlebell, when you bend over, you want to be underneath your eyes and you just hike it. back behind you, keep your head up, stay forward, and you’re just popping your hips out. So it’s almost like a barbell hip thrust. Squat. It’s so far your glutes up. So here, same thing, 20 reps, driving those hips, driving through your heels. So you’re not supposed to be flying in the same way over your head. You’re gonna throw the kettlebell back down. It’s like a battle between throwing it down and throwing it up. So when I teach people at the MIT studio, it’s almost like spanking your butt, and you just pop a kettlebell, straight out. Okay? So pumping those hips. So, yes, the split squats, preferably on the Smith machine.
Second exercises the barbell hip thrust, or glue raises the bandage side steps kettlebell swings, and shebang. We got high foot placement leg presses, getting out of breath. So this will be regular foot placement. So you would literally walk your feet all the way to the top of the press. nice and wide, toes angled out a little bit. And it’s got to really dig into that hiney pushing through those hills. Same thing, 20 wrench, nice high repetitions here. Really firming up that booty. So 20 of those and then you would start right back over on that circuit.
So split squats, blue raises, favorite sidesteps, kettlebell swings, high foot placement leg presses. You will, I promise you in one workout, you will feel a difference in those glutes and you only kill one day you probably feel every three days. So I hope you guys enjoyed this little bit of a workout, but same time. This is just the best glute exercises to not only lift, but tighten those glutes as well. So if you’re trying to deal with some of this stuff on your own, trying to figure things out, you know, this, definitely don’t waste your time. You know, even if you’re stuck at home, you’re trying to figure things out, you know, reach out. I write programs for everybody, wherever they’re at and at whatever level they’re at. So I don’t want to waste your time. I want you to get the most out of the time that you work.
All right, what’s going on everybody? How is my fitness family. Today I’m going to teach you how to increase weightlifting. And what I mean by that is how to gain strength.
Now once you guys get a lot of questions, people want to put on some massive amounts of strength, you know, whether it’s on their benchpress, whether it’s on their squat, whatever it may be. And this has been the hands down best program for slapping on some serious strength. I use this with a lot of my athletes and I also use this with a number of other clients just when they come in, and this is their goal is to get stronger.
My name is Brent Kasmer, this is Brent, BKPT baby. And I want to go ahead and knock this topic out for you guys. So that way you just get you get down to the nitty gritty.
HOW TO IMPROVE MUSCULAR STRENGTH | Increase Bench Squat & Pullups
All right, so this would be a squat program for putting on a massive strength, you know, in your legs, which is a big, huge, important You know, this helps increase your growth hormone. This helps you get stronger everywhere. So Don’t slack on the legs, all right. But you can use this protocol with any body part. So if you’re trying to slap on some serious strength in this specific body part, whether it’s your bench, whether it’s your arms, whether it’s your back, you know, whatever it is, this is the best protocol to do this. And this is a progressive. So it’s a progressive program. And what I mean by that is, we’re going to do is you’re going to start off with the least weight, working your weight to the most weight, but you’re going to do it also with exercises, you know, as well. So for instance, you know, when you’re squatting or your goal is to get stronger at the squat. We’re going to start off with front squats. Obviously not gonna be doing the same amount of weight as you would for your back squats. So we’re gonna start off doing sets of five, and we’re going to superset this with hip thrusts over here. So I’m going to show you the exercises, but then I’m also demonstrate you how you would progress it up.
So front squats, there’s two different grips here. So you can do the cross arm grip, or you can roll your wrist back and do your traditional. That’s your athletic front squat. But we’re gonna go ahead criss cross your hands. I’m an old man. So this is how our front squat elbows up. Key is keeping those elbows up nice and high, squatting down, driving up through your heels. All right, it’s definitely hard to talk when you’re front squatting, because the bar is on your throat. So you would do a set of five there and you would jump into a set of hip thrusts. And on the hip thrusts, you can use a kick thrust pad, or you can just use a neck roll. What you’re going to do get hit up against the bench here, pull this back to you. The biggest thing is making sure it’s centered. Okay, so making sure it’s centered, rolling up to your hips, pull your knees in tight, and pin it up through your hips. So you’re using your shoulder blades on there, just might come around on the shoulder blades as well. So you want to make sure your shoulder blades are on the bench, and you’re pivoting through your hips. So don’t lock your head down and just roll your back. You want to make sure you got a good range of motion, driving through the hips. So you would do 10 of these.
So five front squats, 10 hip thrusts, alright, and you would go right back into your front squat, and you would add weight. So depending upon how light you started as how high you would jump, but we would do five sets of five. Okay, so you would go five more reps 10 more on the hip thrust and weight, five or five on the front squats 10 more on the hip thrust until you get five sets of front squats in. Once you get to that peak point,your last set of your five on your front squats. That is where you would start weight wise for your back squats. All right, so say I ended with 185 to 225 whatever it may be, for your front squat set of five and you’re borderline failing. That’s where you would want to start your back squats. Okay. So, going into your back squats. This is just a bar. It’s across your traps. When I have somebody jump in here for back squats, you would make sure your fingers are lined up on the bar properly. That way when you get duck up under the bar It’s you, your body is centered. So feet together picking the bar up. Always I like having that box behind people. So that way they can sit down and touch that box. The biggest thing with the box squat is you don’t want to relax your spine to always stay tight. Just down, touch, right back up. Alright, so you would do five,back squats, right back to your hip thrusts, okay.
So once you get done with your five sets of this, so same thing, so say you started at 185 because that’s where your front squat ended. And you typically squat like 405 pounds, you know, you would want to incrementally jump that up faster, to make sure you’re at the right point, you know, so that way you’re at 315 – 405, and you get to that part real fast. When you’re doing your back squats, same thing 10 hip thrusts in between also five sets back and forth, you know, incrementally getting stronger with your back squats.
The last exercise that you would do. So now you’ve done five sets of front squats, five sets of back squats, all with, you know, sets of 10 hip thrusts in between. So your body your booty is warmed up, I’ll tell you that I promise you. Then we’d go into the top half squat, top half squat. Same thing, this is just getting your body, your spine and your erector spinae which is around like alongside along your spine, protecting that used to heavy weight. So if you’re used to squatting four or five and you want to get to a 500 pound squat pretty quick, the best way to do it and the safest way to do it is to get your body used to at least holding that way and moving it so that way, when you get into a good deep squat, it’s already ready for it.
So every week, you want to progressively get stronger with this. So you would start at that 405 pound range, wherever it were, or wherever you ended with your back squat, and you go into a top half squat. So that just means that you’re, you’re picking this bar up on your back, feet together, picking it up over the hinge, you’re gonna come back, and it’s just a small movement. So this is a very heavy exercise. Boom, up and squeeze tense the size of the talk. This is just getting your body used to heavyweight, heavyweight heavyweight and you will be able to increase this really fast. So say you’re used to squatting 405 I mean, you’ll be up at like the five 600 pound range, just giving you an idea of throwing numbers out there. Like that’s not where you’re supposed To be that’s fine, you know, everybody’s at their own limit, I’m just saying it’s significantly higher than where you would end with your back squat. Okay, so then you would strip it all the way down. At the end of this, you know, five sets, same thing, five sets of top half squats, superset it with your five sets of hip thrusts, which those are 10 reps. So you’d literally be doing 30 hip thrusts, so and that weight never changes, you always want that at a good weight for you to do 10 the entire duration. So it really gets those boots engaged that way or using the proper muscles when you’re squatting.
So all of these exercises so you see the progressive so it’s front squats, back squats, because you can progressively get heavier because it’s a progressive, you know, movement through it. So hopefully these things help you and you understand what I’m talking about. If not, you know, shoot some comments to me. That way I can help you out you know, to To further understand it, but you can do this with every single body part, this is how I get my athletes super strong in the gym. That way you get the best results and the best outcome like I mean, I have clients that I’ll slap on like 200 pounds in their squat within a six to seven week incremental time. So you know, this is this, this will help you get those massive gains. So this is that the today’s topic was increasing, you know, your weight training.
So I want you to make sure you take this, you know, and and use it and implement it and watch yourself get massively stronger. So, all right, Brett Kasmer here. If you’re tired of trying to figure things out on your own and you want a specific goal, you want a specific outcome, message me ask me, I’ll help you. I want you to get the best results in the shortest amount of time. That’s what I’ve been helping
What’s up my fitness family. Today I’m gonna teach you how to lean out the thighs.
Alright, so my name is Brent Kasmer, Brent Kasmer Fitness.
So I’m going to show you several exercises, these are techniques that I use right now with my clients to help get them in nice, lean, sexy legs. So,you know, obviously, I love strength training. So everything is primarily based around that, but then I throw in some ballistic movements also to help with, you know, leaning out those legs. So I’m going to show you a few exercises, so pay close attention.
Lean THIGHS | Burn Thigh Fat and Get Rid of Your Thigh Gap Fast
And then if you want a template to this workout specifically, then go ahead and comment below, send me the template, we’ll get something put together for you. So you have a template of this workout program. All right, so follow me over here. So you would start off with a barbell back squat. So if you’re not familiar with squatting, always with my clients I have them put their pinkies on the line so that way it helps them to stay centered when they get under the barbell. So if you don’t have a barbell, you want the weight across your traps, okay, which is the top part of your shoulder slash neck area that’s not on your spine itself. So head up, standing on your heels, squatting down and driving up through your heels. Okay, so, you do 10 good back squats, trying to get down 90 degrees. You’ll walk forward, set the bar on the rack, and then go right into Well, there you are. I don’t know where are you at? All right, so then you’re already in a 10 box hops so vertical jumps onto the box.
So this is the ballistic movement. So when your box hopping, make sure you jump and then stand up to finish the movement. Okay. So jumping up and finishing So if you don’t have a box and you’re scared to box hop, which is okay? You would just literally do a squat jump standing up. So do you see how I landed softly? So squat, softly stand up. the same premise is a box, okay? So don’t sweat it, you would go back and forth, we would do three to five sets of these two exercises, and then we would move on.
So this is a trap bar deadlift. So trap bars are just the type of bar I’m using. You can use a barbell as well. I just prefer a trap bar because we have one. Stand in it nice and tall. grab the handle, drive through your heels. Stand up, full extension. So when you stand up some full extension drive through your hips, walk that out head up so the ballistic movement you would pair with the trap bar deadlift is a broad jump. Broad jump is jumping for distance. So if you’re right here and you’re shooting from your hips forward, so it’s like a ski jump, shoot, and land soft, shoot and land soft and land stop, and it’s a good idea to get a target so that way you’re trying to jump as far as you can. So in here we will have like, you would choose two tiles or three tiles. So that way, you know like, Hey, I can make this distance. Sometimes we’ll lay down an ab map and jump over the whole mat.
So to give you a depiction of how far to jump so same thing trap bar deadlifts, broad jumps. The ballistic movement helps you to elongate those muscles and lean them out so you pair those guys. Hey, thanks for your five sets and we would move on.
So the next thing is a dumbbell walking lunge. So let me get some. All right. So dumbbell walking lunge, head up, shoulders back. Nice big step, stepping forward into your foot. So stepping forward, stepping forward, this would be 10 per leg. So once you get 10 per leg in, right into a ballistic lunge, so ballistic lunge, you’re just kneeling down, jump up, switch your feet, jump up switch your feet. So this is a workout that I do with a lot of my athletes, because you’re getting power and then a ballistic burst. So Same thing about three sets of ten. And then ten per leg ballistic lunges as well. So if you want a template to this workout program, just comment below, send me a template. This is a great way this is, I feel probably the best way to lean out those thighs for sure.
So my name is Brent Kasmer, I have been doing this a long time and I love helping you guys get good information. So that way helps you read between the lines, and not like get caught up in the bull crap. Because there’s tons of stuff out there. And if you’re tired of wasting your time and tired trying to figure this out, you know, I want you to make sure that you’re getting exactly what you want.