Today I’m gonna teach the men how to strip off that belly fat. Alright, my name is Brent Kasmer. This is BKPT. So if you have not yet subscribed, definitely hit that subscribe button and mash that notification bell so you’re notified as the new stuff coming out. Alright, let’s get busy.
HOW TO LOSE STOMACH FAT FOR MEN Without Cardio & Restrictive Diets
So, generally, I have to start helping people understand the fact of eating food and not doing so much cardio, which in essence sounds pretty good. But it’s an old school habit that people just can’t let go. They think if they want to lose fat or weight, they need to starve themselves and naughty and do a bunch of running, which is garbage.
So, pick up some dumbbells. Let’s do this. Let’s pick up some weight. Start building some muscle so it helps to increase your metabolism and then eating some of the right foods. So, you know, a lot of times it’s just about choosing the right foods to eat at the right times of the day. So that way you can strip off that fat.
Waking up having breakfast, a lot of people say, hey Brad, I can eat in the morning when I wake up. So then if you can’t eat and people’s first thing they want to do is have a cup of coffee. I tell him to throw some protein powder in the coffee. Startup and now you have a protein shake with your coffee in the morning. All right, so you kill two birds with one stone.
Then after about three hours later, we’re going to have another either protein shake, or oats, this is when you would have your breakfast, which would be about six to eight egg whites. Whatever vegetables you want. Throw some bacon if you’d like, some not. Don’t get crazy, you know, some fruit, you can have some ezekiel bread, some oats, you know some type of carbohydrate, try to keep it to a serving.
This is where you want to be able to label read. Alright, so learning how to label read. I’ve taught this before learning how to read labels. So check out one of the previous videos on label reading. But it’s a huge factor. So you want to make sure your one serving about a half cup of oatmeal and then you would move on to your lunch lunches.
A lot of times for men, it’s simple, it’s easy. Having some type of sandwich you want to throw some chicken breast on a sandwich. You know to throw your vegetables on their lettuce, tomato on in, slap on some mustard.
There you go. Well, three o’clock have another shake. Takes you at dinner time. 6:30 is when you have your dinner. This is when you want to eat a nice healthy, nutritious protein salad or vegetables and unhealthy fat, either some avocado, coconut, some oils using oil and vinegar on your salad. That’s a great day, and then repeat it, you know? So these are some key factors is simple nutrition.
We’ve got tons of videos on there, different types of recipes. I try to help this as keep it as entertaining as possible. A lot of people are like, Oh, I have kids, I can’t, you know, I’ve got to eat this because my kids left their mac and cheese on their bowl, you know, just run over throw away real fast. Try to help yourself not want their food by just pitching the crap out, you know? And then just staying with what you got to eat. Making sure you’re getting adequate water in, that’s another key factor. A lot of times men drink like, two glasses of water a day is awful. So I’ll preach by Like a 32 ounce or a 64-ounce container and drinking out of it,
Alright, so that way you know exactly how much water you’re drinking, you’re getting in a gallon, a gallon and a half of water a day. So you want about 180 ounces, or so give or take a little bit of water, and you’re always wanting to get enough protein.
So like you always pick your body weight, what you want to weigh. And that’s where you want to start with your grams of protein and then just divide it throughout the day so that way you have it in five incremental meals.
So those are some quick easy tips. I’m not making you, go out, cook these lavish meals take forever. I mean, everything has to be super simple, super fast. That’s what makes it duplicatable. It’s all easy.
And if you’re having issues just message me, man, this is a simple thing to do. There’s no reason you can’t make this work for your life. I help people from all different avenues, you know, Doc And lawyers and salespeople, people that travel all the time, all it does is take a little bit of configuration there’s no, I can’t it’s just how do I fix this problem to make it work with your life?
All right, so hopefully there are some great tips. All right, man, I take the challenge. It’s time to ignite that belly fat right off of you. All right, so these are some quick tips to lose that belly fat for men.
All right, Brent Kasmer BKPT, subscribe, smash the bell, give us some thumbs-ups. This is some great information. take this to heart and it’s time to shred that belly fat.
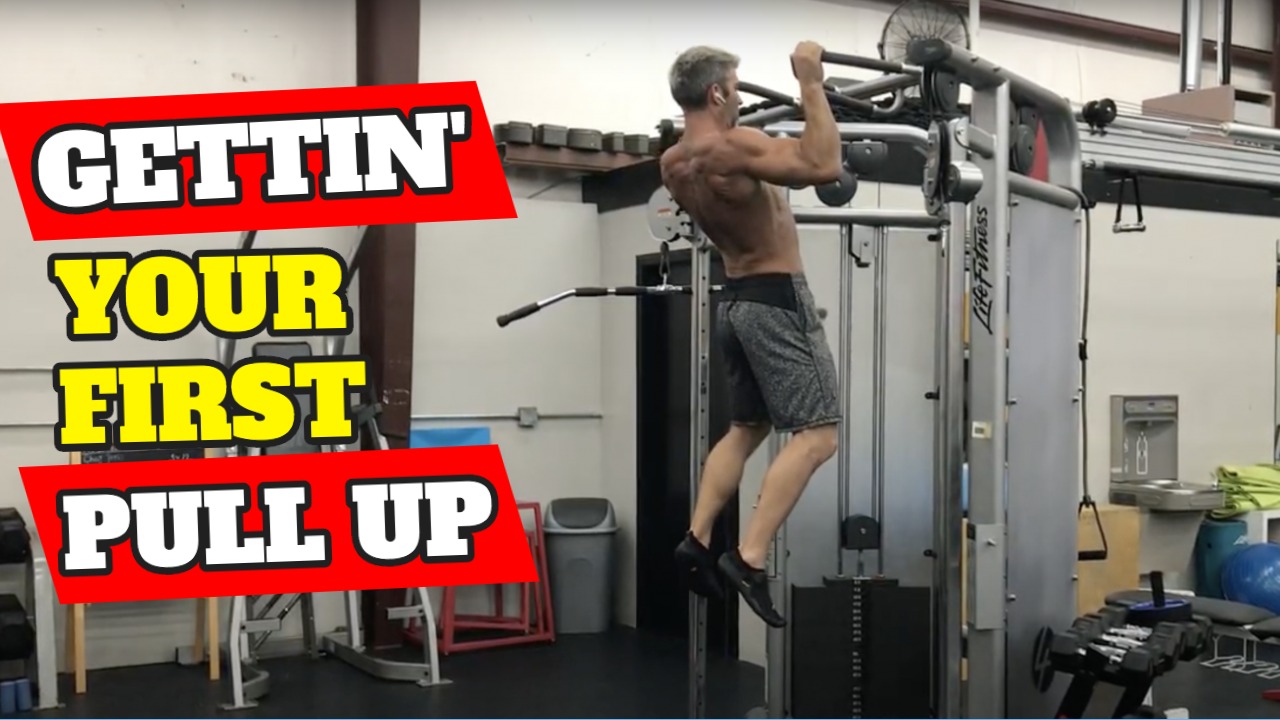
What’s up my fitness family! Today, I’m going to teach you how to get your first pull up.
All right, so these are six great tips on how to perform your first pull up. Everybody always struggled. A lot of people come to me and they’ll be like, man, I really won’t be able to pull up.
Alright, so my name is Brent Kasmer, BKPT. If you have not subscribed yet, definitely hit that subscribe button, smash that notification bell. That way you’re notified as the new stuff coming out. And I love teaching. So this is some great information.
CANT DO PULLUPS! 6 Pullup Tips to Get Your First One!
Everyone wants to be able to do pull-ups, I should say, but a lot of people do. So I want to teach you some quick tricks on how to get your first bullet.
All right, so we’re going to start off right here. So a lot of times you’ll see at the gym a lat pulldown bar. If you haven’t seen it in the past, I’ve taught people how to hook up resistance bands to make a pull-down without actually looking it up overhead. But we’re going to go ahead. I’m going to show you a quick tip. It’s kind of funny because most people don’t think about that. So like most gyms, the lat pulldown bar, you sit down in front of it, it’s got the knee pads that go over top of your knees and you kind of lean back and pull the bar down. When you’re trying to get pull-ups in.
When I’m working with clients, I’m always working with one, I want them right outside, their shoulders are not super far out wide, not all the way in close. We’ll start off overhand grip because that’s a pull-up. And we’re going to go from our knees to keep your chest up tall, just as if you’re hanging from a pool of water. So you’re kind of in the same position. So what this is doing is this is engaging your core tremendously. So your core is engaged.
A core is a huge factor in pull-ups. All right. So looking up where the cables attached and pulling this straight down and squeezing your lats. So looking up, exhale as you pull down. So you would just be performing your lat pulldowns from your knees.
I could feel my chords tremendously engaged, and you’re just doing your repetitions. So from your workout, whatever workout you’re doing for your lat pulldown, you’ll just use it from your knees, just as to help you to build up to getting your pull ups in. Alright. So that’s tip number one.
All right. So, tip number two is working on your grip strength. All right, so you can do your lat pull downs, and then jump right into a pull up bar, and literally just hang there. Alright, so we’re going to hang. We’re also going to engage our lats. So do you see me picking my body up just a little bit. It’s that first motion. So just arching your chest up and engaging your lats. Alright, so you don’t want to come up and then just fall down and torque your shoulders. You only want to be in control. So tear up, right back down into the relaxed position, but you want to do it in control.
Alright, so tip number two is to hang. And whenever you’re hanging also a caution in other videos before, well, you don’t want to slip into just a hook. So when I say a hook, you’re not wanting to just hook the bar with your fingertips, you want to make sure you’re firmly grabbing that bar, because you will suffer an injury from that which I taught in one of the previous videos also.
Alright, so the dead hang with the lat engagement. The next one is the negative. So you want to pull a box up or bench up to pull up bar and you want to jump up and just hold it as long as you can. Coming down. Nice and slow and controlled. All right, so doing several of these to jump up, holding it, the control coming down nice and slow. So if you can’t come down slow, you’d want to continue and doing the black pull down from your knees until you’re able to least hold three to five second hold on your negative, so it’s a negative motion for your pull ups. Alright. So that is tip number three, the negative pull up.
All right, tip number four, we’re going to do an assisted pull up. So you can take a regular band, there’s tons of different bands, but this is a very common one. So that’s why I’m showing it with this one. So you’re hooking it on to the actual pull up bar itself. Pull this band down in a rap, you’re around your foot. Okay, make sure everything’s secure. So that way doesn’t snap on you. So you’re gonna put your hands up for the pull up again, you’re gonna stop that band down, keep your legs straight, and crush your other foot in front of it, holding that band on it.
So this is just taking some of the resistance off of you being able to do a pull up. So just making it a little bit easier to an assisted pull up using a resistance band pulling that body up, good control and just performing these and the cool thing about these resistance bands is they all have different strengths. So you can change the strengths and work your way easier harder, and you know as you progress.
So we had a lat pulldown bar. We’ve had the hang for your grip strength, engaging your lats. The negative pull up, the assisted pull up. Now I just want to teach you how to engage your lats. All right. So just engaging your lats is going to help tremendously getting them engaged. So that way they can get stronger to help you with your pull ups as well. So grip strength is huge.
The next one we’re going to do because a core is a straight arm lat pulldown. So when you’re doing this, this keeps your core engaged, which is a huge factor in your pull ups. So grabbing it the same grip as you did for your pull downs. You’re gonna love that kind of hinge your butt back. There you go straight arm and just pull this down to your thighs.
So straight arms coming up to about your eyes, straight down your thighs and just feel your lats and, you know, engaged. So as you’re pulling that down straight, coming straight down, pulling down just like that.
And then the last one, number six, for just getting into those pull ups for engaging those lats is literally going to take you could use a doorknob or a door handle. I’ll show you here’s what that handles in general, but it’s just a rotational row.
So we want this down around your stomach belly button. You’re just gonna hold us in a neutral stance side by side, and you’re gonna start with your hand, overhand, so pronated grip, and you’re just going to be pulling it back and rotating underhand grip. And this is just slow. We’re just engaging your lats. So the key factor is getting those lats engaged. So that way you can start to mentally feel so it’s like a mind body connection, getting those lats engaged. And that way once you get the muscle engaged, and you’ll be able to feel it to make it work to do your pull up. So that rotational row like that helps you get those in you want to feel when you’re working so that way you know exactly how to do it.
All right, so those are the six tips to getting your first pull up. So hopefully, all of those help, I can’t wait to hear how fast people get their first pull ups when performing those six actions.
Alright, so definitely got that Make sure to subscribe, smash that bell so that way you’re notified when new stuff comes out BKPT and I look forward to teaching you some more helpful tips to get in that seven-figure body.
What’s up my fitness family? I am going to bring you today, the 10 best biceps and triceps exercises to get those big arms. All right. So Brent Kasmer from BKPT, can’t wait to share this with you. I’m gonna show you five exercises for each of the five to the triceps, five of the biceps key things.
THE 10 BEST BICEP AND TRICEP EXERCISES | For Getting Those Big Massive Arms
A lot of times you’ll see people out there working their biceps to get bigger arms, but guess what, the triceps make up two-thirds of the arm. So you can’t neglect them. You got to work them just as much. So I want to show you these exercises.
For the rep ranges, you want to make sure that you’re getting air between like six to eight repetitions on these and you want to have the time under tension. Be effective, so needs to be the correct weight.
So if you’re not logging your weights and you don’t know what you’re using you come in and do the same repetitions and the same weights over and over again, you’re not gonna have any improvements. So you have to make sure you’re challenging yourself. Don’t push yourself through injury, be smart about what you do. But guess what, are we going to show you the best exercises.
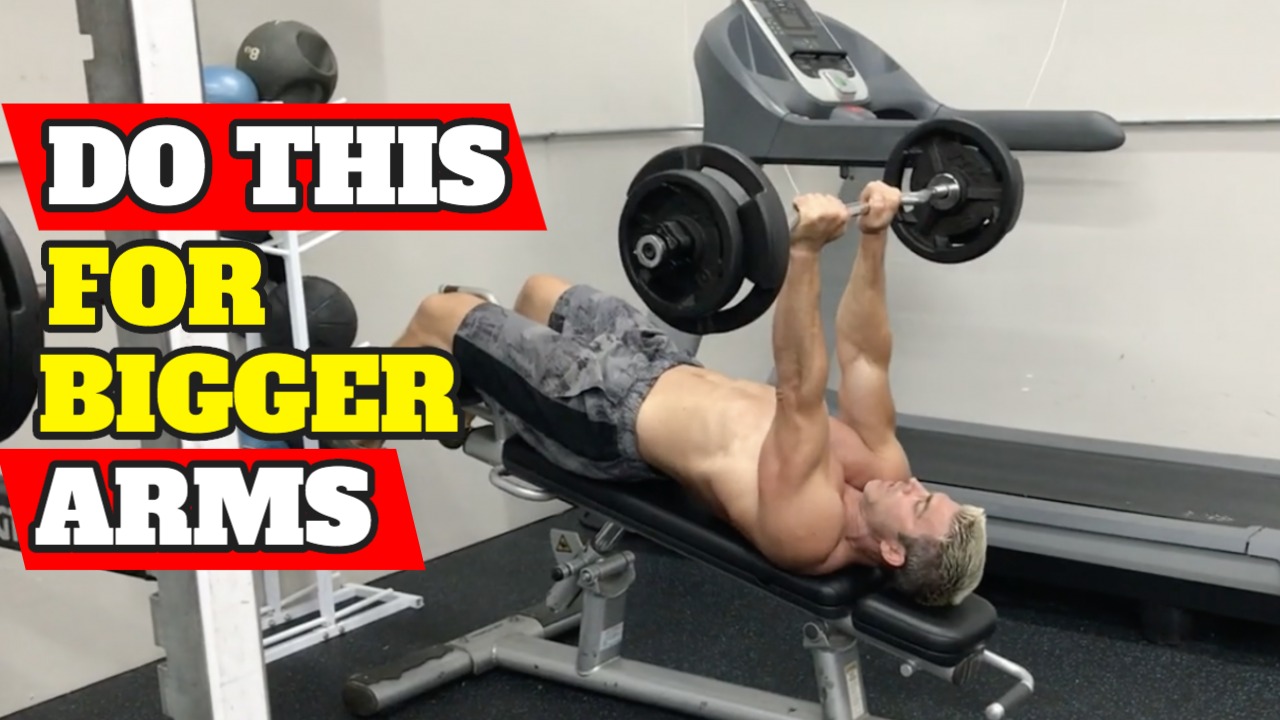
So first start off, this is a major mass builder for triceps. So this is known as the floor bench. All I did was raise these ups. So this is my floor. But what you’re doing is when you’re benching you only want to come down to where your elbows are parallel with your shoulders. So when your attention is so and you can do this real heavy too, which makes it really nice to pick it up. Come down, basic control drive. so it nicely controls the drive.
You want to make sure you lock that up, totally locking out those triceps. Boom. Like I said, six to eight repetitions. Okay, so I’m going to show you superset. So this is probably the most effective blasting to get that massive tricep barbell curls.
Great exercise. So this is for the biceps so we would superset these back and forth. I like the narrow grip, narrower grip makes the outside of the arm. This is the pretty part which most people see. So you’re going to have a narrow grip and just curl it up. If you notice, what I’m doing is I’m keeping those elbows in front of me. You don’t want to have your elbows tucked along your side. So keep your elbows in front, curling up. Good right demotion, keeping that tension on those biceps. Okay. Six to eight repetitions.
Next one I’m going to show you is a decline, skull crusher decline skull crusher. I’m super excited. So I want to pick up this bar. The decline, the reason I’m like on the decline, and it just gets a better range of motion. So it’s just a bigger range of motion. Good control, keeping those elbows straight up, dropping that thing right behind your hairline. If you don’t have a hairline, just the front top or your head. Same thing six, eight. All right.
So, next favorite bicep number two. So these first ones are for putting on that mass. The last ones I’ll show you for making them look crazy. So this is the seated bicep curl with a barbell. So it’s a smaller range of motion. Sitting on the end of a bench box chair, keeping the elbows in front of you just like I was sharing before with the barbell standing curl, and you’re gonna curl this up to your shoulders.
So, coming down to your knees, get control, sit, coming up to your shoulders, right back down. Same thing for six to eight graphs. All right. So we have so far as the floor bench or just bringing it down to 90 degrees. We got the barbell standing close for it. Curl skullcrusher on a decline match.Now they look closer and closer to benchpress. For by the way, my drop, this a little bit close grip. So when you’re doing your claws, grip, keeping those elbows alongside your body.
So you want your pinkies about so take your thumbs, meet them in the middle, take your pinky stretch them out, or issues on my bar or some rough stuff right there are two ways to hold the bar unhooked or hooked with your thumb. Depending on wrist issues, we’re just taking the bar coming down below your sternum and straight up. Okay, always when you’re working your triceps. You want that good lockout. So you want a good lockout. That way you engage them. All right. Same thing six to eight reps. All right to the biceps are moving right along.
We’re gonna do an incline curl. With the incline seat, the back is further back than normal for incline. And I do that same thing for range of motion. If you have shoulder issues, you don’t want to stay tight like that. You don’t want them to stretch your shoulders out like that. So you put it up a notch or two. Like I always say it hurts, don’t do it. Of course in a bad way, not a good way. Okay, so the incline curl, I like putting my feet on the bench, but the goal is to keep your knees together so that we can keep these dumbbells nice and tight to your body on the curl up.
So just nice and slow, good rotation. So starting off with the hammer, curling up, rotating those pinkies all the way up and almost out a little bit. See I’m trying not to roll my elbows forward, rolling my shoulders forward, keeping those arms straight down, just concentrating around those biceps. It’s a nice and hang on those arms. So you get them all the way down. It’s a dead
Hang and just rotating on the way out, keeping those elbows down, getting a good motion on a curl. Another great exercise for the bicep.
Alright, so we’ve gotten top half bench, we got the skull crushers, close grip batch. Now we’re going to the reverse grip, tricep press downs. We’re almost to the end already. Can you believe it? So we’re doing a reverse grip. So it’s just a lot better on the long head of your tricep. So it’s a reverse grip makes that portion finishes up that horseshoe for you. So standing nice and tall, and just reverse grip so your palms are facing up, hands over the edge of the bar, straight down, locking that tricep out, and you can really feel it on that long head. Same thing six to eight reps. You won’t be able to go as heavy as you would with your You know, regular barbell cable press down, but definitely better for hitting that targeting that long and tricep.
Alright, so moving right along. So we got last two for biceps. So here we go. This is one of my favorites as well. Preacher curl. Show you guys have these kinds of cables. I like using my flex lines, which I’ll show you a whole series on those coming up. All right. So your roll over the incline bench. You want the whole back your arm resting on this pad and you’re just using as isolation and good contract, you’re at the top, same thing six to eight reps. It’s a home keeping institution of all time. Just squeezing that bicep at the top.
So it’s almost like a concentration curl, but it’s a cable. preacher curl one arm preacher curl.
All right, drum roll. This is my favorite one for the tricep. Just for making it look great. And this is what I use for my bodybuilding competitions. shredding up my triceps. Same thing hit that long head.
We’re going to criss cross your hands. I grabbed the nub of a ball that hooks into the cable coming back, which is coming down and out. So it’s almost like a hit back that you would do with dumbbells, but it really isolates that long head of the tricep, again, making it look nice and thick. Really getting some size on those arms. Same thing, six to eight repetitions on that, and the last one for the bias set.
So this will be the fifth one that says like a climb, but instead you’re going to put your chest up against it. So it’s an incline dumbbell curl. And if you’ve seen this before, it was in my working on your bicep peak exercises. So you’re leaning forward on the badge with the big big part of this is squeezing those dumbbells together, it’s the second. It’s like a major key component to the exercise. So squeezing it together while you curl them up. So it’s just like the incline curl clip your arms are hanging down, squeeze them together and contrasting them up. Six to eight repetitions.
And if you throw this in and you do this arm workout, you’re trying to put some massive size on, especially for the beach or summer boating or whatever it is that you’re gonna do. Or you’re just trying to put some gains in your arms.
These are the 10 best for sure. So hopefully you guys enjoyed this bicep and tricep workout. If you haven’t subscribed yet, subscribe, smash that bell. That way you’re notified as new information comes out to you. But I look forward to giving you guys more information. Stay posted
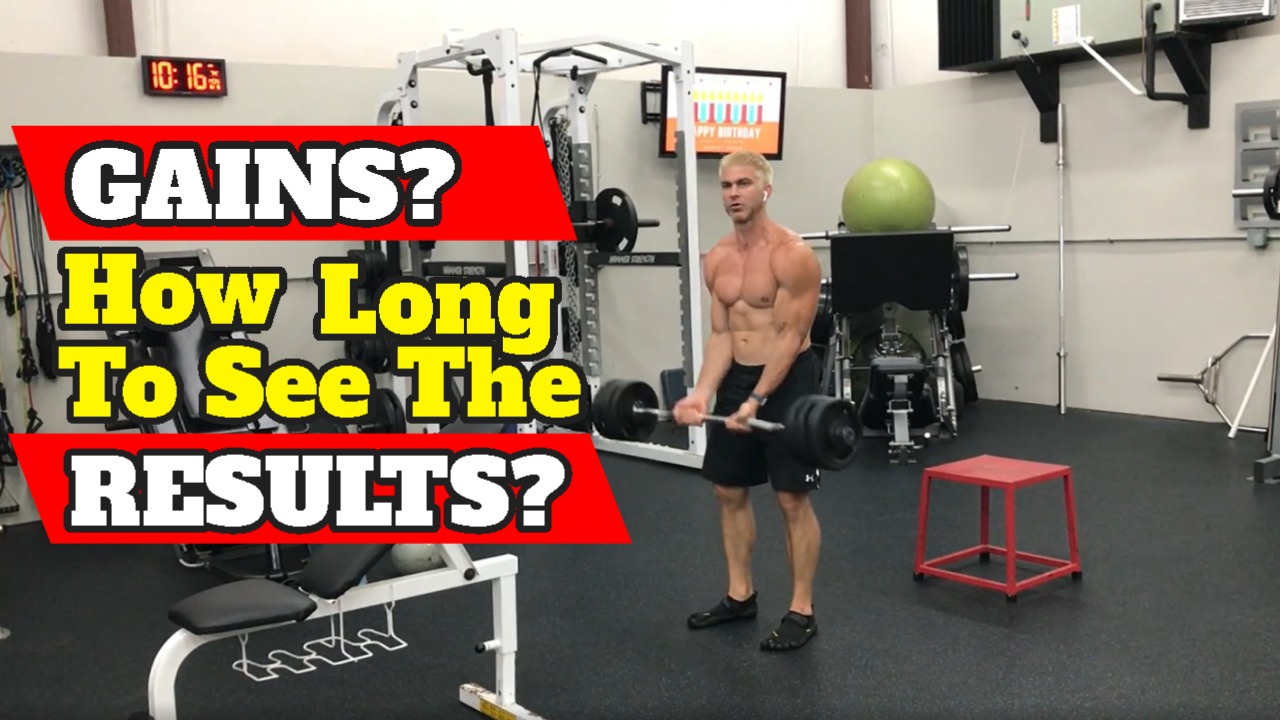
What’s up my fitness family? Today I’m gonna be sharing with you how fast you’re going to see results with weightlifting. Guess what? My name is Brent Casper, BKPT. So thank you for joining me. If you’re tired of trying to figure things out on your own, and you really want some professional guidance so that we are done wasting time, and you just are getting results, definitely just messaged me.
HOW LONG TO SEE RESULTS FROM WEIGHT LIFTING | You’ll Never Believe It
But let’s get on to the topic. So how fast is it until you see results when you’re doing some weight training? Ah, once when somebody comes to me and they’ll ask you this question. I always rebuttal it with how long does it take you to get over the common cold. It could be three days it could be five days, it could be seven days, it could be one month.
Typically when people are starting off when they’re strength training, It’s it varies. You know you see results right away, you’re gonna see improvements especially, it depends on what level it is that you’re coming in at. So if you’re coming in and you’ve been doing tons of stuff on your own already, and you’re starting something new, or you’re not starting something new, you know, obviously, the gains aren’t going to be as drastic. But you’re going to see results, you’re going to see things when you’re doing things properly.
So if you aren’t seeing results, and you’re not visually seeing things, change with your body, one, take pictures along the way. Because if you’re counting on yourself to see yourself in the mirror every single day, it’s hard to notice the results until somebody else tells you, Dang, are you doing something different? You know, because they’re going to notice it because they haven’t seen you in a while, where it is that you’re seeing yourself every single day. So you’re not going to see the change as much until it’s drastic. And you see like, you know, you dropped you know, 10 pounds. Have fat or you’ve dropped like a significant number, were opposed to somebody that just notices you like, every two weeks, like oh man look like you’re doing something differently.
But if you’re not seeing change, if you’re not seeing those numbers, if you’re not seeing visual changes, then something needs to change with what you’re doing nutritionally with your weight training, whatever it is that you’re doing, because you should see change all the time. Other big questions are when people are with me, and they’re lifting on their own, so they don’t have somebody there to spot them to help them get an extra rep or two, and they’re doing an exercise and you’re like plateaued at a certain point. So if you’re doing curls, per se, and you’re doing a easy bar curl, and, you know, anytime you’re doing small muscle groups, and you’re stuck and you can’t get 10 reps on this, you know, take two second break, shake, get out picking right back up and finish your reps. So that way you are putting more resistance against your muscle because you always want to make, you know, you’re trying to change yourself, you’re trying to make positive changes to try to increase your weights and what you’re using. So you want to be like running up the numbers and like, you know, you want to know where you’re at.
So that way you can, you know, increase it five pounds, increase the 10 pounds, you know, so you’re steadily making improvements, because that is what’s going to make the most change in your body is by putting more resistance against that, but you want to make sure you’re safe when you’re doing it using proper technique. You know, you want to make sure you’re doing everything correctly. So that way when you’re doing it, you’re actually you know, challenging the muscle the way you’re supposed to. So there’s two ways to change your muscle, right, you know, adding more resistance, so if you’re going to increase the way or like that’s like I’ll just show setting it down and doing you know, take 10 seconds and finish Your repetitions, or just increasing the amount of reps that you’re doing with the same weight. So if you’re used to doing 12 reps with 50 pounds, then do 15 reps or do 20 reps. I’m just somebody that would rather do less repetition. So I like to stay in that six to 12 range, and always increasing my weights. So all a lot of times, make sure that I’m if I’m stuck at a certain point, I’ll set it down, take a few seconds.
I’m not saying to take five minute breaks, don’t sit that Don’t be that person that’s sitting on equipment, checking text messages, check in, you know, who’s talking to them on Facebook, while you’re trying to, you know, wait five minutes before your next reps. So you know, 10 second break, pick it right back up, finish out your set right away. So making sure you’re making the progressions you need to make. So hopefully that stuff helps you should be seeing significant changes immediately. I don’t know if you saw in the last video that I posted though, that, you know, when you’re starting a new program, you don’t want to jump too hard too fast, you know, with weights because your muscles might be ready to increase, but your joints aren’t ready yet.
So this is only if you’re just starting something new. Make sure you go back and watch that video. So that way you can see what I was stating on those things, but always making positive progression. So make sure that you are seeing those results. Make sure you are seeing those numbers change because you should see it pretty fast. All right, so hopefully that tip helps. I look forward to seeing you next video. All right. Take care.
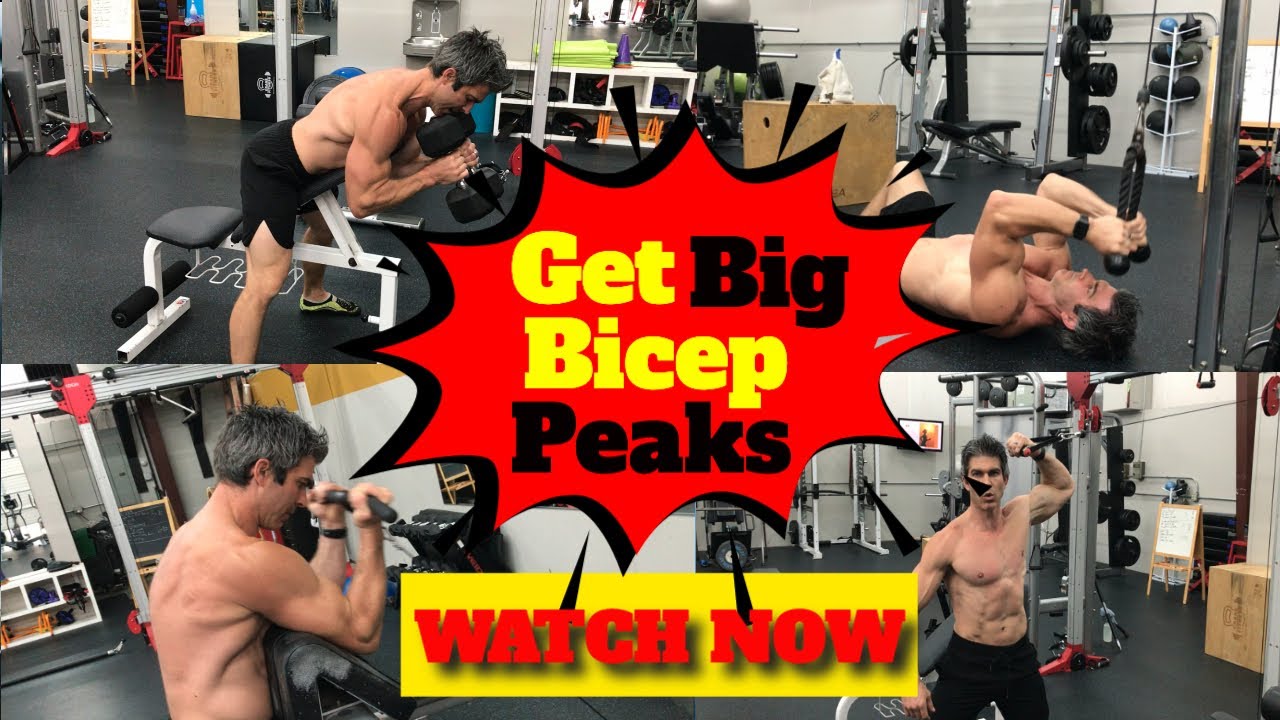
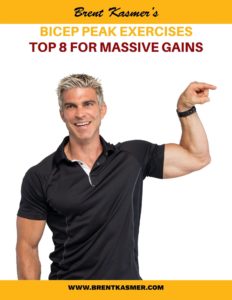
All right, my name is Brent Kasmer. And I’ve been doing this for a long time now and I’ve been working with thousands of people helping them get great results. So what I want to show what I want to break through to you is, that these are the best ones. Okay? If you want to get that nice rounded peek on your bicep then you should follow these 8 bicep peak exercises.
BICEP PEAK EXERCISES Number 1:
The first bicep peak exercise we’re going to start off with is a barbell, seated barbell curl. So when you do this, you want to pick the bar up, you want your hands about the distance of your knees apart, so right about your hips. Want to keep your back nice and tall. You want to keep your elbows in front of you, so you don’t want your elbows back here behind you. Okay, so you’re keeping your elbows up in front of you, and you are curling this up towards your shoulders. And this is an exercise you can put some serious weight on Because of the fact that it’s half the range of motion, and you’re just peeking your biceps out, good squeeze, good control all the way down. You’ll feel this in your core, big time to squeezing it up. So that’s your seated barbell curl.
BICEP PEAK EXERCISES Number 2:
The second bicep peak exercise is an incline match, except this time instead of lay my match. This way, we’re going to lay with a chest against the top of the incline. This is a hammer curl. So incline hammer curl, boy you’re gonna do is squeeze the dumbbells together. So you’re putting your sternum up on the bench, squeezing the dumbbells together, and half the motion is literally squeezing them together. That’s what’s gonna help pick those out also. So you’re forcing them together and curling them up. So down also great. For peeking those arms out. All right, so that’s your incline hammer curl.
BICEP PEAK EXERCISES Number 3:
The third bicep peak exercise I’m gonna take you to is the preacher curl. And first, if you notice, we have a flat side, we also have an inclined side. Now the flat side is great because it’s almost like a concentration curl. Now, a lot of times people were like, well shoot, I don’t have that exact batch, you know. So here’s the thing. You would just take a pinch, flatten it out and look nice. You just have to do it with a single arm. So the big thing that you want to do is make sure that your tricep is driven into that pad, as opposed to your elbow where he can help the leverage.
So you want to make sure that tricep is that way can’t help you. It’s not going to help you. And another big key thing that people do they mess up with is they let their risks Rock in the curl, which takes away from the bicep motion. So, a lot of times people’s forearms will fatigue faster than the bicep itself. So you want to make sure that you’re keeping that wrist locked straight and you’re letting the lever of your forearm just curling it straight up contracting your bicep.
BICEP PEAK EXERCISES Number 4:
So, back to our fourth bicep peak exercise. You’re keeping your elbows in, grabbing it and close grip. A lot of the stuff for the peak also is in closer wrists are rolled out almost. So that way, you’re engaging the peak and the outer part of your bicep. Okay, so there are actually two ways to do this. So you’re in close like this. curling it up. See how contracted that is? Curling it straight up like that.
And the best part about being shredded Up and down, unlike the regular preacher side, is the fact that you don’t get the rest of the top once you get that bar up there, which is going to take me into my next exercise. So one way to do it, the Enter grip here, or even a barbell helps you to make your wrist a little straighter, just depends on if you have any wrist injuries. So just keeping it in tight, and curling it up like that.
BICEP PEAK EXERCISES Number 5:
Another way to do this bicep peak exercise,which no one really ever holds the EZ curl bar this way, it’s not really taught, but it forces the angle of the wrist. So instead of grabbing it like you normally would, you would grab it with the curl out and curl it up like so.
So I’ll demonstrate one time with that as well.
So it’s here with your wrists curled out and peeking in good control and peeking picking up okay.
So that is kind of like a concentration curl but preacher curl.
BICEP PEAK EXERCISES Number 6:
Another great way to do this bicep peak exercise you know, I was saying how the top of the motion on the preacher curl is hard because of the fact that you know would be a great way to lock in that bicep that peak. But when you’re using dumbbells or barbells or free weight, that’s a resting spot also. So what you would do is roll this in front of a cable machine. Okay, so you roll this in front of a cable machine.
What happened is someone stole my plan. Okay. I won’t freak out on camera.
All right. So we’re gonna want to do is pulled us back, but what happens is when you have it on a cable There’s no resting spot. So when you get into that peak and you’re squeezing at the top, the cables still pulling it forward. So there’s no rest, you’re actually getting a great contraction on the peak of that bicep, getting that massive growth.
And you’re like, well, Brett, I don’t have a preacher curl machine, I can just roll around anywhere to get that motion. So I’m always creating stuff to help people figure this out. So all we want to do is take an incline bench, like so. And most people have a cable machine.
So what you’ll do is now you just created a preacher curl in front of the camera. Using the incline bench. So same thing, see that contraction. And the biggest thing was when you’re trying to peek out your arm is keeping your pinky rolled out a little bit more than you normally would. So it’s here, rolling it out. And the biggest thing too, you don’t want to roll your elbow inward, okay? You want to make sure you keep your elbow nice and straight. Keep that pinky rolled out and just pick up your bicep, squeezing it. So that’s how you would make a regular preacher curl. peek out your arm for massive gains.
BICEP PEAK EXERCISES Number 7:
Okay, so the next bicep peak exercise is the one that a lot of people are very familiar with is a concentration curl. So concentration curls.
What people mostly do wrong, is they’ll put their elbow in their bicep. I mean elbow They’re in their leg. So it is going to help them to, you know, aid them in the motion up into their curl. Or if you put your just like I was showing you on that pad there, if you’re using your tricep, you’re not adding any extra pressure into that elbow helping it, you know your arm to do the work. So you want that tricep right there in the inner thigh, and you’re just curling it up, like so. So curling it that way here, concentration curls, a great exercise for getting that peak in your bicep also, squeezing it up, they’re curling it squeezing it up, they’re curling it. You know, and when you’re trying to get massive gains. Also, you want to make sure that the weight is right. You’re always wanting to measure what you’re doing. Making sure like, you know, obviously not picking up the same way over and over and over. Again, you’re always logging it, measuring it and knowing your progression. So you always want to make sure that you know, if you got a and you’re supposed to get a, and you got Nate every time, it’s time to increase the weight.
So you have your concentration curl. We also have a case that’s a dumbbell constitution or we also have the cable concentration curl as well. So all you would do is take the cable to the highest point.
And you want to make sure your elbow is level with your shoulder or, or a little bit higher. So when you’re doing a cable concentration curl, you don’t want it down here. You want it up high. And to help with the peak, you want to curl it towards the back of your head. So I’ll show you from this angle as well. So when you’re curling it, the curling force the back of your head, biceps, nice and peeked out.
It’s good to control out.
So there’s your cable concentration curl.
Sounds nice and smooth, keeping your wrists nice and straight. And the to get it nice and straight. You just squeeze the handle the grip, whatever you’re using at the time. Okay, so now we’ve had preacher curls. We’ve had the flat sided preacher curl, the seated barbell curl, the hammer incline curl, the cable concentration curl, cable incline curls.
BICEP PEAK EXERCISES Number 8:
Now the eighth bicep peak exercise wants to show you also lying on the floor cable curl. So right here, I have the ropes that you would normally use for triceps. On the grip. You can use a barbell also. Same thing as long as you’re looking at a narrow grip. boar laying on the floor and you want your head to meet the cable.
So for this exercise, you’re here, your arms are straight up, and you’re curling right past your ears. It’s all about that squeeze.
And if you notice, this is the same angle is if you were using the flat side of a, you know bench or the flat side of the preacher curl, or even when you’re laying with your chest up against that incline, creating the same exact motion by having your tricep or your arms nice and straight, and curling them out.
So I’m flipping those risks. So the biggest thing, like I’ve shared now are rolling those pinkies. So the, you want to make sure you’re rolling those pinkies out because that last little flick is what helps that peak of your bicep to get that shape. Alright, so flipping that pinky out is huge. And then the last one same premise is when we’re doing dumbbells is picking these exercises right out. So if you’re standing, curling, you want to make sure you’re here and the last motion you flick, so that’s what’s gonna help. Flick that to the top of the bicep.
When you get in there. See how you keep your elbows from in from like talking behind you. A lot of people when they’re at the gym, they got this little elbows way back beside them and their motions really limited. Make sure you keep that motion, nice and right. And point those pinkies out and lock in it right into the top peak of that bicep.
Summary:
All right, so those are our top 8 exercises for bicep for that peak, massive game. All right, my name is Brent Kasmer. Here’s a long time. Hopefully, you find a lot of this information helpful. You know, I look forward to hearing about you guys’ gains. So you know, make sure you comment below and see you next video.
Each week I’ll be bringing you amazing tips and tricks to kick your at home workouts into hyperdrive so you can still increase your muscle mass, burn fat and improve your overall health.
Wanna share this with your workout buddy because you think they might like it too? If so, click the link below to share this with them on facebook!
Today I’m going to show you shoulder impingement exercises to really pay now, first off, when do you feel like you have a shoulder impingement, you’ll know like your shoulder is bothering you, you’re not sure what’s going on with it. A lot of times people will jump into workouts really fast and too hard to quick. And they just they need to get loose, they need to figure out what’s going on with their shoulder and what’s going on and how to deal with it. My name is Brett Kasmer. I’ve been doing this a long time. And I have clients that come in and just because they’re active, they have ailments going on. So we’re always working through things because of golf or tennis or, you know, different sports that they play. Now, as older adults, it doesn’t mean that this only affects older adults though. So, you know, you just got to be safe. You know, I never want people to work through pain. You definitely want to work around it, but you definitely need to address the issues. Also, so here we go. These are some exercises that will relieve shore impingement pain right now.
Shoulder Impingement Treatments Top 7 to Relieve Pain Now
So when you start, you want to grab a nice, easy band. So there’s, I mean, there’s all kinds of different tensions of bands. These are not things that you want to be heavy or hard, okay? You want this to be nice and easy, nice and light. For instance, this is one of my weaker bands. So I will actually double it up for myself and just put my thumb’s in it. Do you have to do that? No, you can hold it shorter with the part and you can just hold the band itself and all you’re gonna do is go up over your head down here but nothing fast. This is not a fast movement. And down in front of you. So up over your head, down in front of you. This you do about 10 times each way you see a loose you know Do you have to use a band? No, you can use a towel. Yes, you can use a PVC pipe or you’ll see those in a lot of gyms also. You know, another way I do it is just hooking my thumb’s in there and taking the band over and back. Also, if you just need a little more attention, do you want to do the second round of these exercises like this. So typically, I’d start off on the rowing machine, and then jump right into these up and over and back. All right, feels really good. That’s why I didn’t want to stop. So the next exercise and I’m going to show you what the band you would hook this on on and then show you how to hook it on inside. We’ll take one step back. So I titled loop on the one side of the band, you can use just a handle also. And you’ll put the handle through this and around anything. You could do like the top of a table. You can do the top of you know post but we’re going to start off with your arm out to the side, keeping your elbow tucked, and just pulling it inward first. So going out nice and slow, good control, keeping that elbow nice and tucked, and doing an inward motion. Just rotating that shoulder. Same thing, you don’t want to overdo these, you’re not like gonna do like a set of 50 you’re just gonna do like 10 to 15 reps. You’ll switch arms, but you’re like, Oh, my left arm doesn’t bother me. It’s only my right. It’s okay. You get, it’s not gonna hurt your left arm. So, but it gives your right shoulder a little bit of a break before you go into the next exercise. So you’re just not doing anything and it’s, you know, it’s all preventative injury anyways. People that work through and don’t work on taking care of this issue. Eventually this can lead to some serious rotator cuff problems. So you definitely want to address this issue. You don’t want it to just let linger on forever. Okay. So and then the next one, we’re going to go right here. So you would go both both arms, then you would go by to keeping your shoulder and elbow align, and you’re going to go up and back now. Okay, so these are all nice slow exercises up and back, just like this. And you’re trying to keep this at a 90 degree angle. So you know, pay attention to what you’re doing. So a lot of times, this is all going to want to move on you. So you want to try to focus keeping that elbow level with your shoulder, hand, straight in front of your elbow. Straight up, good control. See, I held it there for a brief moment.
Back then, Won’t do all of the same things, but the opposite. What do you mean? So we would enter. So now you would do the same thing, but you’re going to go out or with it. So you’re going to start with it across your body, keeping that elbow locked in, coming across and out. You don’t want to go past so let’s say your arm stuck right here and you’re done. And the mobility is over. It’s not like you’re trying to force it any further than it really is. You know, you want to just do what’s natural, and go where you know, it’s allowing you to move the mobility wise. So keep that elbow top. Driver, that forearm straight out, rotating your shoulder outward. Same thing, 10 to 15 exercises. So just a quick little recap. So far, what we’ve done is the over and back with the band, so holding it in both hands, we went enter, across, enter. We’ve done up in level with his shoulder and now we’re doing a crossing out with the band. Okay? People get so stuck up on where the band’s hooked up and you’re watching these videos like oh man, like he’s got it hooked up high on there, I need to find something high. I don’t have anything in my house that’s hot. You could hook it down on the bottom and a bass and do all of these things from your knees or laying down. So I’m going to show you one more time through them, you know, lying down with the band. So if you’re lying down, you would be on your side, just like this and coming across. So coming across your body going outward with it.
All right. You could do them seated.
Sitting nice and tall, elbow out, coming up with it. Like I said, Before you don’t want this to be too heavy, and don’t get caught up on where you’re located when doing it. Same thing right here on my knees and coming across my body. So coming out and across the net. The biggest thing is your elbow alignment. So you always want that 90 degree bend, wherever you’re at. So whether it’s here, whether it’s here, you just pay attention to that 90 degree bet. All right, now, hold on, I don’t wanna blow your mind. But you can do this with some dumbbells as well. Okay, so this is a three pound dumbbell. Nothing heavy, you guys can use it can have green means or can have corner, whatever you have at your house, just some additional weight. Nothing heavy. This is not a power lifting exercise. We’re dealing with trying to help your impingement heal. So we’re here Same motions, just holding a dumbbell.
Okay, just a little bit of weight.
You could even do these without weight, it’s not a big deal, you’re just going through the motions, just helping your body, create that circulation, creating a blood flow, your body wants to heal itself. It just got to get that motion in there to help open it up. Okay, so here, same thing even lay on the ground, coming across the body and up. Obviously, it’s a dumbbell now. So gravity is what’s going to force that dumbbell against you. So you got to find those motions, coming across them out. And up. And also the other way, would be the same thing. So common like this.
Got me. So it’s coming this way. And just rotation from your forearm to your elbow, and then down and up.
Just these small rotation movements. Alright, so these are all four or five different exercises, done a couple different ways. So that way, you guys can kind of see like just the motion that you want to put that shoulder through to help with the mobility of that, you know, socket. So that way you can help with those impingements and deal with the issue deal with the issue before it becomes a major, you know, problem with surgery at the end, you know, so these are all exercises to relieve impingement, shoulder impingement right now. So you take care of this issue right now. Guess what? It won’t be a problem later. Okay, my name is Brian Cashman. I’ve been doing this a long time. I really hope all this information is helping you out with your journey, you know, wherever you’re at in your journey as well. Alright, see you next video.
Each week I’ll be bringing you amazing tips and tricks to kick your at home workouts into hyperdrive so you can still increase your muscle mass, burn fat and improve your overall health.
Wanna share this with your workout buddy because you think they might like it too? If so, click the link below to share this with them on facebook!
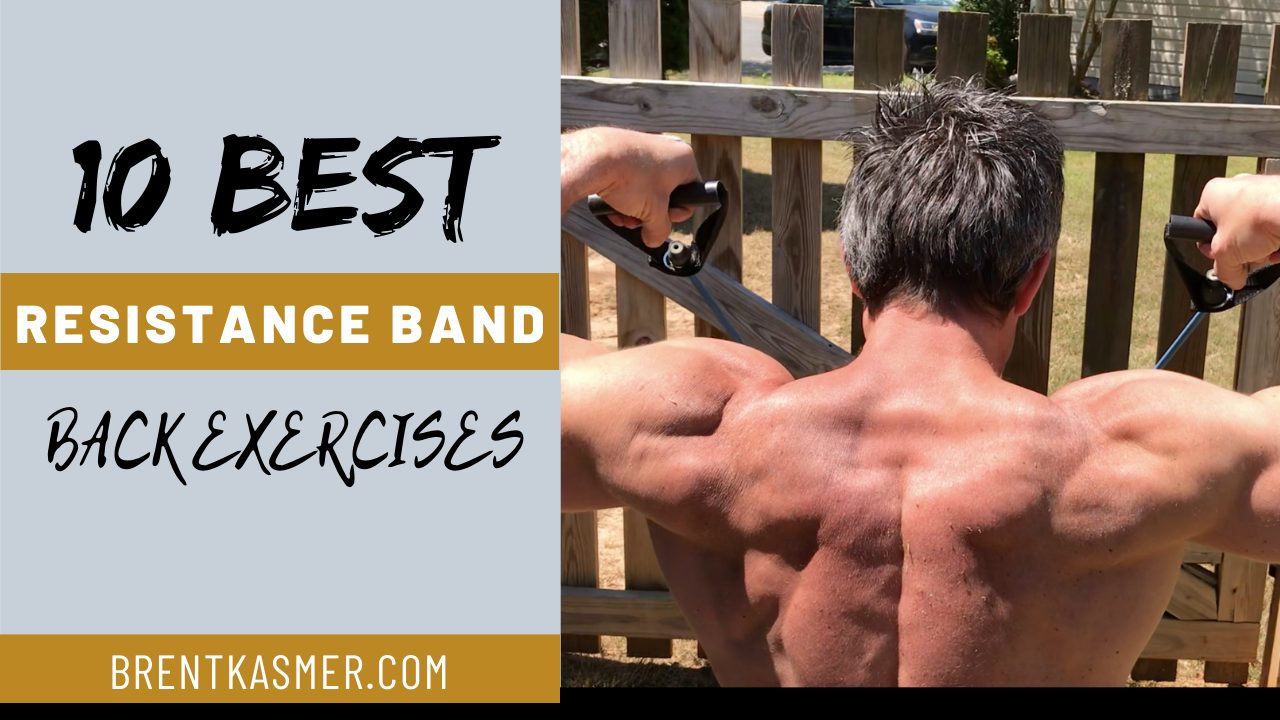
Resistance band back exercises are a great way to add strength training to your routine without needing any expensive equipment or a lot of space. In fact, all you need is a resistance band and something to anchor it to, like a doorframe or weight machine.
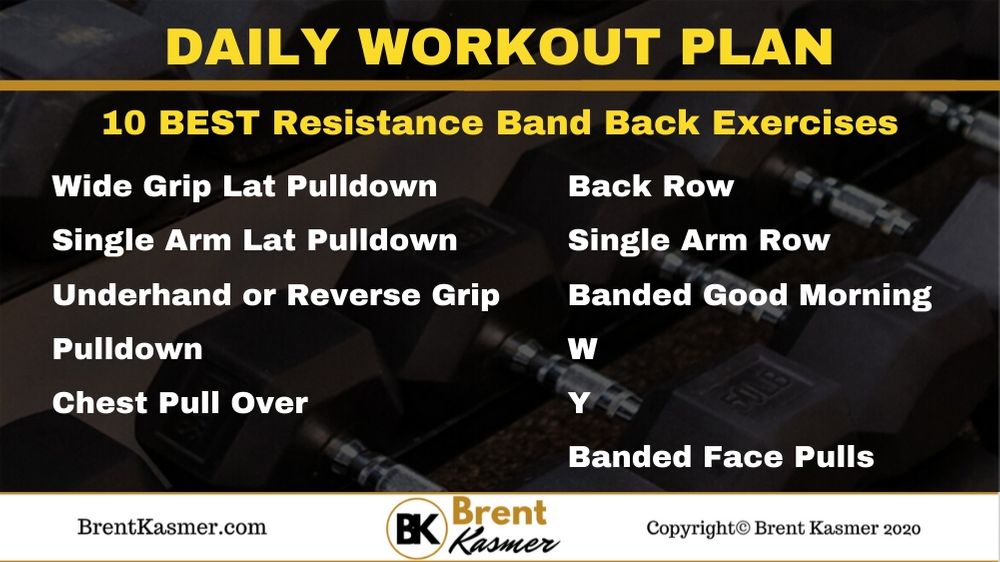
Today I’m going to show you the 10 best resistance band back exercises to gain strength and prevent injury.
Are you guys ready?
My name is Brent Kasmer. I’ve been doing this for 17 plus years and I’m super excited to show you this.
I know we’re all stuck at home. I’m in my backyard, and I’m going to show you how to do these things.
Obviously, I’m going to be using a fence post. In some of my other videos, I’ve used trees, people will ask you like, well what happens if I don’t have a fence post? What happens if we don’t have a tree?
I’m gonna walk around and I’m gonna try to show you different things to hook into. Alright, so that way you guys don’t have the excuses. We can hook into all kinds of stuff. Just make sure everything’s stable, and you’re not hooking into something very easy, it’ll fall down on you.
Alright, enough of that chatter. We’re gonna go ahead and get started with our Resistance Band Back Exercises!
1. Hook the band through the fence and grab a handle with each hand.
2. Kneel down on one knee while facing the fence.
3. Lay down flat while keeping your back straight and arms pointed towards the anchor with palms facing down.
4. Pull the handles down and out to the sides through your elbows until your hands are even with your chin.
5. Slowly return to the starting position.
Single Arm Lat Pulldown
1. Grab the handle with one hand.
2. Lean forward and pull the bands down behind your head.
3. Squeeze your shoulder blades together as you extend your one arm.
4. Slowly lean back and pull the bands down toward your chest.
5. Return to the starting position.
Underhand or Reverse Grip Pulldown
1. Hook the band through the fence and grab a handle with each hand.
2. Arch your body up while keeping your palms facing up.
3. Pull the handles down underneath your chin.
4. Pull the bands up all the way to your chest.
5. Slowly return to the starting position.
Chest Pull Over
1. Grab those same bands and lay down on your back. Keep your feet on the floor, shoulder width apart.
2. Grab the handles with your hands, placing it over your chest then slightly bend your elbows.
3. Hold and slowly lower the bands backward over your head until the upper arms are in line with the torso, parallel to the floor.
4. Pull the bands back over your chest, then squeeze your chest.
5. Return to the starting position.
Back Row
1. Grab the handles in each hand and squat from whatever you have hooked in your bands.
2. Hinge forward and aim yourself forward towards the post.
3. Make sure that your head straight and chest up.
4. Pull the handles until your hands are by your chest while squeezing the middle of your back.
5. Pull the bands back and squeeze your shoulder blades together.
6. Return to the starting position.
Single Arm Row
1. Grab one handle in one hand, keeping yourself nice and straight.
2. With knees bent and torso upright, pull the band to your side.
3. Squeeze your rhomboids – the middle of your back while pulling the bands.
4. Keep your elbow near your side during the motion.
5. Pass the handle to your other arm and repeat.
Banded Good Morning
1. Stand on a band with your feet apart and grab the band at roughly shoulder level.
2. Begin the movement by leaning forward and pushing your butt back.
3. Drive through the whole foot while pulling back up, keeping your upper body nice, tight and straight.
4. Repeat for the desired number of repetitions.
Shoulder Press Variation Called the W
1. Grab the bands about shoulder width apart with feet a little wider.
2. Begin movement by going down with your hands then straight up.
3. Keep an angle at the elbow which forms a “W” when you reach the end range of external rotation.
4. Squeeze your back and your rotator cuffs while moving.
Shoulder Press Variation Called the Y
1. Grab the bands about shoulder width apart with feet a little wider.
2. Begin movement by raising your arms up and out.
3. Keep an angle of your arms to form a Y-shape at the top of the movement.
4. Lower your arms back down and repeat.
Banded Face Pulls
1. Grab the bands about shoulder width apart with arms straight out in front of you.
2. Pull the bands straight up towards your face with the elbows high and wide.
3. Make sure your elbows are going straight out to the side and you’re pulling your hand as far as beside your ears.
4. Slowly lower the band back to the starting position and repeat on both sides.
Conclusion
Resistance band back exercises are a great way to tone and sculpt your back. They are also a great way to improve your posture. In this article, we’ve discussed a few of the best exercises to target your back muscles using a resistance band. We will also provide you with a few tips on how to properly execute these exercises. For more detailed instructions, please visit my website.
Each week I’ll be bringing you amazing tips and tricks to kick your at home workouts into hyperdrive so you can still increase your muscle mass, burn fat and improve your overall health.
Wanna share this because your workout buddy needs some help at home with their workouts too, click the link below to share this with them on facebook!
Every week I post 3-4 new workout videos and free resources on my blog.
Coming soon, I’ll be offering a Live Lifting Logics Q & A on my FB Page so make sure we’re connected on Facebook
Today I’m going to show you the 10 best resistance band chest exercises for increasing your strength and getting a better physique.
Are you guys ready?
My name is Brent Kasmer. I’ve been doing this for 17 plus years. I am super excited to show you how to do this in your backyard.
I know we’re all kind of restrained right now and about getting bored yet, but there’s lots of house projects.
I had the last couple times I’ve hooked these bands onto a tree. And funny enough I had somebody asked me in one of my comments, well what happens if you don’t have a tree? I was like, really? Anyways, I got a fence here. So if you don’t have a tree, you might have a fence. If you don’t have a fence, we’ll figure something else out for you.
Alright! Let’s get started!
Resistance Band Chest Exercises - 10 BEST for Strength & Physique Workout
Incline Chest Press w/ Resistance Band
Decline Chest Press
Resistance Band Chest Press
Pec Deck Fly
Chest Pull Over
Single Arm Pec Deck Fly
Single Arm Chest Press
Chest Pulse
Isometric Holds
Drop Set
RESISTANCE BAND CHEST EXERCISES:
CIRCUIT #1
RESISTANCE BAND CHEST EXERCISES #1:
Incline Chest Press w/ Resistance Band
1. Grab the band with elbows bent and shoulder height.
2. Lean forward at about a 45 degree angle.
3. Pull those handles and extend both arms forward and down until arms are straight.
4. Slowly lean backwards and bend arms back to the start position.
5. If you want to make it more challenging, you would just walk forward further away from the fence or the tree, or whatever you’re using to hook into.
RESISTANCE BAND CHEST EXERCISES #2:
Decline Chest Press
1. Hook the band onto something tall and pressing straight down, or you hook it into something low.
2. Create that angle and slowly press down the band to your chest.
3. Lift the band up then squeeze your core, keeping your chin tucked.
4. Raise your body and try to get that distance away.
RESISTANCE BAND CHEST EXERCISES #3:
Resistance Band Chest Press
1. Grab the band and place it underneath your shoulder.
2. Keep your hands up from your elbows while your elbows just a little bit bended down.
3. Press your arms straight forward, pulling the band up with them.
4. Slowly, lower your arms back to starting position.
RESISTANCE BAND CHEST EXERCISES #4:
Pec Deck Fly
1. Hook the band onto the fence or post. Grab each handle of the band.
2. Lean back while keeping your feet flat on the ground.
3. Place the band handles around your forearms and walk forward.
4. Bring the handles in front of your chest and squeeze it.
RESISTANCE BAND CHEST EXERCISES #5:
Chest Pull Over
1. Grab those same bands and lay down on your back. Keep your feet on the floor, shoulder width apart.
2. Grab the handles with your hands, placing it over your chest then slightly bend your elbows.
3. Hold and slowly lower the bands backward over your head until the upper arms are in line with the torso, parallel to the floor.
4. Pull the bands back over your chest, then squeeze your chest.
RESISTANCE BAND CHEST EXERCISES #6:
Single Arm Pec Deck Fly
1. Grab one handle of the band with one hand and bring to middle of the chest.
2. Extend the arm in front of the body with the hand about shoulder level to prepare for movement.
3. Keeping the elbow extended, pull your arms toward your body while contracting your pec muscles.
4. Bring back the handles in front of your chest and then slowly release back to starting position.
5. Do 12 reps.
RESISTANCE BAND CHEST EXERCISES #7:
Single Arm Chest Press
1. Grab the band and place it underneath your shoulder.
2. Keep your one hand up from your elbows while your elbows just a little bit bended down.
3. Press your one arm straight forward, pulling the band up with them. Make sure you’re not twisting and throwing your arm.
4. Slowly, lower your arm back to starting position.
5. Do the same thing to your other arm.
RESISTANCE BAND CHEST EXERCISES #8:
Chest Pulse
1. Press your forearms together and then clasp your hands.
2. Raise your arms up so that your elbows are at shoulder height.
3. Press your forearms together and as you do lift you arms up 3-4 inches, go back down.
RESISTANCE BAND CHEST EXERCISES #9:
Isometric Holds
1. Stand up straight with your arms at your sides and your feet shoulder width apart.
2. Put your arms in a 90 degree angle right in front of your chest with your palms together.
3. Walk forward, press your hands against each other while holding the bands.
4. Squeeze your chest until you feel tension in your muscles.
5. Hold onto this position then slowly go back to the starting position.
RESISTANCE BAND CHEST EXERCISES #10:
Drop Set
1. Wrap the resistance band around the harsh points of your body.
2. Keep a distance away from the post or fence where you hooked your bands. Make sure your back straight and hands on the handles of the band.
3. Walk forward then press yourself back up through the resistance band.
4. Take a step back then perform a few more presses.
5. Do a couple of presses , then a couple of step back.
Each week I’ll be bringing you amazing tips and tricks to kick your at home workouts into hyperdrive so you can still increase your muscle mass, burn fat and improve your overall health.
Wanna share this because your workout buddy needs some help at home with their workouts too, click the link below to share this with them on facebook!
Every week I post 3-4 new workout videos and free resources on my blog.
Coming soon, I’ll be offering a Live Lifting Logics Q & A on my FB Page so make sure we’re connected on Facebook
Today I’m going to show you the best resistant band chest workout for gaining strength and getting a better physique.
Are you guys ready? Or ladies? whoever’s watching.
My name is Brent Kasmer. I’ve been doing this for 17 plus years. I’m super excited to bring you guys this information.
I know we’re all stuck at home right now. But guess what, it’s okay.
We’re still getting great workouts while we’re watching some pretty good content. So, chest workout, here we go.
Let’s get started!
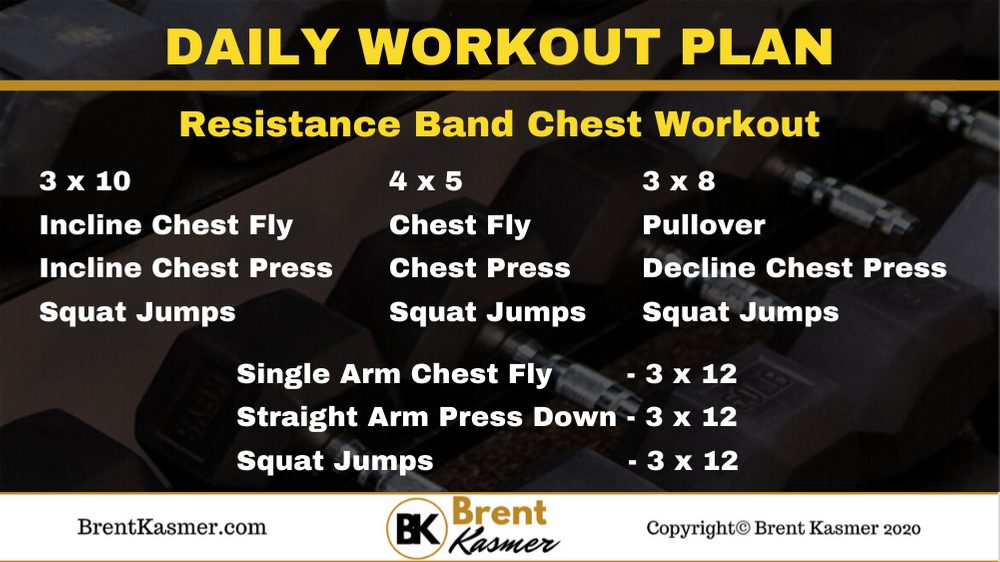
Best Resistance Band Chest Workout
3 x 10
Pec Deck Fly at an Incline
Incline Chest Press
Squat Jumps
4 x 5
Pec Deck Fly
Chest Press
Squat Jumps
3 x 8
Chest Pull Overs
Decline Chest Press
Squat Jumps
3 x 12
Single Arm Chest Fly
Tricep Pushdown
Squat Jumps
CIRCUIT #1
Pec Deck Fly at an Incline
1. Hook the band onto the fence or post. Grab each handle of the band.
2. Slide the handles down your forearms while keeping your arms nice and straight. Make sure that the band handles are equal.
3. Bend your arms at a 90° angle and keep your elbows at chest level.
4. Gripping the band handles, pull your arms toward your body while contracting your pec muscles.
5. Bring the handles in front of your chest and then slowly release back to starting position.
6. Do 10 reps.
Incline Chest Press
1. Grab the band with elbows bent and shoulder height.
2. Lean forward at about a 45 degree angle.
3. Pull those handles and extend both arms forward and down until arms are straight.
4. Slowly lean backwards and bend arms back to the start position.
5. If you want to make it more challenging, you would just walk forward further away from the fence or the tree, or whatever you’re using to hook into.
6. Do 10 reps.
Squat Jumps
1. Place the band around your thighs right above your knees.
2. Stand with your feet slightly wider than hip wide.
3. Squat down then jump up. Make sure you land on the ball of your foot and absorb the impact from the jump through your.
4. Do 10 reps.
CIRCUIT #2
Pec Deck Fly
1. Hook the band onto the fence or post. Grab each handle of the band.
2. Lean back while keeping your feet flat on the ground.
3. Place the band handles around your forearms and walk forward.
4. Bring the handles in front of your chest and squeeze it.
5. Do 5 reps.
Chest Press
1. Grab the band and place it underneath your shoulder.
2. Keep your hands up from your elbows while your elbows just a little bit bended down.
3. Press your arms straight forward, pulling the band up with them.
4. Slowly, lower your arms back to starting position.
5. Do 5 reps.
Squat Jumps
1. Place the band around your thighs right above your knees.
2. Stand with your feet slightly wider than hip wide.
3. Squat down then jump up. Make sure you land on the ball of your foot and absorb the impact from the jump through your.
4. Do 5 reps.
CIRCUIT #3
Chest Pull Overs
1. Grab those same bands and lay down on your back. Keep your feet on the floor, shoulder width apart.
2. Grab the handles with your hands, placing it over your chest then slightly bend your elbows.
3. Hold and slowly lower the bands backward over your head until the upper arms are in line with the torso, parallel to the floor.
4. Pull the bands back over your chest, then squeeze your chest.
5. Do 8 reps.
Decline Chest Press
1. Hook the band onto something tall and pressing straight down, or you hook it into something low.
2. Create that angle and slowly press down the band to your chest.
3. Lift the band up then squeeze your core, keeping your chin tucked.
4. Raise your body and try to get that distance away.
5. Do 8 reps.
Squat Jumps
1. Place the band around your thighs right above your knees.
2. Stand with your feet slightly wider than hip wide.
3. Squat down then jump up. Make sure you land on the ball of your foot and absorb the impact from the jump through your.
4. Do 8 reps.
CIRCUIT #4
Single Arm Chest Fly
1. Grab one handle of the band with one hand and bring to middle of the chest.
2. Extend the arm in front of the body with the hand about shoulder level to prepare for movement.
3. Keeping the elbow extended, pull your arms toward your body while contracting your pec muscles.
4. Bring back the handles in front of your chest and then slowly release back to starting position.
5. Do 12 reps.
Tricep Pushdown
1. Place the band around hook above your head.
2. Grab the band with both hands (palms facing in) just below chest height.
3. Keeping your elbows tight into your side, drive your hands down towards your waist.
4. Lock your arms out and rotate your hands slightly outward as you do.
5. Slowly bring your hands back up to just below chest height.
6. Do 12 reps..
Squat Jumps
1. Place the band around your thighs right above your knees.
2. Stand with your feet slightly wider than hip wide.
3. Squat down then jump up. Make sure you land on the ball of your foot and absorb the impact from the jump through your.
4. Do 12 reps.
Each week I’ll be bringing you amazing tips and tricks to kick your at home workouts into hyperdrive so you can still increase your muscle mass, burn fat and improve your overall health.
Wanna share this because your workout buddy needs some help at home with their workouts too, click the link below to share this with them on facebook!
Every week I post 3-4 new workout videos and free resources on my blog.
Coming soon, I’ll be offering a Live Lifting Logics Q & A on my FB Page so make sure we’re connected on Facebook
Today I’m going to show you a lower body workout. This is a strength workout that you would typically do in the gym.
I’m going to show you how to do it at home using bands or random stuff that you have in your house. But I’m going to show you how to do it in a strategic way using tempo.
So tempo time under tension or TUT is going to be how you’re going to make this into a strength-based program.
We will be hitting quads, hamstrings, calves, and abs in this workout.
My name is Brent Kasmer, and I’ve been doing this for 17 plus years now, and I just want to show you some of the creativity that I will take from the gym to the house.
All right. Keep going.
30 Minute Butt and Thighs Burnout With Mini Band Workout 🔥Burn 300 Calories! 🔥
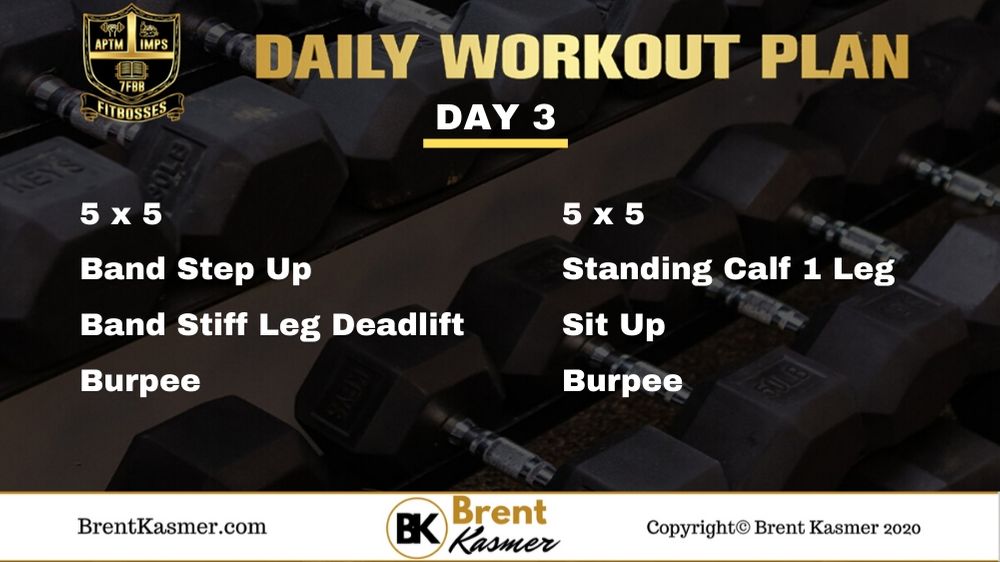
5 x 5
Weighted Step Ups
Banded Deadlifts
Modified Burpees
5 x 5
Weighted Calf Raises
Sit Up
Modified Burpees
CIRCUIT #1
Weighted Step Ups
1. Loop the band on something sturdy. Make sure it is at the same height of your face.
2. Grab the band and get yourself in front of the box.
3. Stand on the band in the middle and start making step up on your foot.
4. Press through your heels as you straighten you leg.
5. Lean your body forward as you extend your lower leg out and squeeze your glutes.
6. Do 5 reps.
Banded Deadlifts
1. Step in the middle of the band, and wrap it around your foot.
2. Grab the handles and keep your chest up.
3. Slowly bend your knees and drive your hips back but NOT lower than your knees.
4. Drive and squeeze through your hamstrings. Double up your bands to give you that extra resistance.
5. Do 15 reps.
Modified Burpees
1. Lay your band on the floor and stand to one side of it.
2. Hands down to the floor then jump your feet back.
3. Jump your feet back in and then jump up. The higher up, the easier; the lower the harder.
4. Do 15 reps.
CIRCUIT #2
Weighted Calf Raises
1. Wrap the band around the balls of your feet.
2. Stretch out your calves to make that actual calf movement.
3. Push your feet forward against the resistance of the band.
4. Point your toes back and squeeze those calf muscles.
5. Do 10 reps.
Sit Up
1. Hook both ends of the band to one handle, and grab the handle with both hands.
2. Position your arms in front of your body with your hands in tight to your chest.
3. Twist your upper body away from the tension.
4. Do 15 reps.
Modified Burpees
1. Lay your band on the floor and stand to one side of it.
2. Hands down to the floor then jump your feet back.
3. Jump your feet back in and then jump up. The higher up, the easier; the lower the harder.
4. Do 15 reps.
Each week I’ll be bringing you amazing tips and tricks to kick your at home workouts into hyperdrive so you can still increase your muscle mass, burn fat and improve your overall health.
Wanna share this because your workout buddy needs some help at home with their workouts too, click the link below to share this with them on facebook!
Every week I post 3-4 new workout videos and free resources on my blog.
Coming soon, I’ll be offering a Live Lifting Logics Q & A on my FB Page so make sure we’re connected on Facebook